Introduction
This guide will show you how to remove the front panel and the metal casing of this 2004 Mazda 3 stereo unit in order to expose the 5-disc CD drive.
-
-
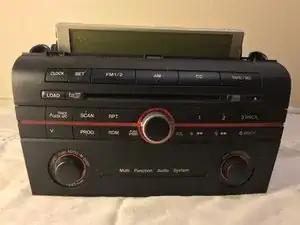
This is the front panel of the 2004 Mazda 3 Stereo-CD Player. It's listed under the model number: BN85-66-9RXA.
-
-
-
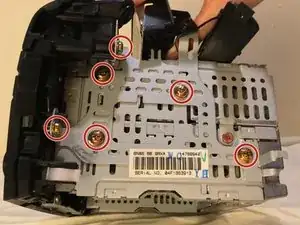
On the right side of the unit, designated by the letter R, remove 6 screws using a Phillips #2 screwdriver.
-
-
-
On the left side of unit, designated by the letter L, remove 6 screws using a Phillips #2 screwdriver.
-
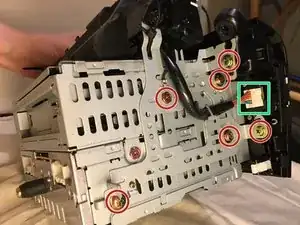
Gently pull on the cable to disconnect it from the front panel.
-
Now you can fully detach the front panel as well as the LCD display from the unit.
-
-
-
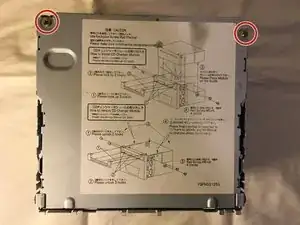
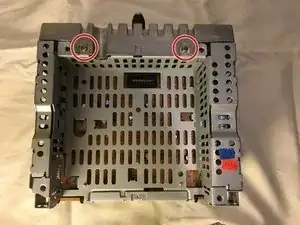
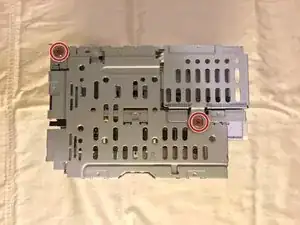
On the top of the unit, remove 2 screws with a Phillips #2 screwdriver.
-
Lift and remove the top case from the unit.
-
-
-
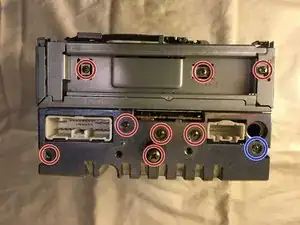
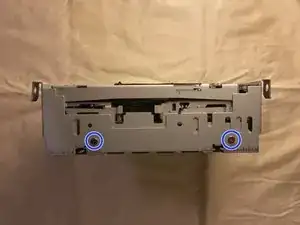
On the back of the unit, remove 8 screws with a Phillips #2 screwdriver.
-
Remove 1 screw with a Phillips #1 screwdriver.
-
Pull off both the bottom and top metal plates.
-
-
-
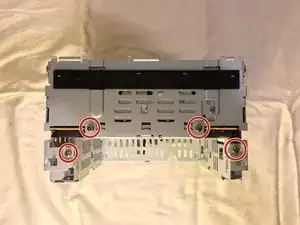
On the left side of the unit, designated by the letter L, remove 2 screws with a Phillips #2 screwdriver.
-
Remove 1 screw with a Phillips #1 screwdriver.
-
-
-
On the right side of the unit, designated by the letter R, remove 2 screws with a Phillips #2 screwdriver.
-
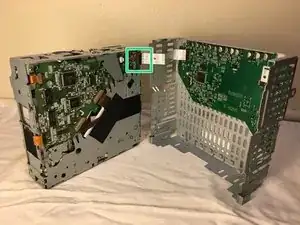
Pull the front metal plate off the unit. Then lift the CD drive from the lower metal case.
-
-
-
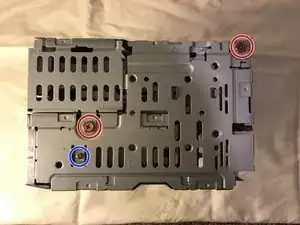
Remove 2 screws with a Phillips #1 screwdriver from the front of the CD drive.
-
Very gently pull apart the top metal case from the CD drive without damaging the ribbon cable.
-
To reassemble your device, follow these instructions in reverse order.