Introduction
If your gaming laptop has begun to overheat or the fans are no longer working, this guide will provide a solution and replace the broken fans.
-
-
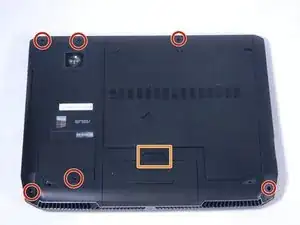
Remove the 6 screws on the edge of the laptop using a screwdriver.
-
Remove the back casing being held on by the one single screw. First, lift the casing at the edge where the screw once was, then carefully lift at the rest of the edges to loosen the casing. Pull the casing towards the edge where the screw was.
-
Remove the battery by sliding the switch circled in the picture and pulling the battery out.
-
-
-
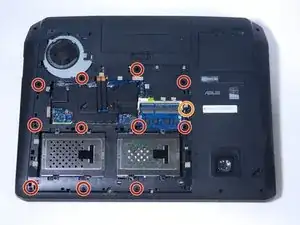
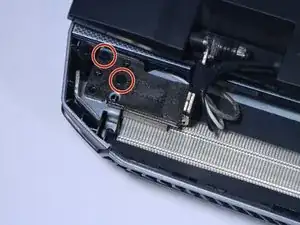
Remove the 11 screws circled in the picture using a Phillips head screwdriver. They should be labeled on the laptop with a capital A, shown circled in red.
-
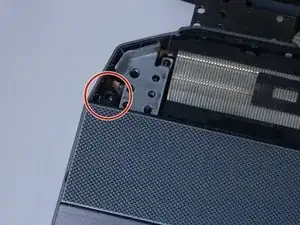
Remove the screw labeled C.
-
-
-
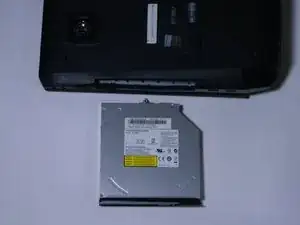
Remove the DVD ROM on the side of the computer, by pulling it out. If necessary, use a plastic opening tool.
-
-
-
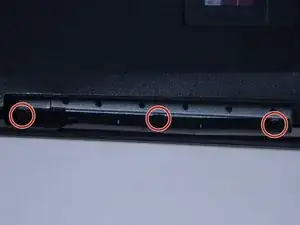
Remove the three screws located where the DVD ROM once was, on the screen side of the laptop.
-
-
-
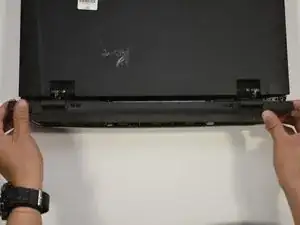
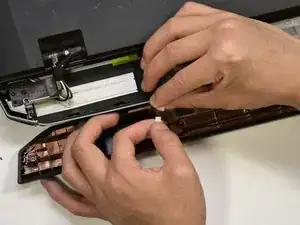
Flip the laptop over and pop the back cover off behind the screen, by grabbing it on either side and pulling it up, vertically off of the laptop.
-
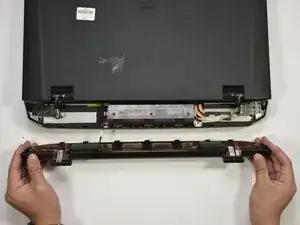
There is a cable connecting the cover to the laptop, shown in picture 2.
-
Disconnect the cable by pulling apart the white connectors, shown in picture 3.
-
-
-
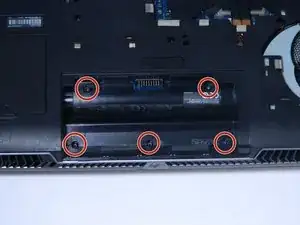
There will be two smaller and two larger black screws on each hinge holding the laptop screen onto the computer. Remove all four of the larger screws with your P0 screwdriver.
-
There is one screw on either side of the keyboards, next to the screen hinges. Remove both screws.
-
-
-
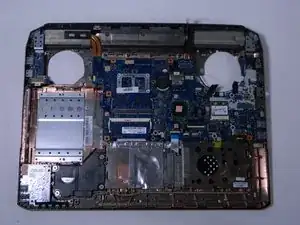
You may now remove the keyboard plate. Simply lift from the back, and pull it off all the way around.
-
Caution with removing the keyboard, as there are 5 ribbon cables that connect the motherboard to the keyboard (motherboard port locations shown in picture 2).
-
The ribbon cables must be carefully disconnected from the motherboard side, by flipping a latch on the port and pulling the ribbon out.
-
-
-
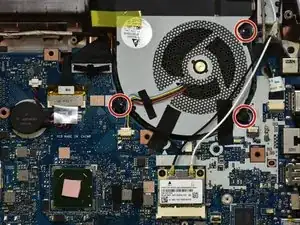
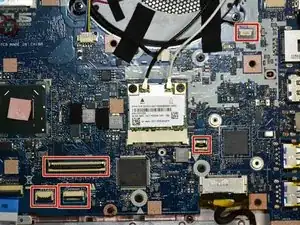
Remove the three black screws holding the fan in place.
-
Remove the multicolored wires by simply pulling outward, away from you, and sliding it out of its port.
-
-
-
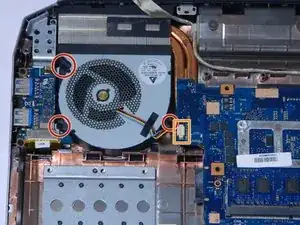
Remove the second fan by unscrewing the three black screws circled in the picture in red.
-
Detach the multicolored cables by pulling the connector out of its port, to your left.
-
-
-
Carefully slide the fans upwards and outwards towards you (here shown as the bottom of the picture)
-
Note that there is tape holding the fan to the heatsink
-

To reassemble your device, follow these instructions in reverse order.