Introduction

  1. XGEmZoXQeglcS2Lh
    • Power off the device

    • Remove any cables that might be connected to your device

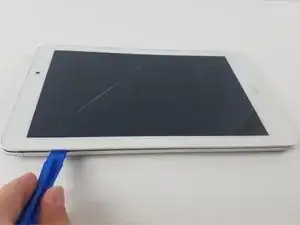
    • Make sure the device is placed on a flat surface with the display screen facing up

  2. MVkMSpUTCauQG5Ec
    • Wedge the plastic opening tool in between the display screen and back panel

    • Do not apply too much pressure in order to avoid cracking the screen

  3. JgjXjXGoVbmIMXfo
    • Carefully separate the display from the back panel

  4. ou64EX1pQMyjVLmE
    • Use your fingers to pull back and remove the yellow plastic tape covering the battery cable.

  5. 3rSggklMBrHcrFpH
    • Use the flat end of the spudger to pry up and remove the battery cable.

  6. UATJEptqDr2paLV2
    • Use the flat side of the heavy duty spudger to lift the small black plastic flap.

  7. XPnw6rPFVGh2WyJN
    • Use fingers to pull the Zero Insertion Force (ZIF) cable from the motherboard.

  8. 6WkvKJClujuwkfAI
    • Use fingers to remove the smaller adjacent ZIF cable from the motherboard.

  9. dBvuErCTXCxrKEXE
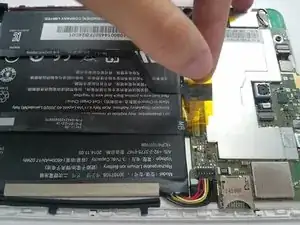
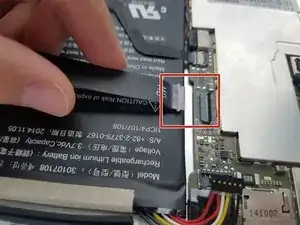
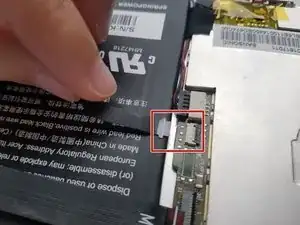
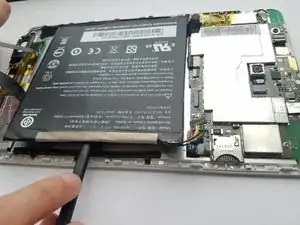
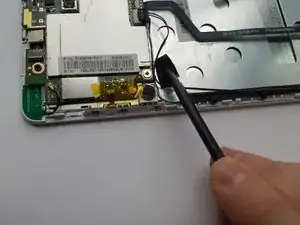
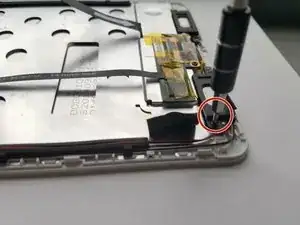
    • Use the flat end of the spudger to pry the battery up from all edges, and remove it from the back panel.

    • There is adhesive behind the battery that holds it in place. Be sure to pry slowly and carefully when removing the battery.

  10. jMOEWkWaq4ckVy3i
    • Use tweezers or the flat end of the spudger to carefully pull the connection loose.

  11. kDfMoVOUQOHcNVET
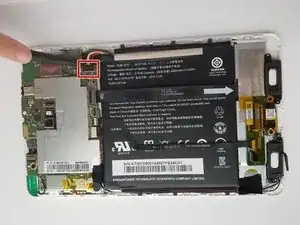
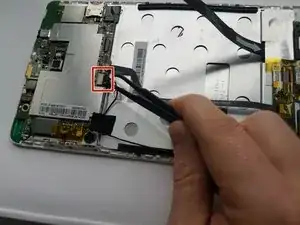
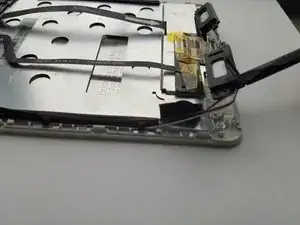
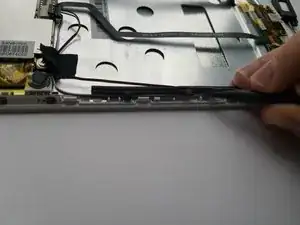
    • Use the pointy end of the spudger to remove the black tape holding the wires in place and completely free the wires.

  12. JSlw5R2YXtNpd6A2
    • Use a 5mm nut driver and Philips#000 bit to remove the four 1.5mm screws.

  13. 1ajs4tiS3qZQsJio
    • Remove the speakers after unscrewing the screws.

  14. Z1cOiKucrXjcbiX2
    • Use spudger to loosen the wire and free the speaker.

Conclusion

To reassemble your device, follow these instructions in reverse order.

Claire Posadas

Member since: 19/10/16

381 Reputation

0 comments