Introduction
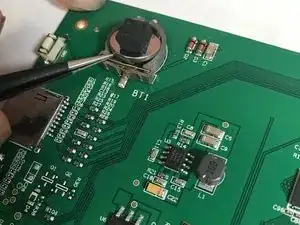
In this fix we will be looking at how to replace the internal battery used to store electrical charge for the device. This will require a Phillips #1 screwdriver, a small plastic tool to remove the LCD screen and to remove the battery.
Good Luck!
Parts
-
-
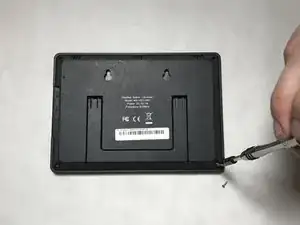
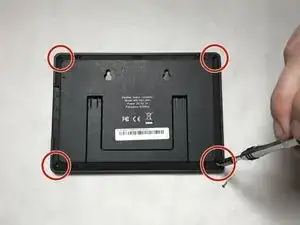
First, unscrew the 4 M2x1.5-7 screws (7mm length) from the back of the device using a number 1 Phillips screwdriver.
-
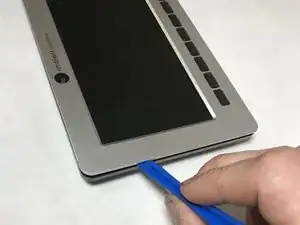
Pry the front silver panel away from the back black panel with a plastic opening tool.
-
-
-
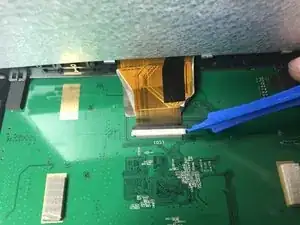
Next, the ribbon cable needs to be carefully removed from the back of the LCD screen.
-
Use a plastic opening tool to press the black bar towards the ribbon and away from the white bar gently. This will release the ribbon.
-
-
-
Remove the 4 M2x1.5-7 screws (7mm length) from the green PCB board.
-
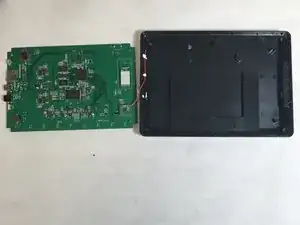
This will result in two pieces, the back black cover and the PCB board.
-

To reassemble your device, follow these instructions in reverse order.
One comment
Hello. My screen is not working. And the electric cable is good.