Introduction
Before using this guide, refer to the troubleshooting page to diagnose the problem and verify if it can be fixed without having to replace the Asus TUF Gaming FX705G speakers.
If your speakers are not producing clear audio with distorted, intermittent, or no sound you should replace your speakers for a better audio experience.
This guide will show you how to safely and carefully replace the speakers in your Asus TUF Gaming FX705G laptop. The Asus TUF Gaming FX705G offers DTS Headphone: X™ technology with built-in 2 W stereo speakers and an array microphone that delivers 7.1-channel virtual surround sound. The speakers have varying settings for games, sports, and movies as well as an equalizer for more control over the sound.
If your Asus TUF Gaming FX705G laptop isn’t producing clear audio from its speakers speakers, follow this guide closely and you should be able to replace these speakers without any complications.
Before beginning the repair, be sure to power off your device and unplug from the charger.
-
-
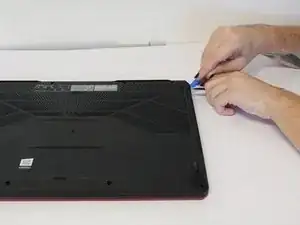
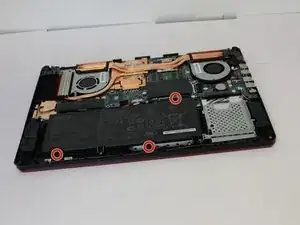
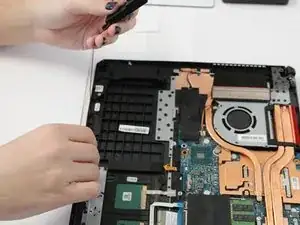
Use the iFixit opening tool to lift the back cover's seam, then insert the spudger parallel to the back cover and lift gently upward.
-
-
-
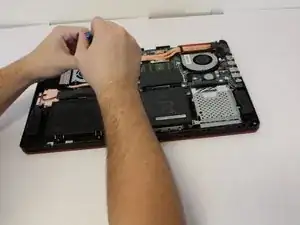
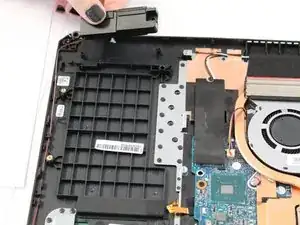
Use your fingers to lift the speaker from the housing and follow the wire path carefully, lifting the wire out of place around the base.
-
-
-
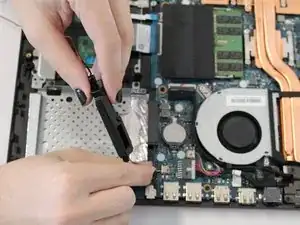
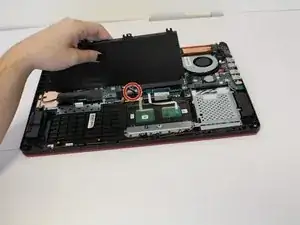
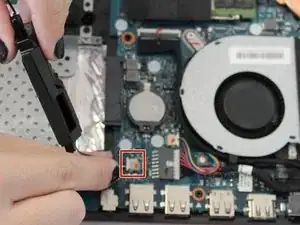
With the second speaker removed from the track, carefully disconnect the three wires from the insert on the motherboard.
-

To reassemble your device, follow these instructions in reverse order.