Introduction

This guide is going to teach you how to change your charging port if it is broken. If your tablet is not charging, replacing your charging port will help fix that problem.

  1. HPPyAgqFKwcKJEEw
    HPPyAgqFKwcKJEEw
    ZCGYs4rTlfdkxRXA
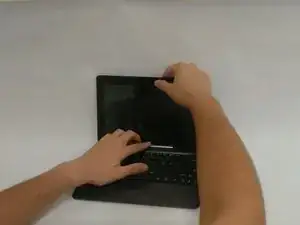
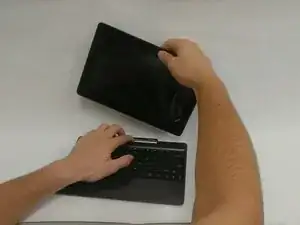
    • Remove the tablet portion of the device from the keyboard by pushing the large silver button near the base of the tablet. Pull up on the tablet to remove from the keyboard.

  2. lBoXprELHT51A2L5
    lBoXprELHT51A2L5
    u6KutHgZXLTJYJNK
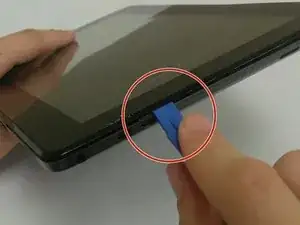
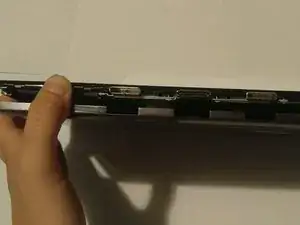
    • Insert the iFixit Opening Tool into the seam of the back tablet casing and gently pry upwards. With enough force the clips will release on the back tablet casing.

    • Make sure to insert the tool in the seam between the black and gray portions of the backing. If the tool is inserted between the screen and the black portion then the screen may crack.

    • Move the iFixit Opening Tool along the seam until the entire backing is removed.

    • Be careful and try not to use too much force while taking off the backing because you may damage the clips. If you damage the clips the backing will not fit properly back onto the tablet.

    Step three is basically repeating what was completed in step two. Possibly find a way to combine the two or delete whatever isn’t necessary.

    Tayler McCleese -

  3. iZINOolZdXVWC6OO
    • Carefully remove the copper tape at the top of the battery.

    • Save this piece of copper tape as you will need it for when you replace the battery.

  4. bVqVtA1KIGNN25ax
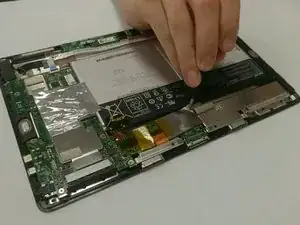
    • Gently pull back on the yellow transparent plastic covering on top of the battery connection port.

    • The plastic covering is located at the top right of the battery, next to where the copper tape had been.

  5. 5GlOjwfeBliTF6a5
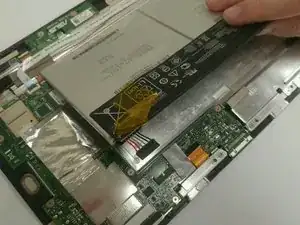
    • Insert the iFixit Opening Tool underneath the top of the battery and gently lift upwards to remove the battery.

  6. cSpvY6PaRZIBDLl4
    • Remove the battery from the tablet by slowly pulling it from the connected side.

    • The adhesive on the back will pull away from the battery.

    • The battery wire harness will come out as the battery is pulled up.

    It is unclear on what direction is best to pull the battery out.

    Tayler McCleese -

    Keep the orientation of the pictures consistent as step 7 and step 8 indicate different things (e.g. top right of device in 7 isn’t the top right in 8). Or at least specify.

    Tayler McCleese -

  7. MMf1eDCbLkI1pqlD
    MMf1eDCbLkI1pqlD
    SQAVajY5ZjbUKTJV
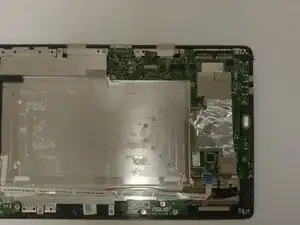
    • Turn the tablet so that motherboard will be in the top right corner of the tablet and will be the largest of the green pieces.

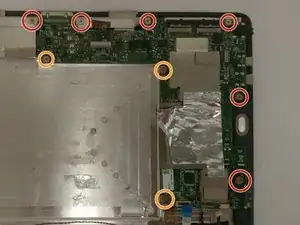
    • Remove six 5mm Phillips #0 screws around the edge of the motherboard.

    • Remove three 3mm screws on the inner side of the motherboard.

    The length of the screws are different in different locations, so possibly find a way to indicate that (e.g. different color marker for different screws) and note in the description. There was also tap covering a screw which wasn’t noted to remove.

    Tayler McCleese -

  8. 1IUFfXenqkHGlKC2
    1IUFfXenqkHGlKC2
    TOKFhEarwppNliJv
    Ath4B6WP61iSf6oS
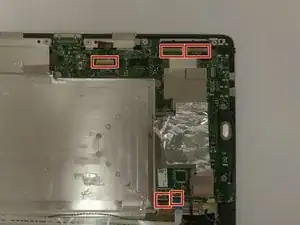
    • Locate the 5 different clips around the edges of the motherboard.

    • The clips will be covered by either tape or a foam piece. You will need to remove this before unlatching the clips.

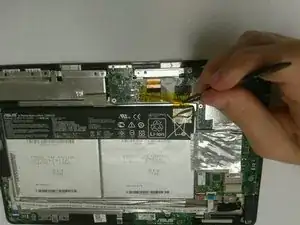
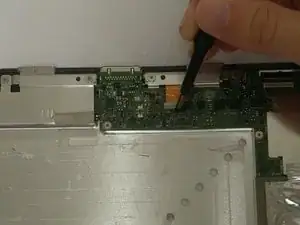
    • Unlatch the connections and use tweezers to remove the cables from the connections.

    • The two remaining connections are slightly different.

    It is unclear on where exactly these 5 clips are located. Possibly find better wording and/or clearly marked pictures of all the clips.

    Tayler McCleese -

  9. DpSA44vcfZoWNPKy
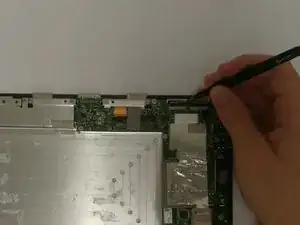
    • Pull the connection on the left directly upwards to remove it.

    • Remove the connection on the right by pulling it towards you.

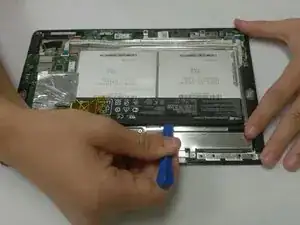
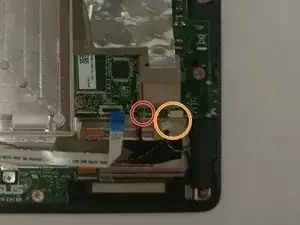
    • The motherboard should now be completely free and able to be removed.

  10. llXpgUlqQ1RkKhvC
    • Remove the motherboard from the device.

    You might want to move step 11 into step 10 as it isn’t really showing you how to do anything.

    Tayler McCleese -

  11. 1jFshUQ1KrONRI5g
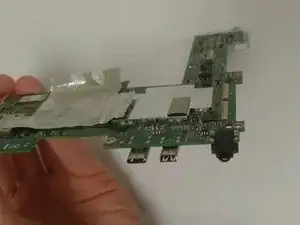
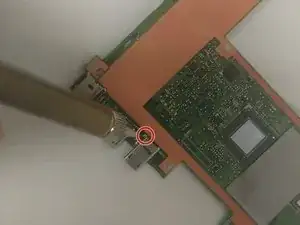
    • Take your soldering tool and place it on each of the four connecting pieces to loosen them.

    • The charging port is the bottom piece in this picture.

    • The charging port should then come off, and the new one put on.

    It isn’t indicated which piece is the charging port. Also, more details on how to use the soldering tool could be beneficial.

    Tayler McCleese -

Conclusion

To reassemble your device, follow these instructions in reverse order.

Brody Moore

Member since: 06/09/18

807 Reputation

0 comments