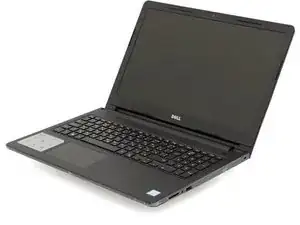
Introduction
This guide shows how to remove and replace the CMOS battery in the Dell Inspiron 15 3567.
-
-
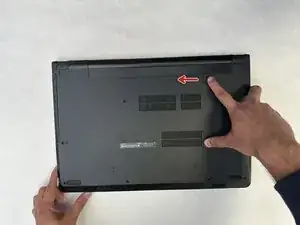
Push the battery-bay-release latch on the bottom of the laptop, sliding it to its unlocked position.
-
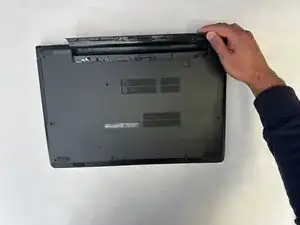
Remove the battery from the bay by pulling it upwards and at an angle.
-
-
-
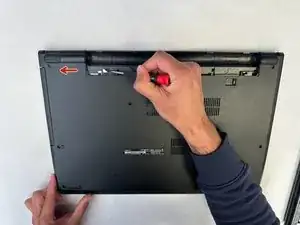
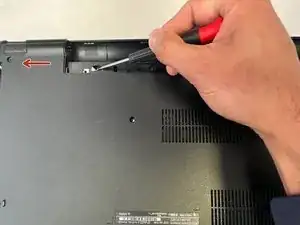
Remove the 2x5mm screw that attaches the optical disk drive to the laptop’s plastic base cover.
-
-
-
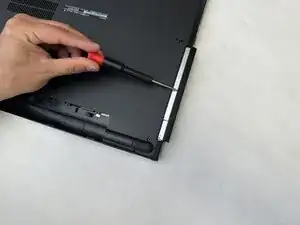
Using a flat-headed screwdriver, push the optical disk drive assembly to the left until it pops out of the side of the laptop.
-
Slide the optical disk drive assembly completely out of the base of the laptop.
-
-
-
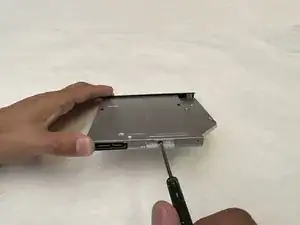
Remove the 2x3mm optical disk drive screw from the optical disk drive bracket located on the right side of the optical disk drive assembly.
-
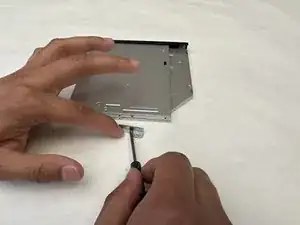
Remove the optical disk bracket from the optical disk drive assembly.
-
-
-
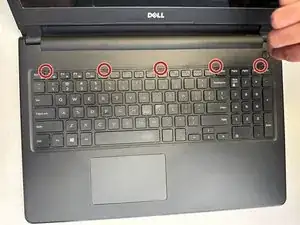
Using a flat-headed screwdriver and the five tabs located at the top of the laptop’s keyboard, pry the laptop’s keyboard upwards, loosening the keyboard from the laptop’s palm-rest assembly.
-
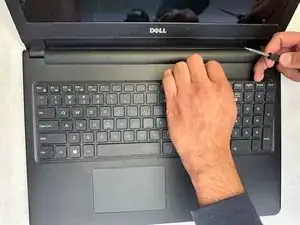
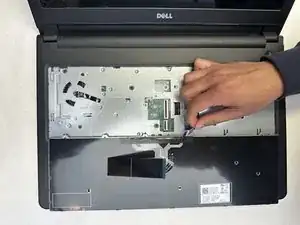
Lift the keyboard off of the laptop's palm-rest assembly and place it upside down on top of the laptop's touch pad.
-
-
-
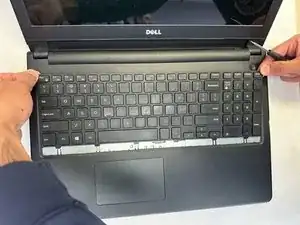
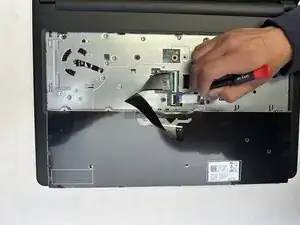
Open the latch securing the keyboard cable by pulling it upwards with a flat-headed screwdriver and disconnect the keyboard cable from the connector located on the system board.
-
Following the same process, disconnect the optical drive cable from the connector located on the system board.
-
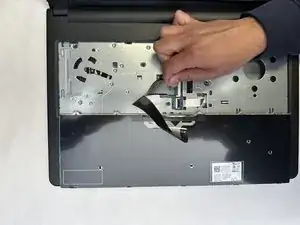
Completely remove the keyboard from the laptop.
-
-
-
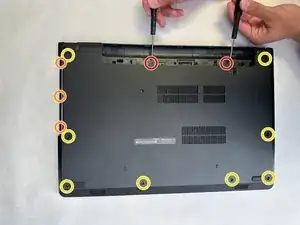
Remove the two 2x5mm screws located in the battery bay area.
-
Remove the eight 5x8mm screws located on the laptop's plastic base cover.
-
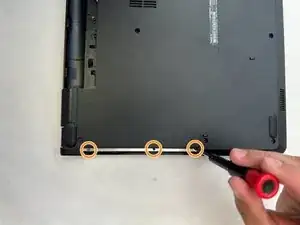
Remove the three 2x2mm screws located in the optical disk drive area.
-
-
-
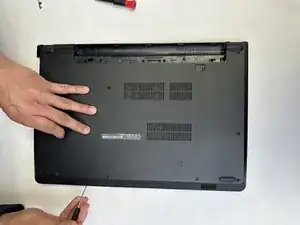
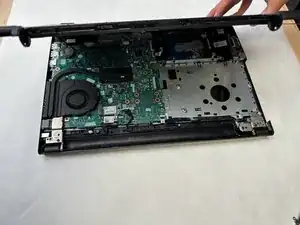
Using a flat-headed screw driver, pry the laptop’s plastic base cover off the palm-rest assembly and remove it from the laptop.
-
-
-
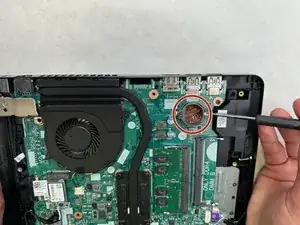
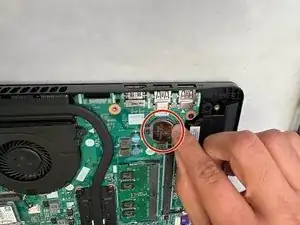
Using a flat-headed screwdriver, release the latch under the CMOS CR2032 battery and gently pop the CMOS CR2032 battery out of its plastic holder.
-


To reassemble your device, follow these instructions in reverse order.