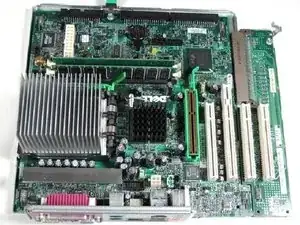
Introduction
-
-
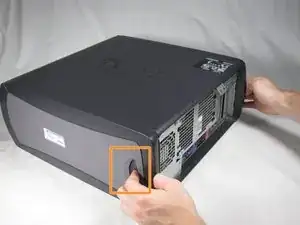
Lay the Dell Optiplex GX260 down on a clean flat surface with the rear towards you.
-
Push the oval shaped buttons located on the top and bottom of the PC simultaneously and lift the case straight up.
-
-
-
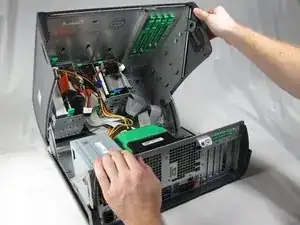
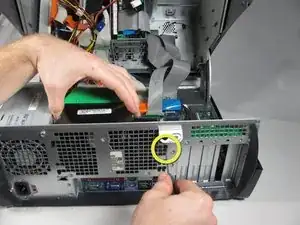
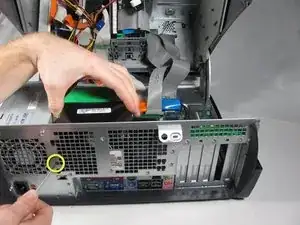
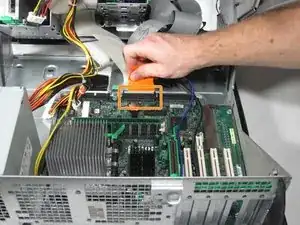
On the rear of the desktop, push the two circled black buttons straight in with a small pointed object while pulling up on the fan.
-
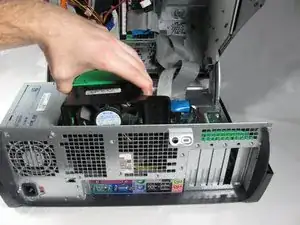
Once the fan is released, lift it straight up and out of the case.
-
-
-
Push out on the cream colored tabs on each side of each RAM module until it pops up and out of its slot and remove the RAM.
-
-
-
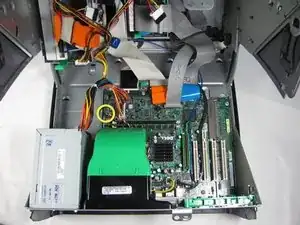
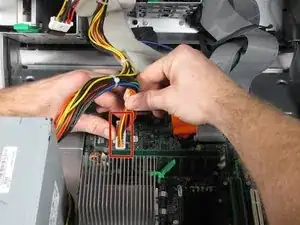
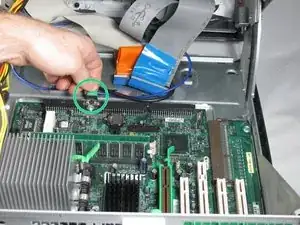
Disconnect the ATX power cable to the motherboard.
-
Disconnect the P4 12V(4x2) power cable from the motherboard.
-
-
-
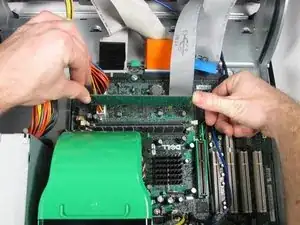
Disconnect the front panel ribbon cable by gently pulling it straight up.
-
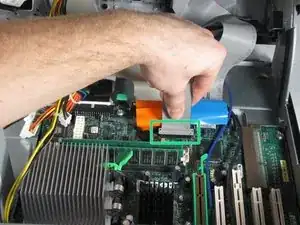
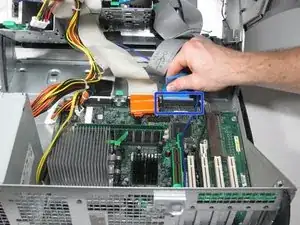
Disconnect the hard drive ribbon cable by gently pulling the blue tab away from the motherboard.
-
Disconnect the optical drive ribbon cable by gently pulling the orange tab away from the motherboard.
-
-
-
Disconnect the floppy drive drive ribbon cable by gently pulling the black tab away from the motherboard.
-
Disconnect the optical drive audio cable connector from the motherboard.
-
Disconnect the audio input/output cable from the motherboard.
-
-
-
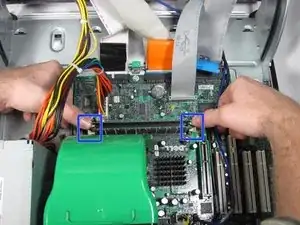
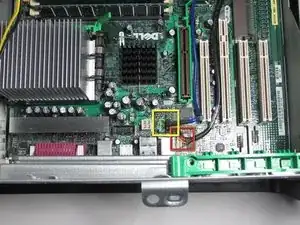
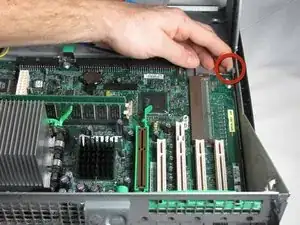
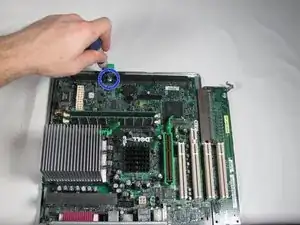
Lift the metal tab near the right corner of the motherboard.
-
Pull the green tab toward the front of the PC to release the motherboard.
-
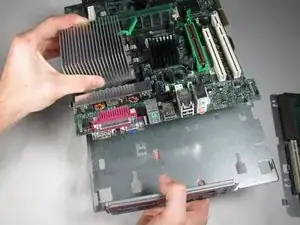
From the rear of the PC, push the ports in while lifting the motherboard up and flipping it away from you.
-
-
-
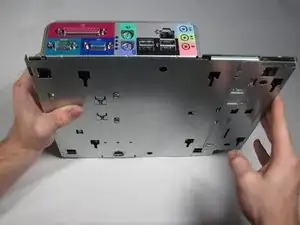
Stand the motherboard up as shown.
-
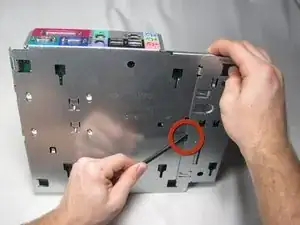
Insert the flat end of a spudger into the slot in the motherboard mounting plate and press the release tab while pushing the extension plate to the right with your thumbs until it comes off..
-
-
-
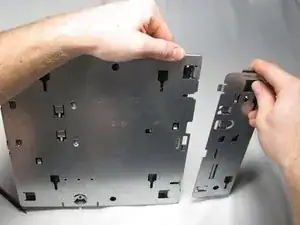
Remove the screw at the rear of the motherboard.
-
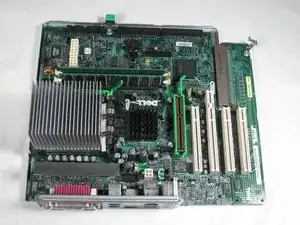
Grasp the heat sink with your left hand and the I/O port panel with your right hand and pull to separate motherboard from the metal base.
-


To reassemble your device, follow these instructions in reverse order.
4 comments
Mines stuck for some reason I almost bent the frame from pushing the ports in while lifting and pulling the tray tab away
make sure you doing it the correct side!
muy bueno gracias bro
Mine did not have the big green fan in back. Rest of the disassembly was similar, until I got to actually removing the PCB from the metal back plate. This says to simply slide it forward while holding the plate in place. Yeah… well, in theory. It actually took a fair amount of gentle prying to get the PCB to slide forward. The key is the little metal grounding clips in the corners. The fingers do not actually present much pressure. However, the vertical metal to which they press is an overhang. So the trick is to gently FORCE the PCB forward at each rear corner until such time as the overhang no longer exists. At this point the vertical metal tab will be full back against their respective slots. The PCB will simply lift out then.
jknox -
cool de faires des sites comme ca :)
baptiste Prando -
Excellent - Only comment - do the the green brackets come with a new hard drive or should I leave them inside the case for the next owner - Removing to donate to recycling
sheila_jones -
I got this yesterday....up and running now....how on earth do I MERGE the 18GB partition D with C....there is just NO option there.
Elvis 1357 -
I got this yesterday....up and running now....how on earth do I MERGE the 18GB partition D with C....there is just NO option there.
Also, want to add another HD....but, there are no cables at all?
Elvis 1357 -