Introduction

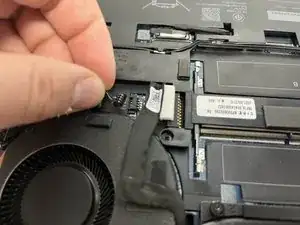
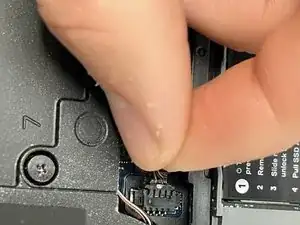
This guide covers how to replace the fans in a Dell Precision 7560 laptop. The fans are responsible for maintaining the laptop's internal temperature. A poorly functioning fan means a poorly functioning laptop, so keeping the fans spick and span, free from dust and grime is a sure way to keep performance high, Caution is required when pulling connecting wires throughout the process.

  1. aNHRHkJVfIPQZVNS
    aNHRHkJVfIPQZVNS
    XZ6lVqPcjIQUexlo
    JScgZ6KuEA3Ngidv
    • The screws holding the back cover in place can not be removed.

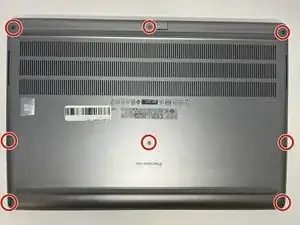
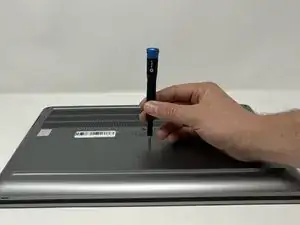
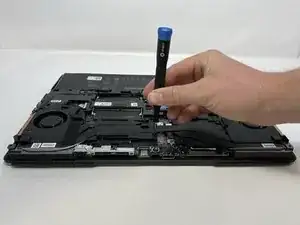
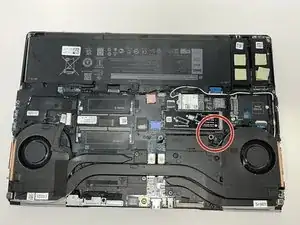
    • Use a Phillips #0 screwdriver to loosen the the eight 5 mm captive screws in the bottom cover.

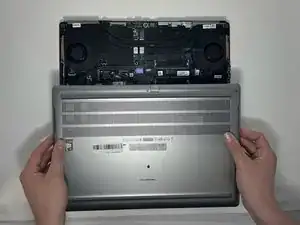
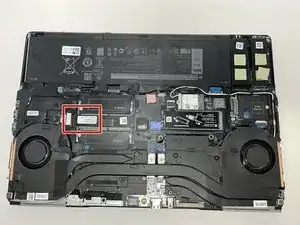
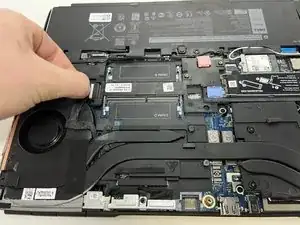
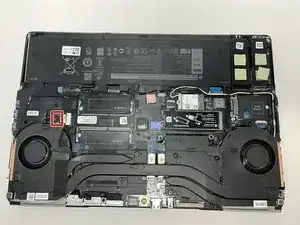
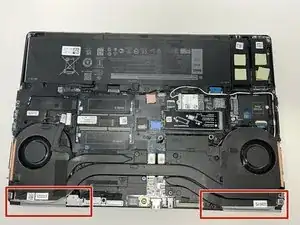
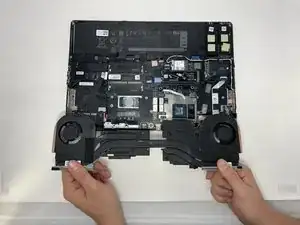
    • Remove the back cover by lifting at the corners.

  2. Ut44ZnQXdbd2cq1l
    Ut44ZnQXdbd2cq1l
    esuntJX5YegKFkp3
    • The screws holding the fan in place cannot be fully removed.

    • Loosen the eight captive screws that secure the fan assembly.

    • Each screw is numbered in the order that they should be loosened.

  3. 6YyPpQ5YymOsjcJ2
    6YyPpQ5YymOsjcJ2
    bYvFpa4HsGp6uyRJ
    • Locate connecter cable and pull lightly until it is removed.

  4. Jx6OQewZESYJdakV
    Jx6OQewZESYJdakV
    BgxXbtOnrGPKStq2
    • Gently pull the first fan connector from the head until it is removed.

    • The thin wire is prone to damage. Exercise extra caution during removal.

  5. gGPLZVOjpAGPBDD1
    gGPLZVOjpAGPBDD1
    XH4pbj4EByxrcydw
    • Gently pull the second fan connector from the head until it is removed.

    • The thin wire is prone to damage. Exercise extra caution during removal.

  6. l4AorUpeXdkOyUqH
    l4AorUpeXdkOyUqH
    MlRUqyymTQfHejZA
    • Lifting from the bottom, carefully remove the laptop's fans.

Conclusion

To reassemble your device, follow these instructions in reverse order.

Jack Allred

Member since: 09/02/23

279 Reputation

0 comments