Introduction

Following this guide will help you remove and replace the battery in your HP 15-db0015dx.

Reasons for battery replacement:

  • Computer won’t turn on without being plugged in.
  • Battery doesn’t seem to hold a charge.

Replacing the battery will alleviate these issues and lengthen the lifespan of your laptop.

  1. HOfXwAAP6GHi6MJL
    HOfXwAAP6GHi6MJL
    CFuvKJdHJQQa3eBc
    • Power off the device before starting.

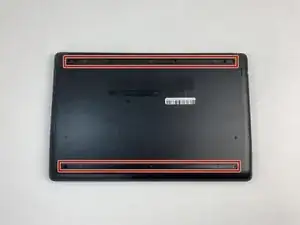
    • Remove the rubber strips that hide the screws using the spudger.

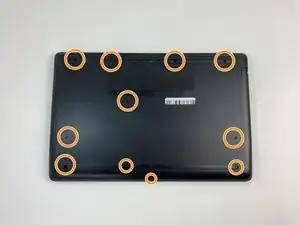
    • Flip the device and unscrew the eleven screws with a Phillips #0 screwdriver.

    How can I remove the rubber strips? Which screwdriver head should I use?

    Alex Watkins -

  2. KiPqBEpA1hOWlXOL
    KiPqBEpA1hOWlXOL
    44QOUBAHoKxyqDGh
    V1VnRogYnXk6SOIE
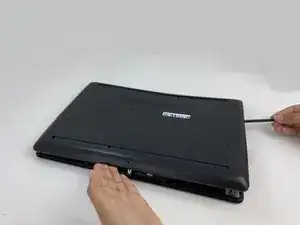
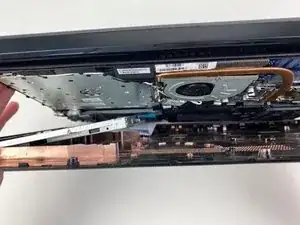
    • Use the spudger tool to pry open the back cover.

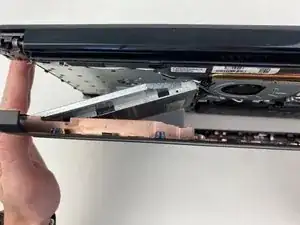
    • Lift the back panel to access the inside.

    • Slide the CD drive to the left, and remove.

    The top of what? Note that iFixit does not like arrows, and this arrow doesn’t seem to make sense here when you’re lifting up. Instead, use a flipbook style shot to show this action. I would also separate out the yellow bullet to a new step so you have three images to show this process, and also, so you can add more details to the description of what to do.

    Alex Watkins -

    I believe the tool here is the spudger, which you have in the tool list as well. Make sure to correctly identify tools.

    Alex Watkins -

  3. F2CqXjKuZpY4HTVB
    F2CqXjKuZpY4HTVB
    DNaNTDZAkyZFgvEX
    nNpoYOZeJJ6FU2DC
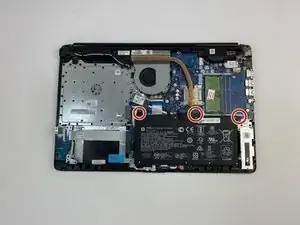
    • Unscrew the three battery screws with a Phillips #0 screwdriver.

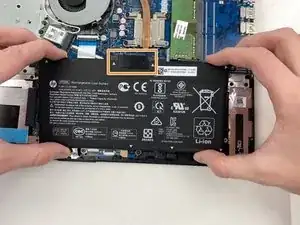
    • Lift the battery up, disconnecting the connector first.

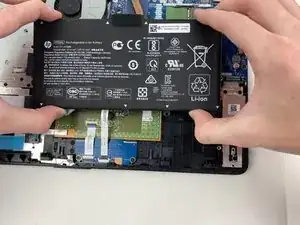
    • Push forward and remove the battery.

    What is the orange highlighted section? You want the text and images to work independently. The picture also seems to contradict what you say, since your hands are on the sides. Reminder: remove arrows in all pictures in favor of action shots.

    Alex Watkins -

    Add warning and info bullets to let the audience know that they may damage other sections of this computer by pulling pieces off.

    Alec Diaz -

Conclusion

To reassemble your device, follow these instructions in reverse order.

Steven Dankiewicz

Member since: 29/01/20

415 Reputation

0 comments