Introduction

This guide will walk you through the replacement of a damaged USB board on the right side of your HP Chromebook 14-ak041dx. If you are unable to insert a device into the USB ports on the right side of your computer, or the device you insert is not being recognized by the computer, your USB board may be internally damaged, and may need to be replaced.

  1. 6VrlZYsZBumwhpaM
    6VrlZYsZBumwhpaM
    oVXCULd4IkYKucaC
    • You will need a pair of tweezers and a Phillips screwdriver.

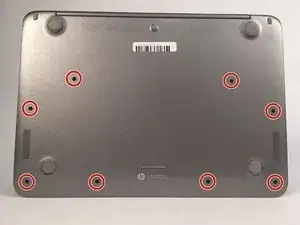
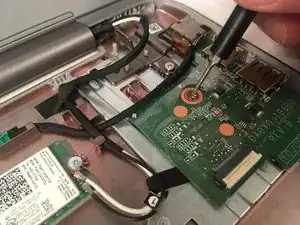
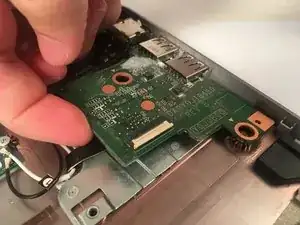
    • Remove eight 5mm Phillips #0 screws from the back cover of the laptop.

  2. aODCWMFAY3u3Td1x
    aODCWMFAY3u3Td1x
    HNK3rkQTQOTsFXgw
    tpYVVHAK2lOVDggF
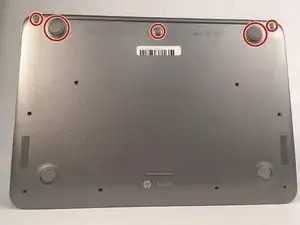
    • Using a pair of tweezers, remove the five grey silicone covers.

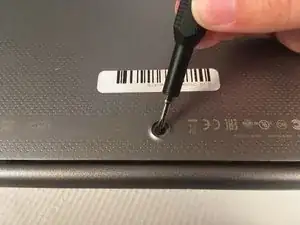
    • Remove the five 5mm Phillips #0 screws beneath the grey silicone covers.

    • Place them aside where they will not be lost.

    I’d love a solution to replace the grey silicone covers which are no longer sticky enough. Can you or anyone else advise? I am open to buying a new sticky circle, just not sure where to turn!

    Katie Courter -

  3. U6ZXbrQVimLVNxj6
    U6ZXbrQVimLVNxj6
    eJxiDZcYKQwxrumI
    4xYWkg1rilv3kqED
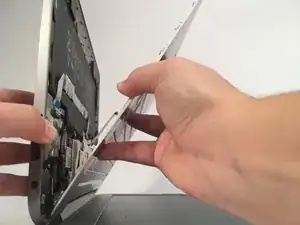
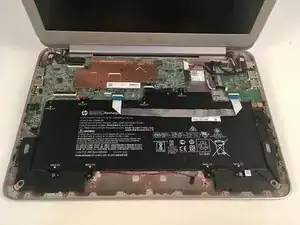
    • Carefully open your Chromebook case and gently pull the keyboard away from the back panel.

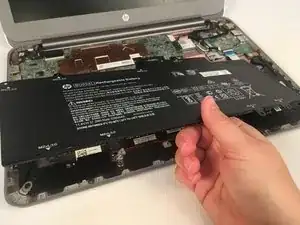
    • Place the keyboard aside. Inspect for any visual damage or marks.

  4. NnsSXGDRkOiRWZRt
    NnsSXGDRkOiRWZRt
    pMBC2lewLX5lLdcK
    • Remove the four 3mm Phillips #000 screws holding the battery in place.

  5. DDmjfVJK6xUJ2ChL
    DDmjfVJK6xUJ2ChL
    ZBL1pGD6rGSKSO3q
    B3m2FpxoF3qjm41r
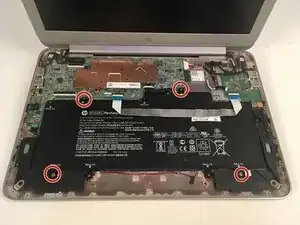
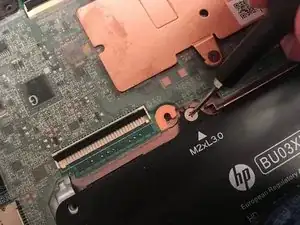
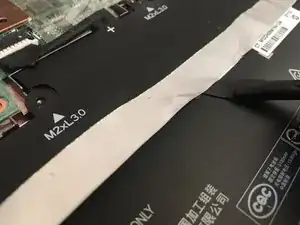
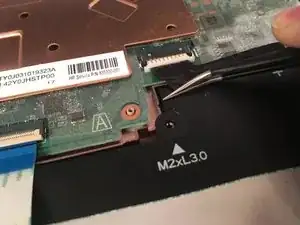
    • Slide a spudger underneath the white strip over the battery to gently pull the strip away from the adhesive sticking to the battery.

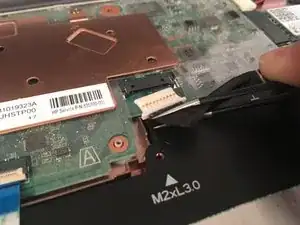
    • Using a pair of tweezers, grip the black tape connected to the battery, and gently pull back to unplug the battery.

  6. t35GIh5ExQ1wOyY3
    • Carefully lift the battery out of the laptop.

  7. 1PICHLDUyZ5kCGkZ
    1PICHLDUyZ5kCGkZ
    2IEhsY1R3v2CMHnI
    • Remove the two 1.5mm Phillips #000 screws from the USB board.

  8. W1yjqTjNi4p35Gl6
    W1yjqTjNi4p35Gl6
    MHqA2McZFHprMxUU
    • Carefully lift the USB board from the computer.

    • When replacing your new USB board, insert the USB slots through the opening in the metal frame first, and then lay the rest of the USB board down.

Conclusion

To reassemble your device, follow these instructions in reverse order.

Sam Keesling

Member since: 15/10/19

485 Reputation

0 comments