Introduction

  1. rd2KGxJrfuQwZVHL
    rd2KGxJrfuQwZVHL
    2NCW11rUlnVsBYVo
    • Use a metal spudger to pry the fabric-covered top off of the speaker.

  2. senHcfHcErjecenC
    senHcfHcErjecenC
    XPt6uGAPeJpPLX5G
    DBCnuRQgPfnA6J2T
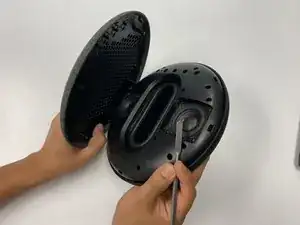
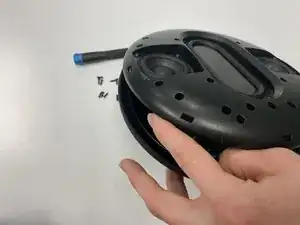
    • Use a Phillips #0 screwdriver to remove the twelve screws around the perimeter of the inner plastic shell.

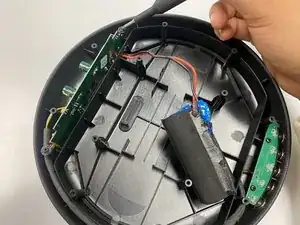
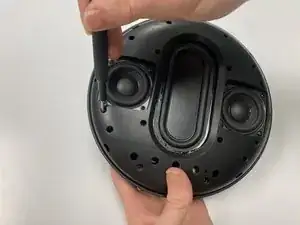
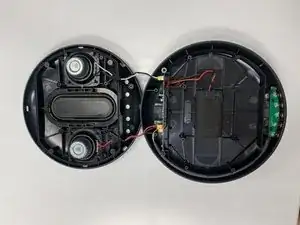
    • Remove the inner shell from the back case.

    • Don't yank or pull the shell case off the bottom case. There are cables connecting the two and they could be damaged if pulled.

  3. Tg665kgsZOZSrDPH
    • Use a Phillips #0 screwdriver to remove the two screws holding the motherboard in place.

  4. RYxNusSuIU5oFs3q
    RYxNusSuIU5oFs3q
    HTS64UrVfQwr4ZwP
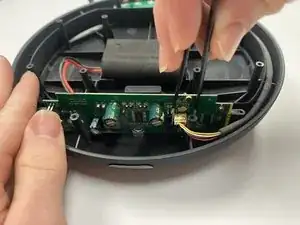
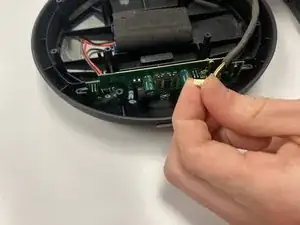
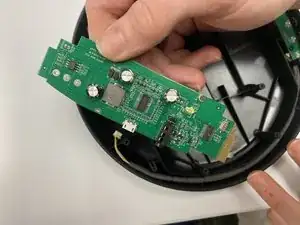
    • Use a pair of tweezers to disconnect the yellow wire from the motherboard by pinching the input and pulling away from the motherboard.

  5. LDCYVWyxDjTu2JiN
    • Carefully remove the motherboard by sliding it upwards.

Conclusion

To reassemble your device, follow these instructions in reverse order.

Jonathan Sotelo

Member since: 22/09/22

281 Reputation

0 comments