Introduction

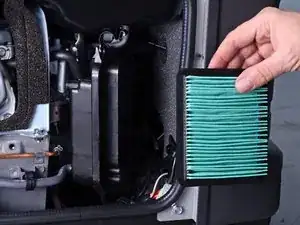
This guide shows how to remove and replace the air cleaner housing for the Honda EU3000IS1AWK 3000 watt generator.

  1. UbGMSPUHmu5Emipg
    UbGMSPUHmu5Emipg
    EOqTsUAtCi2KFHFw
    • Before you begin, make sure the generator is off and cool to the touch.

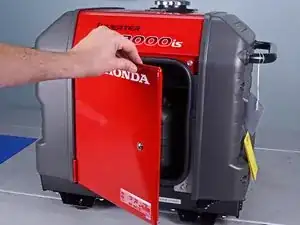
    • Use a large flathead screwdriver to unlock the maintenance cover.

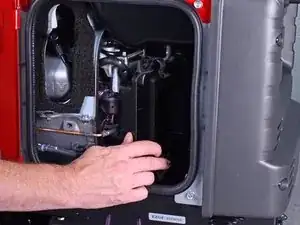
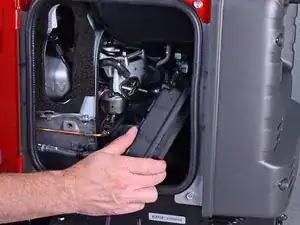
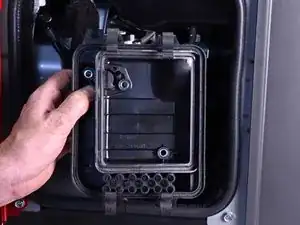
    • Open the maintenance cover.

  2. sJT2NiSJDvqIrsat
    sJT2NiSJDvqIrsat
    CGOaGS1UbALvMXom
    • Use a Phillips screwdriver to remove the screw securing the spark plug cover.

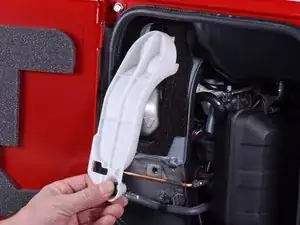
    • Remove the spark plug cover.

  3. PQCWqaPkWnK4k6CD
    PQCWqaPkWnK4k6CD
    EoOtaOPaXQtnwgWu
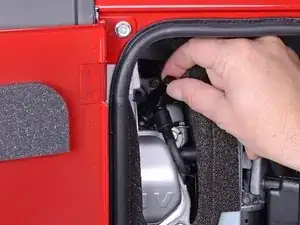
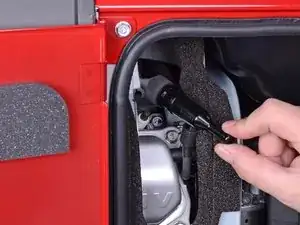
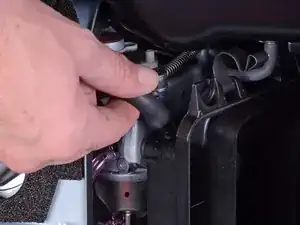
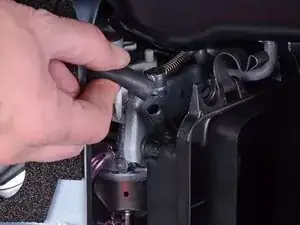
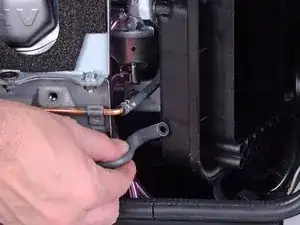
    • Grab the plastic housing at the end of the spark plug wire.

    • Pull firmly to disconnect the wire from the spark plug.

  4. 23thAcA2vMUnJWdU
    23thAcA2vMUnJWdU
    C5yxoojJaXjxcEnE
    • Turn the fuel valve to the cutoff position.

  5. aZbFSyElfRAbk4iE
    aZbFSyElfRAbk4iE
    NSU2VO1fI6LQXpdT
    EOtddsjVDpUoDXjj
    • Unlatch the four clips securing the air cleaner cover.

    • Remove the air cleaner cover.

  6. r2CUAnagAv4TeIIJ
    r2CUAnagAv4TeIIJ
    iv6VGmToTNHLO2Qt
    • Remove the air cleaner filter from the housing.

  7. NRRX2WLmyXFOOINU
    NRRX2WLmyXFOOINU
    JdxoBWLsdCTrgHjb
    • Pull and disconnect the breather tube from the top corner of the air cleaner housing.

  8. jJBH12ltYZQji4MO
    jJBH12ltYZQji4MO
    w6Z1feCgClIedueB
    • Pull and disconnect the lower tube from the bottom corner of the air cleaner housing.

  9. hdCBBWxetmZjJRm4
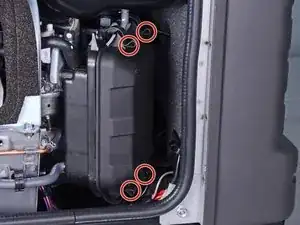
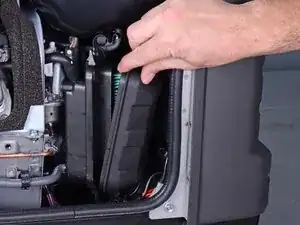
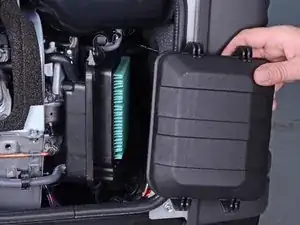
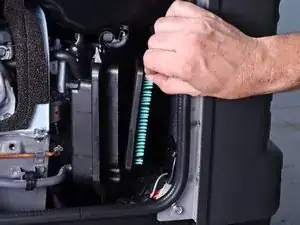
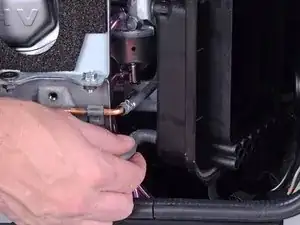
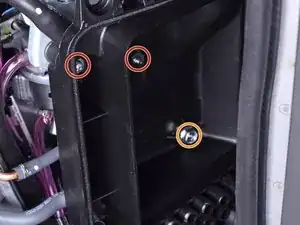
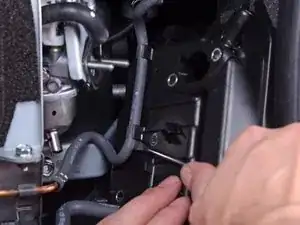
    • Use a 10 mm socket to remove the three fasteners securing the air cleaner housing:

    • Two 10 mm nuts

    • During reassembly, tighten these nuts to 6.3 ft-lb (8.5 N-m).

    • One 10 mm bolt

  10. cWHNJgHfMD4Tqrx3
    cWHNJgHfMD4Tqrx3
    eU3IthgywBNquEqR
    • Pull the housing out slightly from its recess.

    • The housing still has tubes clipped to it.

  11. eJ6M2sUyK2YStWCk
    • Use a flathead screwdriver to pry and unclip the tube from the air cleaner housing.

  12. mWKqHEQm5p2O4Qc5
    • Remove the air cleaner housing.

Conclusion

To reassemble your device, follow these instructions in reverse order.

Arthur Shi

Member since: 03/01/18

225807 Reputation

0 comments