Introduction
-
-
Place the fan on the back of the case and screw in the four corners.
-
Observe the orientation of the fan, so that its air flow circulates from the inside to the outside
-
-
-
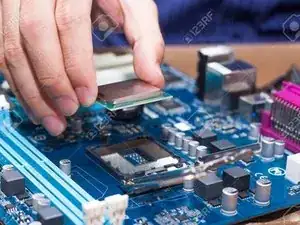
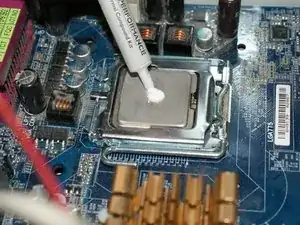
Place the processor in its socket, respecting the pin orientation.
-
Do not force it, to prevent the pins from bending. It should go in smoothly.
-
-
-
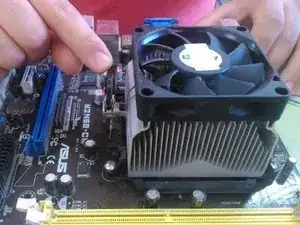
Fit on top the cooling with the fan, with the thermal paste between the two.
-
Connect the fan to the motherboard.
-
-
-
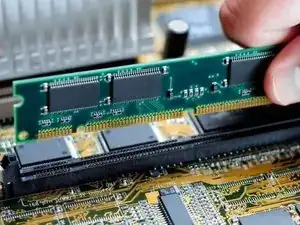
Open the socket tabs on the motherboard.
-
Once the module is correctly oriented, press it all the way down.
-
-
-
Place the hard disk on its rails.
-
Slide the hard drive in, until it is aligned with the screw holes. Screw it on both sides.
-
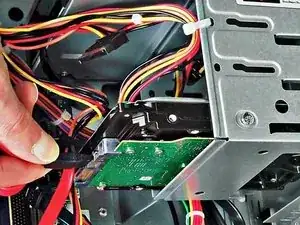
Connect the supplied SATA cable to the hard disk and the motherboard.
-
Connect the power cable coming from the power supply unit.
-
-
-
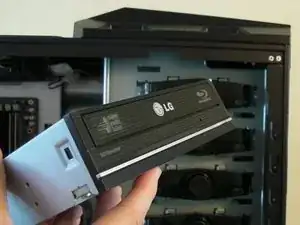
Place the hard disk on its rails, inserting it from the outside to the inside.
-
Previously remove the external cover of the box at the desired height.
-
Screw the unit on both sides.
-
Connect the supplied SATA cable to the drive and to the motherboard.
-
Connect the power cable coming from the power supply unit.
-
To disassemble your device, follow these instructions in reverse order.