Introduction

Doors are everywhere and provide privacy in a variety of places. If your door doesn't function properly, it is useless. This guide will provide you with easy steps that can be done on your own, in a short time to get your door into tip-top shape. There will be certain steps that may not work the first time around but do not panic, just simply start the step over again. Before starting anything I recommend that you have all the tools needed ready and that you have read the steps at least once. After successfully completing this guide you will have had the privacy of your bathroom restored.

  1. NCTeXREZT6d5tECt
    • Check for any screws that may have become loose over time in your door hinges.

  2. HSxZtKKhIZncZZaq
    • If you found any loose screws on the door hinge, use your screwdriver to tighten them.

    • To make this easier, you can slightly lift your door while screwing the screws.

  3. kx1qBJxRgCqS1ypm
    • Examine the faceplate, checking for any loose screws like you did with your door hinges.

  4. Fu5UKyDi1p4VaADF
    • Use your screwdriver to tighten any loose screws found on the face plate.

  5. EfhuWrPw44RXIsAq
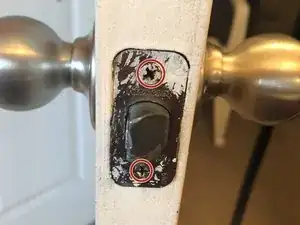
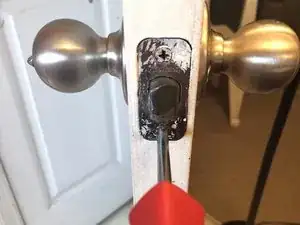
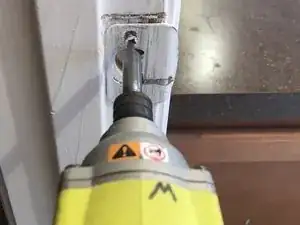
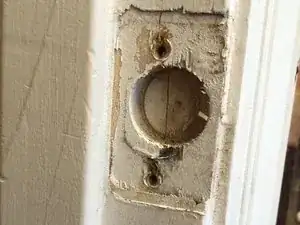
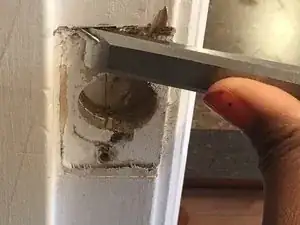
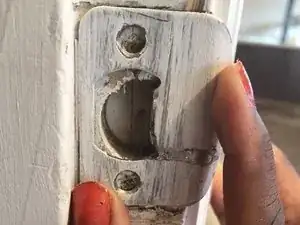
    • This is your strike plate. Take a look to see if it has shifted, and in what direction it shifted.

    • In the photo provided you can tell my plate has been shifted downwards.

  6. YTvtag3kSA5rwWHF
    YTvtag3kSA5rwWHF
    CfRypQFUwk3FhX6X
    • Use an electric power drill to remove the screws from your strike plate.

  7. HOIAlmrZBZMFDEGR
    HOIAlmrZBZMFDEGR
    dIVAcpkNG41DJly6
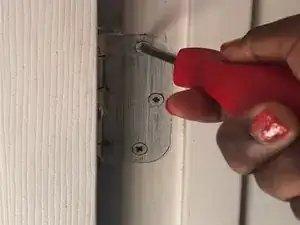
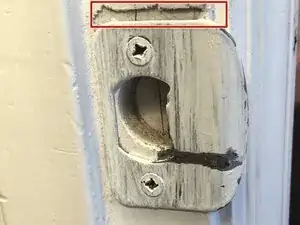
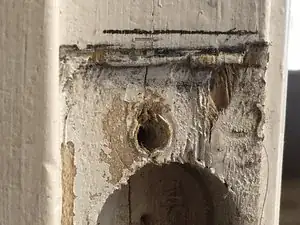
    • Make a line on the wall where you will be moving your strike plate. Use something that you will be able to remove, such as a pencil.

  8. bkkPTggLUZ6uehHe
    bkkPTggLUZ6uehHe
    AGfNmfH5FDnryGUQ
    • Using the wood chisel, chisel out the wood above the line to make space for the new placement of the strike plate.

    • An easy way to do this is to tap the end of the chisel with a hammer.

  9. lmZjsSkcmZEd2MHZ
    lmZjsSkcmZEd2MHZ
    qDiM1n1yAKNml3Wa
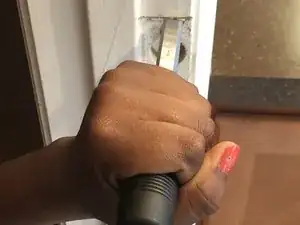
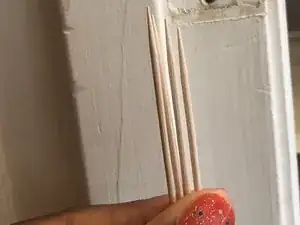
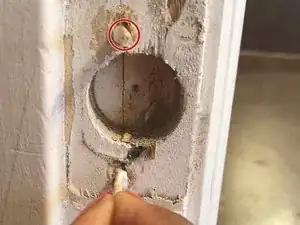
    • Take as many toothpicks you will need to fill up the holes that were created for the previous screw holes, and dip them into the Elmer's glue.

  10. FZw1SLrQ23MHiXRR
    FZw1SLrQ23MHiXRR
    UnT3YF1rLUcbc1Sn
    kFW1rtgah1MPEu5B
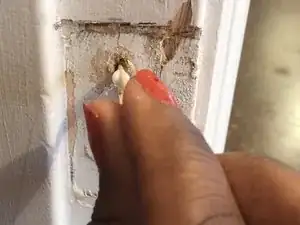
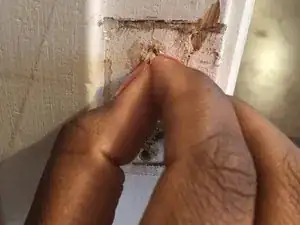
    • Place the toothpicks into the openings. By doing this, you are preventing your new screws from falling back into the old spot causing the door to be re-positioned again.

    • Let the toothpicks sit for about 10 minutes

  11. mgndJlMXf2A2PsAc
    • Place the strike plate in its new position.

  12. SAATo6HmXGREw2sG
    • Using an electric drill, screw your strike plate into the wall.

Conclusion

To reassemble your device, follow these instructions in reverse order.

Shanice Joseph

Member since: 22/01/18

367 Reputation

0 comments