Introduction

Use this guide to replace the motherboard & daughterboard in the Huawei Watch GT 2 (46 mm).

  1. ilVxkpVKgnI2Ev5G
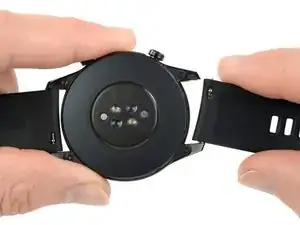
    • Before starting repairs, take your watch off the charger and power it down.

    • Remove the watch band.

  2. iqQMELJhICcegBUY
    • Remove the four 3.7 mm-long Torx T2 screws.

  3. V5XxdHQuZTVHMMMR
    V5XxdHQuZTVHMMMR
    3QZLp2OxOsOiJCBt
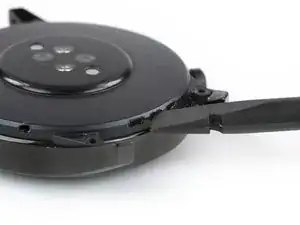
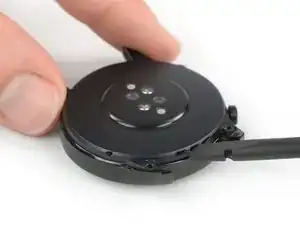
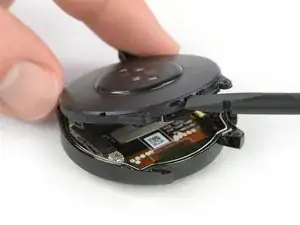
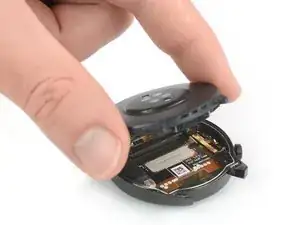
    • Insert the edge of a spudger into the middle loudspeaker opening at the top edge of your watch.

  4. XlCRrBMNGKgH2RaQ
    XlCRrBMNGKgH2RaQ
    dJGSvCUKHPBwBEkR
    • The plastic clamps holding the back cover in place sit very tight and may require some force during the prying procedure.

    • Use the spudger to pry up the back cover assembly of your Huawei watch GT 2.

    • Don't try to remove the back cover assembly all the way yet, it's still connected to the motherboard.

  5. DMO5iwerreCkJ63l
    DMO5iwerreCkJ63l
    nNnXovmc2KQN2EYv
    • Carefully swing the back cover assembly open to an upward position.

  6. Z2OCOWPr2S6GIRNV
    • Remove the two 2.3 mm-long Phillips #00 screws.

  7. QuUnxlir5E1TMHEJ
    QuUnxlir5E1TMHEJ
    ap2OgASgpXgKm6tN
    • Use a pair of tweezer to remove the metal shield covering the multi-purpose flex connector.

  8. UjBDIxT1PbmCLVMY
    UjBDIxT1PbmCLVMY
    o6JqlZPhGtkJnhvp
    • Use the flat end of a spudger to pry up and disconnect the multi-purpose flex connector.

  9. ISeGjiIVBKM1iOAO
    • Separate the back cover assembly from the watch case.

  10. i3ZbnEqCIUmeDs24
    i3ZbnEqCIUmeDs24
    g2YA4JqrvndlxiFa
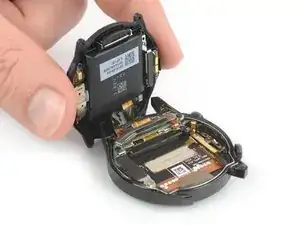
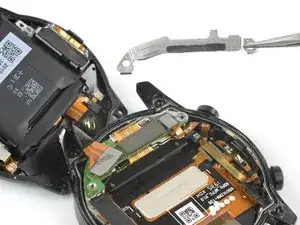
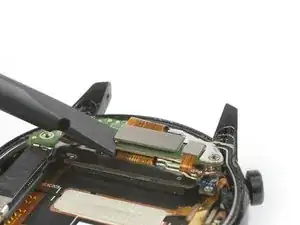
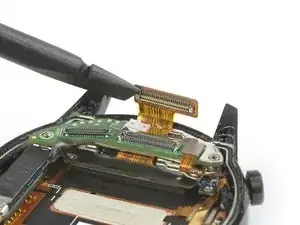
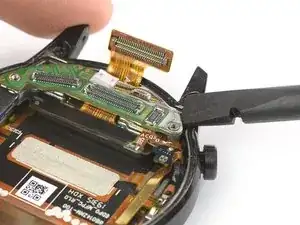
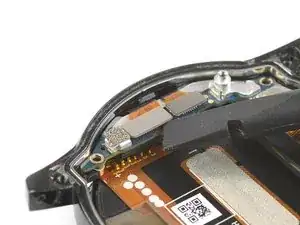
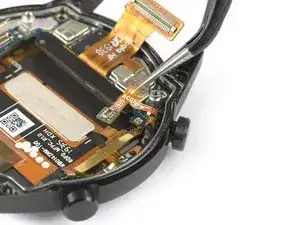
    • Use the flat end of a spudger to pry up and disconnect the main flex cable from the daughterboard.

  11. FGcZRiAF2QA1BvuZ
    FGcZRiAF2QA1BvuZ
    eG4WiZcRrytTkAvc
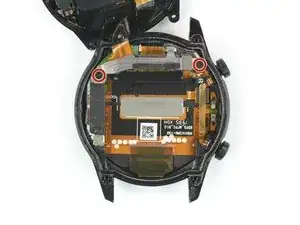
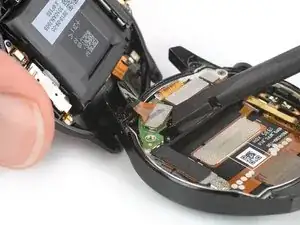
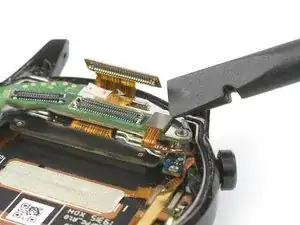
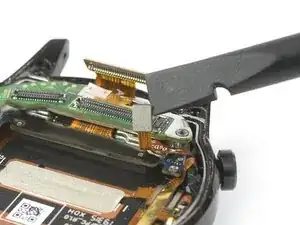
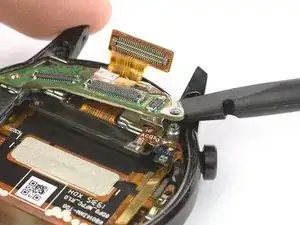
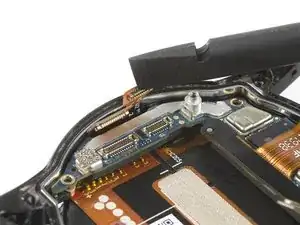
    • Use the flat end of a spudger to pry up and disconnect the watch buttons flex cable from the daughterboard.

  12. As6Yyyq2nVuwZZvI
    As6Yyyq2nVuwZZvI
    2mk2sGBO1FG2xJRe
    • Use the flat end of a spudger to lift the right edge of the daughterboard off its socket.

  13. YFPnfi5GvuDU4JQY
    YFPnfi5GvuDU4JQY
    WrRcfEloSj3hs1Gh
    • Use a pair of tweezers to remove the daughterboard.

  14. sHNUkKOwDoX2VMoA
    • Remove the three 2.3 mm-long Phillips #00 screws.

  15. nKfeAQpnYjKHBWSL
    nKfeAQpnYjKHBWSL
    OiafWo6FmeV22dW4
    • Use a pair of tweezers to remove the metal shield covering the display connectors.

  16. KMXiRaamtv2Qd1jW
    KMXiRaamtv2Qd1jW
    McmTOXl2qVYhHifn
    • Use the flat end of a spudger to pry up and disconnect the left display flex cable.

  17. tbFFVIaoIqbpkfEK
    tbFFVIaoIqbpkfEK
    LcoFTBrRsfDbUMOT
    • Use the flat end of a spudger to pry up and disconnect the right display flex cable.

  18. WrXVHh3yEJqSQOWD
    WrXVHh3yEJqSQOWD
    IQIUQCTwEaLrTD3Y
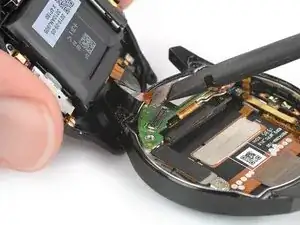
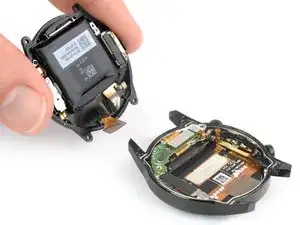
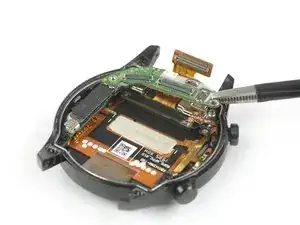
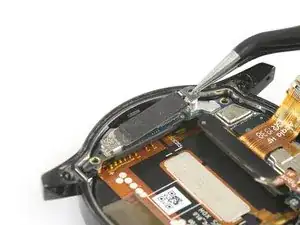
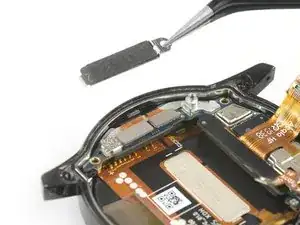
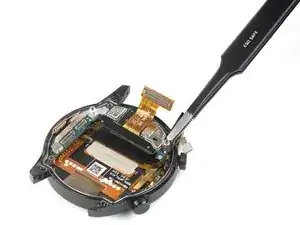
    • Use a pair of tweezers to carefully peel the watch button flex cable off the motherboard and fold it to the side.

  19. PRJKirvHuINHKCIL
    PRJKirvHuINHKCIL
    dxttybVAWSEYOpFM
    • Remove the motherboard.

Conclusion

To reassemble your device, follow these instructions in reverse order.

Take your e-waste to an R2 or e-Stewards certified recycler.

Repair didn’t go as planned? Try some basic troubleshooting, or ask our Answers community for help.

Dominik Schnabelrauch

Member since: 23/11/16

176120 Reputation

One comment

Fine, the step 15 is quite difficult, because there is a pin into the U near the edge ... I did have to remove by the middle of the shield and pry It

Good job

Bruno Dujardin -