Introduction
This guide is designed to help users successfully repair battery terminals for your Kid Motorz Xtreme Quad 12V Vehicle. These toys have the common problem where the battery terminals get loose causing the electric circuit to break and thus not being able to turn on and operate the electric quad. The goal after finishing this repair is being able to transfer the skill learned in this guide to other applications with similar issues.
Before you being this guide you will need to be familiar with soldering techniques and some materials required
- Flathead / Philip screwdriver
- 1 x Soldering Iron Holder (with wool ball & rosin)
- 1 x IC Extractor,
- 1 x Roll of Lead-free solder (0.8mm 35g),
- 1 x ESD-Safe Tweezers
- 1 x Lead-free solder (0.8mm 35g)
# Safety gloves
The materials required can be found at any local home depot and I encourage the use of youtube to become more familiar with the equipment and material required to complete the following guide.
-
-
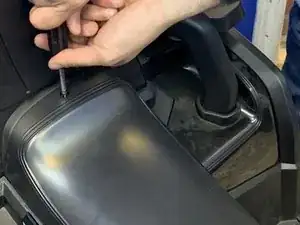
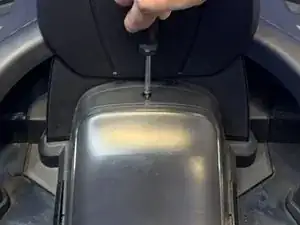
Located at the back of the seat is the position of the first screw which will need to be removed in order to gain access to the battery and its components.
-
-
-
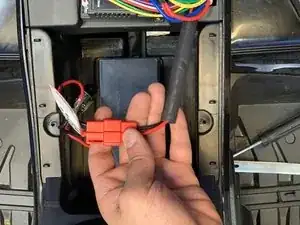
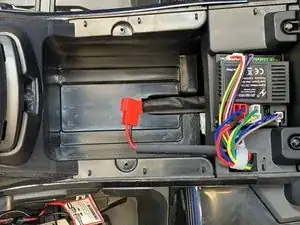
After removing the seat you will gain access to the battery which should be disconnected by gently pushing the tabs inwards and carefully separating both ends of the cable making sure to unplug before continuing through the guide.
-
-
-
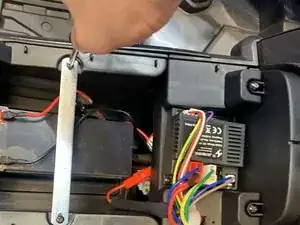
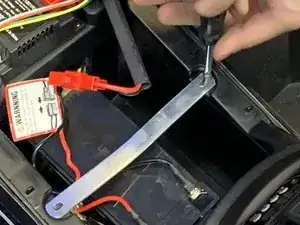
Making sure the battery is disconnected, locate the bracket which can be found horizontally to protected the battery from moving around. The bracket contains two screws which can be removed using a philphead screwdriver.
-
-
-
After removing the battery terminals along with the batter you can take both parts and head toward the soldering station. (make sure to preheat the station so make this step as efficient as possible).
-
-
-
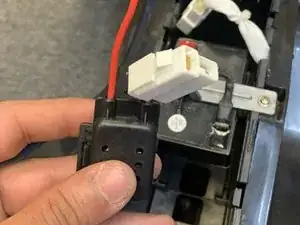
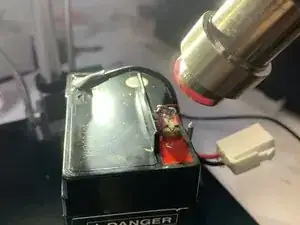
Take your solder and place carefully on the terminal points of the battery (negative and positive) and after gently added heat the solder should begin to melt onto the terminal ends
-
-
-
After preparing the solder onto the terminal points of the battery apply heat making sure not to overheat the solder. It is recommended to use safety gloves while handling the heat gun and solder
-
-
-
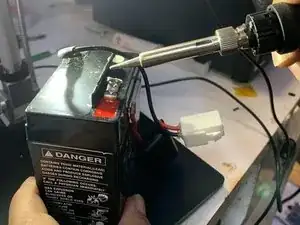
After the solder has melted onto the battery terminal located the end piece which is being connected to the battery and gently apply heat while positioning of the wire onto the terminal end and melting the solder on top of the wire until the wire is secured and firmly in place
-
-
-
After completing the solder, plug the battery back together and position it back into the groves of the bottom seat
-
-
-
Reattach the bracket using a philphead screwdriver the location of the screws which will needed to be inserted can be found on the endpoints of the horizontal bracket.
-
-
-
Afterwards gently slide the seat pack into position and prepare to screw it back into place using a philphead the location of the screw is similar to to first step and can be located and the back panel of the seat
-


The goal of this guide is to repair a battery terminal through solder and after completing the guide you should be able to apply what you learned to other projects and similar electronics