Introduction
Disassembling a tablet often requires some gentle prying of the frame. Be sure to exercise care during these first few steps(disassembling), and do not lose your screws! The Paperwhite is a sturdy tablet that can be broken down into just a few components. This guide will show you in just eight steps how to replace a faulty motherboard.
-
-
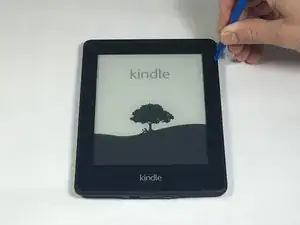
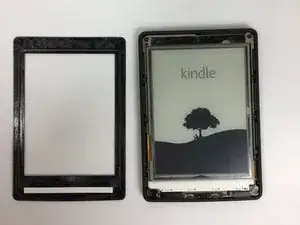
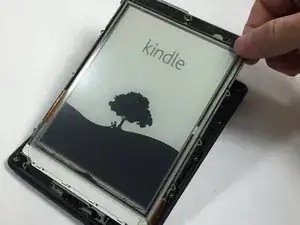
Insert plastic opening tool into the corners of the Paperwhite and slide around the edge perimeter to remove bezel.
-
-
-
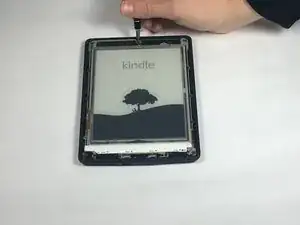
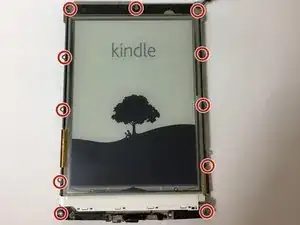
Using a Screw Driver, Remove the eleven 3.2 mm Phillips 000 screws from corners of the mid-frame and from behind the black strip as shown.
-
-
-
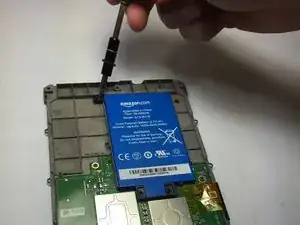
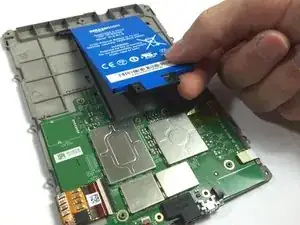
Use a screwdriver to remove the three 3.0 mm Phillips 000 screws that are holding the battery in place as shown.
-
-
-
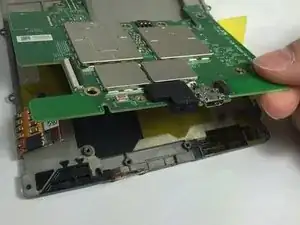
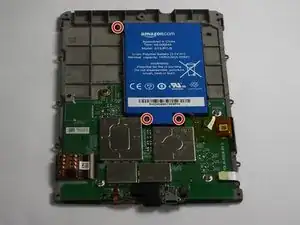
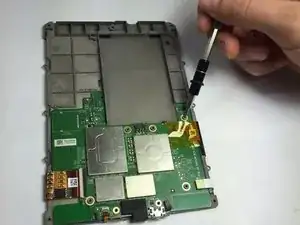
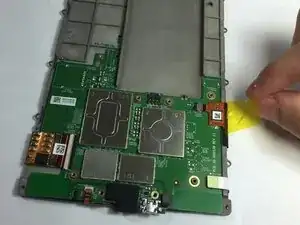
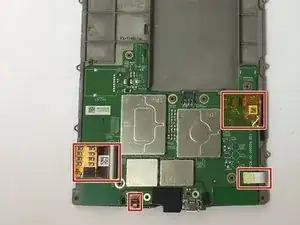
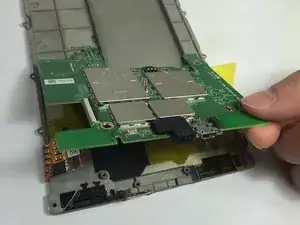
Use a screwdriver to remove the seven 3.0 mm Phillips 000 screws that are holding the motherboard in place as shown.
-

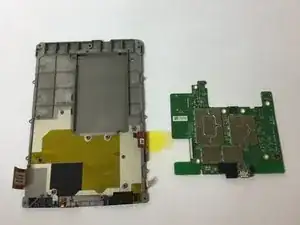
To reassemble your device, follow these instructions in reverse order.
I broke an LED light and slightly pulled up the layer protecting the screen leaving some bubbles I can’t really get rid of. This guide has no warning whatsoever about being careful with the spudger and making sure you don’t go too deep. The sticky bezel you pry off can be really sticky and difficult to come off (like mine was). If this guide had a simple warning and explanation to be careful about depth of spudger/plastic tools around LEDs and the middle of the screen I would not have ruined a perfectly good kindle and new battery!
Albert Einstein -
I noticed that the screen protector film was starting to lift with the outer bezel. Luckily I stopped at this point as it would have ruined the Kindle. It would seem some paperwhite 2s have a bonded screen film which makes battery replacement impossible. Perhaps you should mention this before owners buy a battery?
Anna Lien -
My first attempt started at a bottom corner— while reading I wouldn’t have to stare at any scratches I made. But the bottom bezel has a ton of glue, and is difficult to separate even when you do it last. What worked for me was to start from a top corner, and separate in both directions, using picks and other tools to keep the side bezels separated. Then I worked the bottom bezel free from both corners.
Matt D -
Agreed that the information in the instructions is lacking. I wish I had known that the bezel is only glued on and not locked in to the backplate in any way. I think the warning to focus on the outer edges is misleading and definitely steered me way closer to the screen separation issues than I would have otherwise. I wish I had read these comments before starting.
Dan M -
Warning: There is a Wi-Fi antenna along the top. I damaged mine (only half of the dipole, so not too bad). It is a flex PCB stuck down and adhered to the bezel.
F. Mort -