Introduction

Amazon’s Kindle Paperwhite 3rd Generation possesses a GS957661, 3G motherboard. This guide requires that the Kindle is turned off, and that a plastic opening tool, angled precision tweezers, and a PH000 screwdriver are used.

  1. mgFAVxtMlxIQ4UXM
    mgFAVxtMlxIQ4UXM
    ruqm6aaQeXEtg61H
    ZtSyLsMBHoJtCOq5
    • Ensure that the device is turned off before beginning.

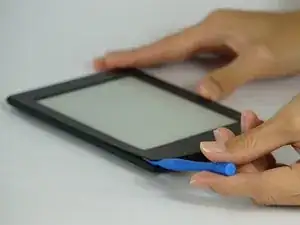
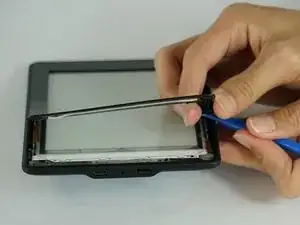
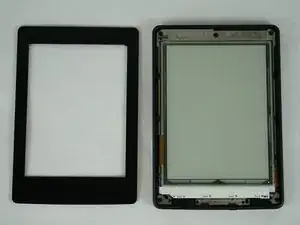
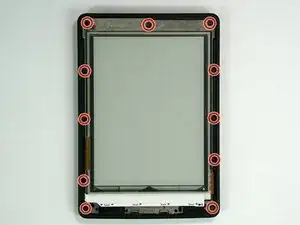
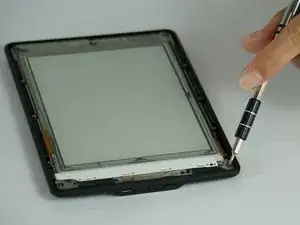
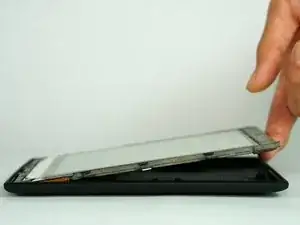
    • Gently pry the bezel off the screen using a plastic opening tool. Start at the corners and slide around the edges until you return to your starting point.

    • Be careful if using the metal spudger, as it can scratch the surface of the Kindle.

    Be very careful along the lower left side, where the cable to the touchscreen can be easily cut with a plastic spudger.

    John Kenny -

    Be careful at the top of the 3G version. The wifi and cell antennas are located along here.

    James Sullivan -

    I can’t get my spudger in to start lifting. Any advice?

    Davey -

    it takes a bit of force to first insert the spudger into the crack

    bonjoukhadar -

    Be careful inserting the spudger too quickly. The glue holding the screen pulled loose in two spots along the side before the bezel did and there are lines along the border of my screen now.

    Nick -

    I made my own version of Nick’s error: I inserted a pick too far under the bezel, and very slightly separated the screen, leaving a small shadow in a corner. Easy does it!

    Other than that, battery replacement was super-easy and successful.

    Brad Compton -

  2. MbWZKSBHjy5mrCMG
    MbWZKSBHjy5mrCMG
    ST1NGusypgqBckxL
    • Unscrew the eleven 3.2 mm Phillips #000 screws surrounding the frame.

    I have a 3rd Gen Paperwhite and there are only 10 screws. 5 along each side

    bonjoukhadar -

  3. tXbdeuCkakiQOUZC
    • Gently lift the mid-frame out of the case with your hands.

    I had trouble removing it. It was stuck and I managed only to free it with force. Now I have to fix the button..

    LGenie -

  4. qp3NYCcJFisoelfD
    qp3NYCcJFisoelfD
    STsGkWp46qJkgbPj
    • Unscrew the three 3.0 mm Phillips #000 screws that are securing the battery.

  5. WdpZapnw22YZYyQl
    • Gently lift the battery from the frame.

    We had a Kindle that unfortunately took a dunk in (clean) water. It was then inoperative. I followed this guide, and took the battery out, let everything dry for a few days, then replaced the battery. Now it works fine! Thanks!

    Frank Demarest -

  6. XvUQXgWHaddm4nnD
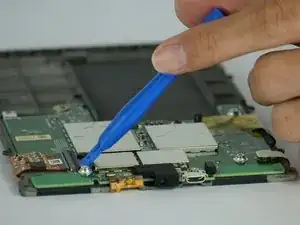
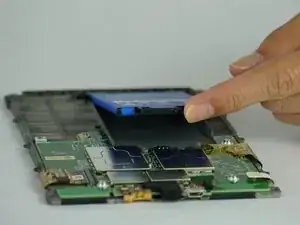
    • Flip the black latch with a plastic opening tool, and then gently pull back the orange ribbon cable.

  7. xv2kgwMWitDs544t
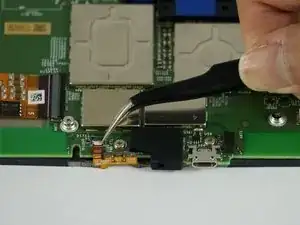
    • Flip the tiny off-white latch with angled precision tweezers toward the direction of the battery.

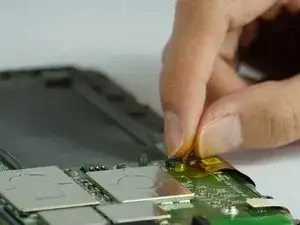
    • Gently peel back the orange ribbon cable.

  8. SOuBPXiDwSrpLvWZ
    SOuBPXiDwSrpLvWZ
    hOAnOqpZ1imdwsZH
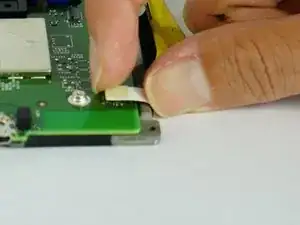
    • Peel back the orange ribbon cable near the battery.

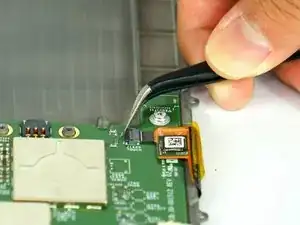
    • Flip the tiny black latch with angled precision tweezers toward the closest edge of the device.

  9. pS1LD5ndEUuYZENZ
    • Peel back the white connector with your fingers.

  10. QPjARqrcOBPYRWiW
    QPjARqrcOBPYRWiW
    3uXUZTKHOcYPNwGB
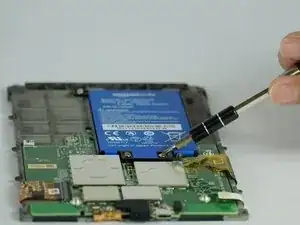
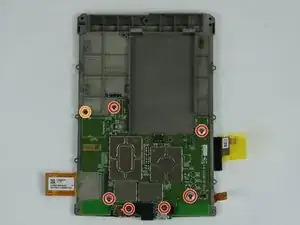
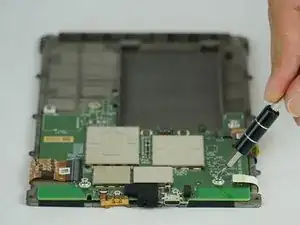
    • Unscrew the six 3.0 mm Phillips #000 screws surrounding the motherboard.

    • Unscrew the one 2.5 mm Phillips #000 screw.

    • There is a little metal plate underneath the 2.5 mm screw and washers under four of the 3.0 mm screws.

  11. Au4BgWmd3rnLtNvD
    • Use a plastic opening tool to lift the motherboard upwards from the frame.

Conclusion

To reassemble your device, follow these instructions in reverse order.

Micah Smart

Member since: 10/02/16

2876 Reputation

5 comments

how do I fix my loose charging port?

angusc -

how do i fix my loose charging port connection

angusc -

Where can I buy a kindle paper white, new mother board?

Lorraine -

Tip, heat the front bezel to soften the glue.

KAASKOP3000 -

I totally know how to fix my kindle but I don’t know where to get the part. I broke the tip to the ribbon cable for the only %#*@ button on the device. do they sell those here?

Corry Newton -