Introduction
This guide is useful for broken, inefficient, or defective fans within a Lenovo Yoga 710-15IKB. For loud or overheating fans, use this guide after confirming that dust is not the cause for fan issues.
-
-
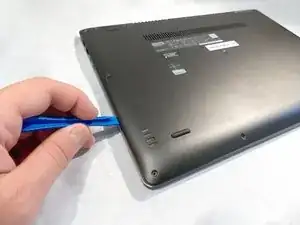
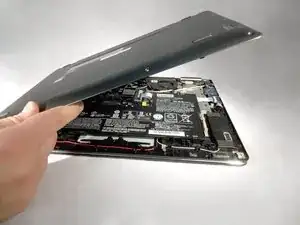
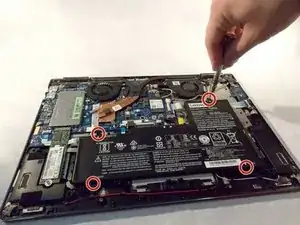
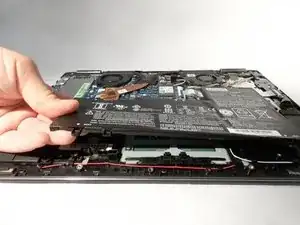
Slide an opening tool between the base and back cover and work your way around the entire device to release the back cover.
-
-
-
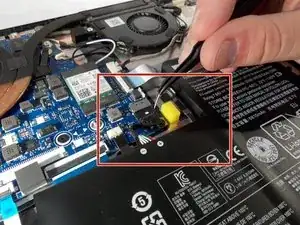
Disconnect the battery by pulling its cable away from the hinge with a pair of tweezers or your fingers.
-
-
-
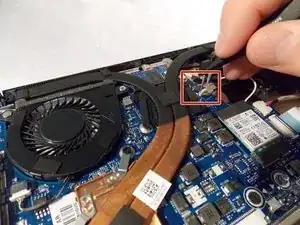
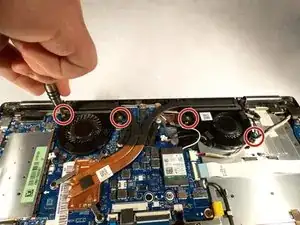
Use tweezers to grab the fan harness.
-
Gently pull the harness to disconnect from motherboard.
-
Conclusion
To reassemble your device, follow these instructions in reverse order.
¿Son Vdes. conscientes de que están haciendo una mala traducción del inglés? Están traduciendo “remove”, que en castellano se traduce por retirar, como remover, que en inglés se traduce por “stir”. No aconsejo remover los tornillos ni las baterías.
stuart.medina -
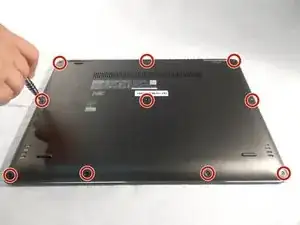
Be cognizant of which screws come from which locations. I did not notice that three of the screws were longer than the others. I ended up reinstalling mine along the hinge side of the back cover.
jcorrell68 -
Thanks for the tip! I’ll add that into the guide.
Arthur Shi -