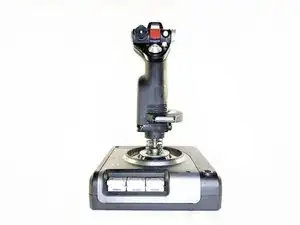
Introduction
This guide will walk you through disassembly of the x52 flight stick to get to the yaw potentiometer and apply contact cleaner to eliminate jitter in the sensor. After which, you will also need to add silicone lubricant.
Other guides have been made, but I couldn't find one that properly details how to disassemble the pinky trigger without damaging it...so I made one. Hope this helps you out!
-
-
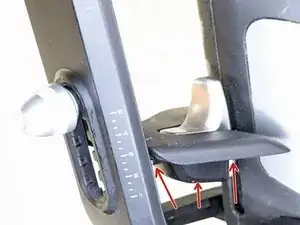
Begin by unscrewing the three small screws (PH#00) under the hand rest that hold the pinky trigger assembly in place.
-
These screws can be difficult to reach with a normal screw driver. You could use a flexible extension or optionally a small philips bit in conjunction with an adjustable wrench to get proper leverage in the tight space.
-
With the screws removed, the trigger mechanism will hang loosely by its wire safely out of the way.
-
THIS STEP IS CRUCIAL Many guides will skip the pinky trigger disassembly and proceed straight to removing the hand rest and guard. If you fail to remove these screws before removing the hand rest you will break the thin wire connecting the trigger with the body of the flight stick.
-
-
-
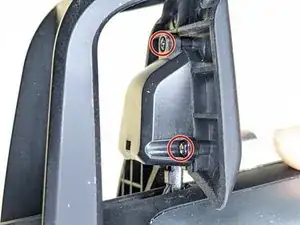
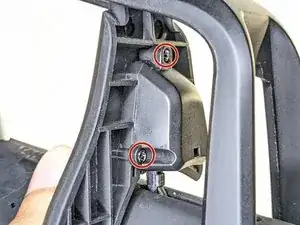
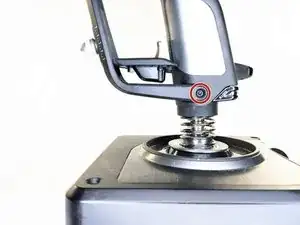
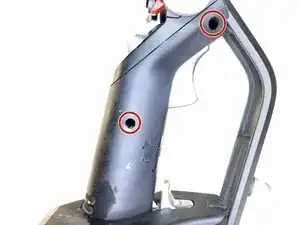
Remove the four screws (T10) holding the hand guard in place. Two in the top of the stick (fig. 1) and one on each side below the hand rest (fig. 2 & 3).
-
Note that the two pairs of screws (those at the top vs the bottom of the hand guard) are threaded differently and should not be confused.
-
-
-
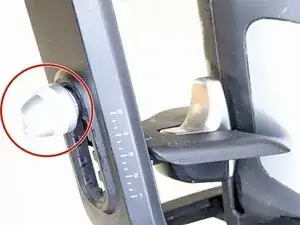
Loosen the thumbscrew (fig. 1) that adjusts the hand rest position. This screw will not come all the way out. Just loosen it as far as it will go.
-
Gently pull on the two arms (fig. 2) connecting the hand guard to the flight stick body to remove them from their sockets.
-
At the same time, pull the hand rest to the side (fig. 3) as you slowly work both components free of the flight stick body.
-
This can be a little awkward and may take some time. Just continue pulling gently on the components to work them loose.
-
Be careful of the loose top half of the pinky trigger which can fall out and will need to be set back in place between the hand rest and the trigger assembly during reassembly.
-
-
-
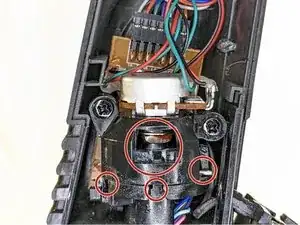
Remove the four screws (PH#1) in the right side of the flight stick body. Two at the bottom of the stick (fig. 1), one in the middle, and one at the top (fig. 2).
-
Using a spudger tool, gently pry off the right side panel to reveal the inner mechanisms.
-
The panel is very tight at the top near the primary trigger and will take some time to pull loose. Just be patient with it.
-
-
-
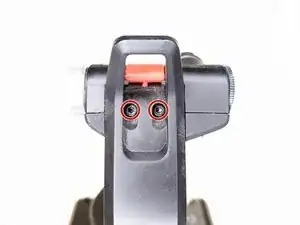
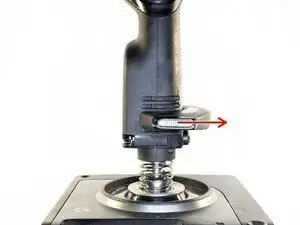
With the side panel removed, you have direct access to the potentiometer and yaw mechanism.
-
Spray contact cleaner in the indicated area (fig. 1) in small bursts and work the yaw axis back and forth to remove any dirt/grit from the potentiometer.
-
You can plug the flight stick in briefly to check the axis for jitter. Just keep working the axis until the jitter is gone.
-
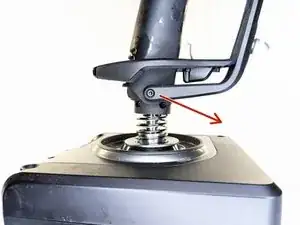
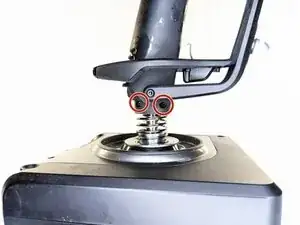
Apply silicone grease to the point of a spudger and apply in these areas (fig. 2), as well as at the bottom of the flight stick body where the tension springs make contact with the plastic (don't forget the right side panel as well).
-
Work the yaw axis back and forth to thoroughly work in the lubricant, checking for any rubbing feeling, and apply more grease as needed.
-


To reassemble your device, follow these instructions in reverse order.