
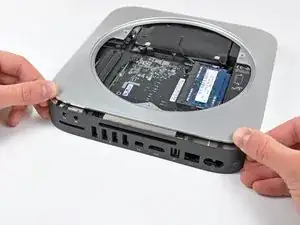
Introduction
Prerequisite only.
-
-
Remove the following three screws:
-
One 5.0 mm T8 Torx or 2.0 mm Hex screw (either will work)
-
One 16.2 mm T6 Torx screw
-
One 26 mm T6 Torx standoff
-
-
-
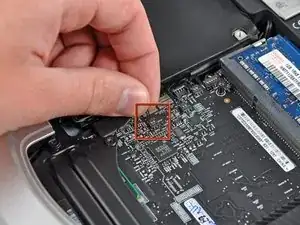
Carefully pull the wires for both hard drive thermal sensors upward to lift their connectors up and out of the sockets on the logic board.
-
-
-
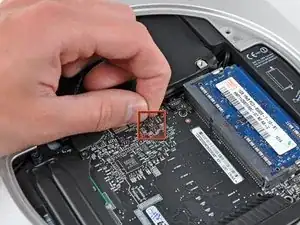
Use the flat end of a spudger to pry both the hard drive and optical drive connectors up out of their sockets on the logic board.
-
-
-
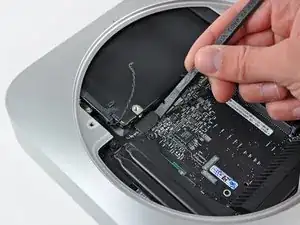
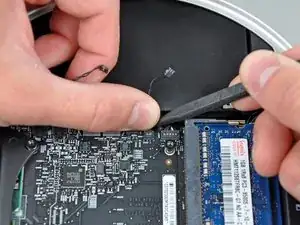
To disconnect the optical drive thermal sensor, pinch its cables between your thumb and a spudger and pry the spudger upward to lift the connector up and out of its socket on the logic board.
-
-
-
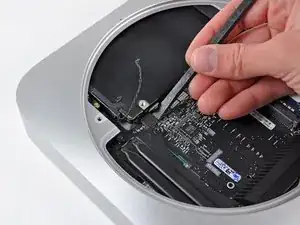
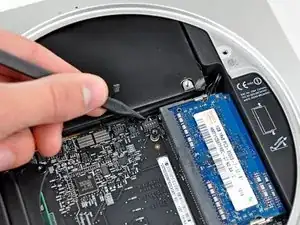
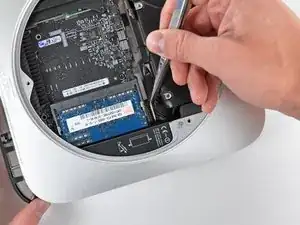
Use the tip of a spudger to lift the IR sensor connector up and out of its socket on the logic board.
-
-
-
Insert a Mac mini Logic Board Removal Tool into the two holes highlighted in red. Be sure it makes contact with the outer case below the logic board before proceeding.
-
Carefully pull the tool toward the I/O board. The logic board and I/O board assembly should slightly slide out of the outer case.
-
Cease prying when the I/O board is visibly separated from the outer case. Remove the Mac mini Logic Board Removal tool.
-
-
-
Simultaneously push the two plastic clips on the far left and right sides of the I/O board toward the middle of the I/O board and pull the I/O board away from the outer case.
-
-
-
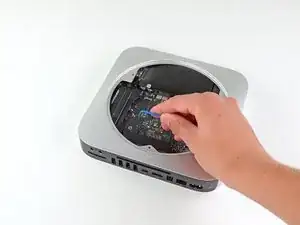
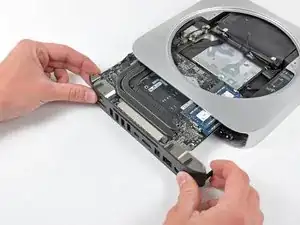
Pull the I/O board/logic board assembly out of the outer case enough to access the power connector.
-
Use a pair of tweezers to disconnect the power cable from the logic board.
-
-
-
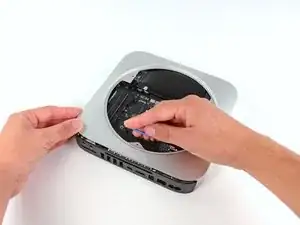
Carefully slide the logic board assembly out of the mini, minding any cables that may get caught.
-

To reassemble your device, follow these instructions in reverse order.

In my case, the yellow circled standoff already came out with the previously removed fan.
Sven Harmstorf -
My standoff screw was really tight and my T6 stripped the screw. :( But, because it's effectively just used as a post to stabilise the fan, I ended up using some surgical clamps, grabbing the standoff where the rubber grommet sits, and gently twisted the screw loose. No major damage because that part of the screw isn't really used! Just be careful and gently twist (patience is KEY) to loosen.
alc217 -
The weak design of the long standoff screw (not enough material around the star-patterned socket head) has probably caused damage of the internal head during production of the Mac Mini!
The standoff screw was in my case extremely tightened and the T6 Torx screw driver could not be used anymore (due to damage of the socket head after applying too much torque during the original assembly).
I needed to use a High Leverage Combination Plier in vertical position to loosen the screw without damage to other parts. I tried to keep the rotation axis of the screw at the centre of the flat nose of the plier. Minor scratches to the screw can not be avoided in this way.
Marc -