Introduction

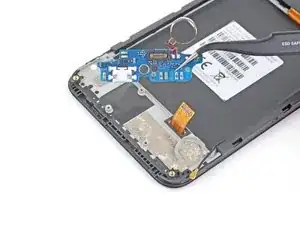
Follow this guide to remove or replace the daughterboard in a Motorola Moto E6 Plus. The daughterboard assembly includes both the charging port and the vibration motor which is soldered on.

Before you begin, download the Rescue and Smart Assistant app to backup your device and diagnose whether your problem is software or hardware related.

  1. DV5tZdENiPJTQAHr
    DV5tZdENiPJTQAHr
    ZLVwPhhuVLkUM2so
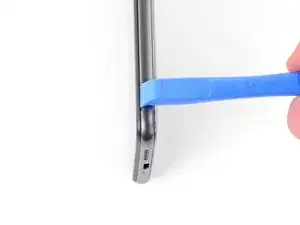
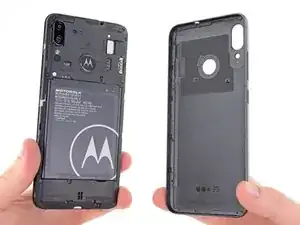
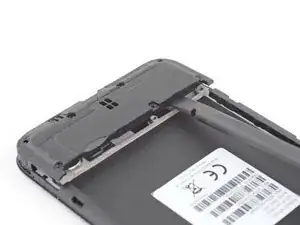
    • Use an opening tool or your fingernail to pry the back cover away from the frame using the notch at the bottom right corner.

  2. J1BapQcYH4yMlOdj
    J1BapQcYH4yMlOdj
    mxJsqtHuwRJjNBR6
    l52kFOQjHdakutLa
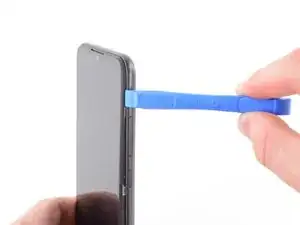
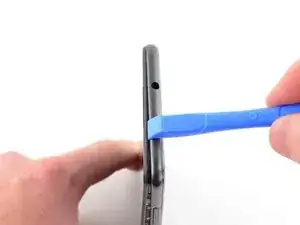
    • Use an opening tool or your fingernail to release the clips on the right edge by sliding up and around the top right corner.

  3. P5IvPvDtn3JNoxHK
    P5IvPvDtn3JNoxHK
    EYwJhkTXPJ3MbcVO
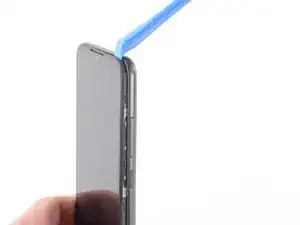
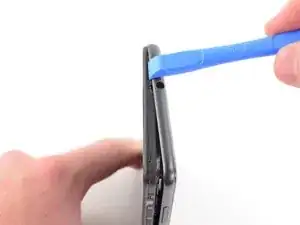
    • Continue to slide the opening tool or your fingernail across the top edge to release the clips securing the back cover to the frame.

  4. NTONYYaIPIFSexev
    NTONYYaIPIFSexev
    UkfubXkAXUxqBxaZ
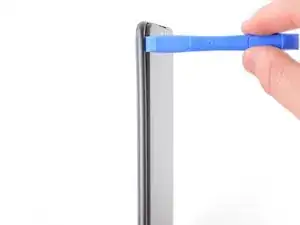
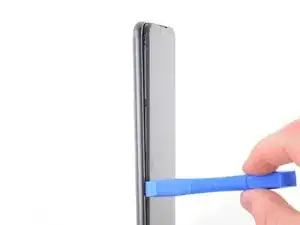
    • Continue to slide the opening tool or your fingernail down the left edge to release the clips.

  5. vgbAQyZt4TIpUmH5
    vgbAQyZt4TIpUmH5
    thBYeufEmQbjUgPt
    GBiAVjADV4gXNKQY
    • Remove the back cover.

  6. 44RTHNyrK1FuSSft
    44RTHNyrK1FuSSft
    pnhYD23GC4DxXqt5
    rLBa4dEMSKgI5ybt
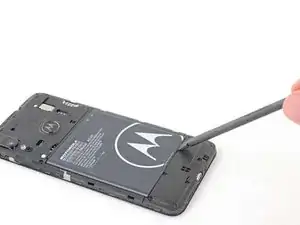
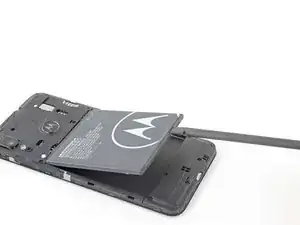
    • Use a spudger or your fingernail to pry the battery up using the notch near the bottom right corner.
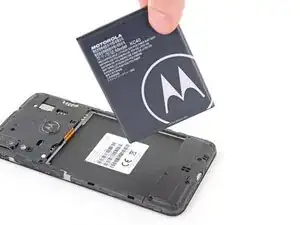
    • Take care not to puncture or bend the battery with your tool—a punctured or bent battery may leak dangerous chemicals or cause a thermal event.

    • Remove the battery.

    This is the best and most easily explained step by step procedure I have ever come across, usually author assumes that one does not need some of the steps, believe me “the more details the better “ this guy certainly knows how to explain things. Well done, excellent.

    Ken Mills -

  7. SCQSb22VXNPBBXUU
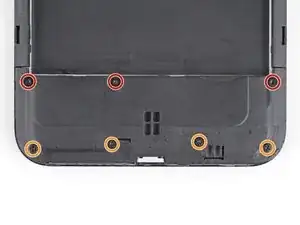
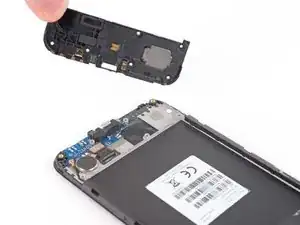
    • Use a Torx T3 driver to remove the three 3.6 mm-long screws securing the loudspeaker to the frame.

    • Use a Phillips screwdriver to remove the four 3.1 mm-long screws.

  8. nwFC5YbPlwNwpgiY
    nwFC5YbPlwNwpgiY
    CwI6rxNQVwEHCF5A
    • Use a spudger to pry up the loudspeaker from the frame.

    • If you are having trouble releasing the clips securing the loudspeaker to the frame, use a spudger to pry around the loudspeaker to loosen it.

  9. ABKbxAPLIRRHyxwY
    • Remove the loudspeaker.

  10. SFdcLi4ZLUwnoR1L
    SFdcLi4ZLUwnoR1L
    BquOEEDXJoFNxWAu
    • Use a pair of tweezers or your fingers to remove the charging port insulator.

    • The charging port insulator may have come off with the loudspeaker.

    Not necessary on my phone.

    Peter Merchant -

  11. oWU1HGUGQcKtM6AU
    oWU1HGUGQcKtM6AU
    GYkkRB4hO2prBQHr
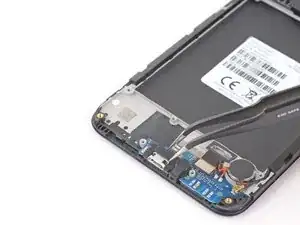
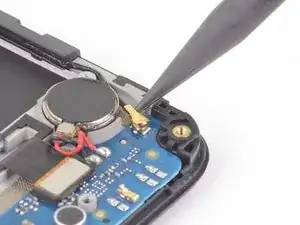
    • Use the pointed end of a spudger to disconnect the coaxial cable by lifting straight up as close to the connector as possible.

  12. TCYqfjckyqJG3JoC
    TCYqfjckyqJG3JoC
    sqr51WsaxY1wutHb
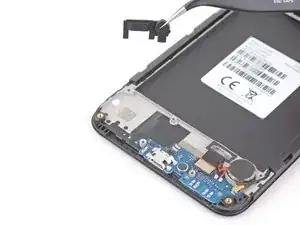
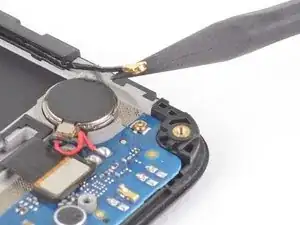
    • Use the flat end of a spudger to disconnect the motherboard flex cable by lifting straight up on the press connector.

  13. VTBIkKtrAPQesHYU
    VTBIkKtrAPQesHYU
    FivSllfTW2dqaYFe
    • Heat an iOpener and apply it to the bottom edge of the screen for 30 seconds.

    • A hair dryer, heat gun, or hot plate may also be used, but be careful not to overheat the phone—the display and internal battery are both susceptible to heat damage.

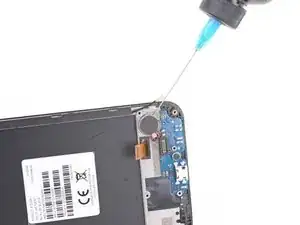
    • Apply a few drops of high concentration (over 90%) isopropyl alcohol underneath the vibration motor to loosen the adhesive securing it to the frame.

    • Tilt your phone to allow the isopropyl alcohol to flow underneath the vibration motor.

  14. dRMeevEUJ1DHv4kU
    dRMeevEUJ1DHv4kU
    lVpQ6iTMiF6FtST1
    • Use an opening pick to peel the vibration motor off the frame.

  15. PxQheLyRkqdBEhSG
    PxQheLyRkqdBEhSG
    fH5qjQoaJwnLsvqi
    dHBGMg6mkHGAaL1w
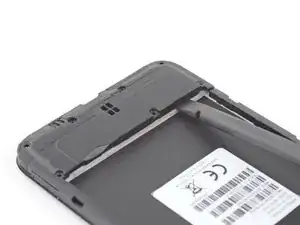
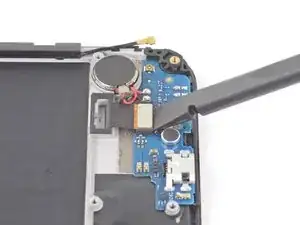
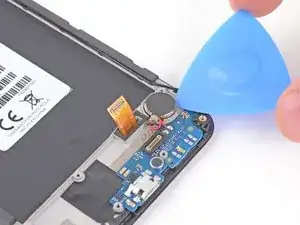
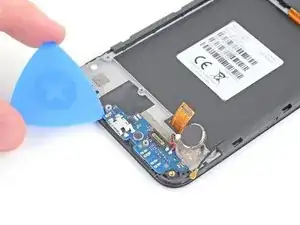
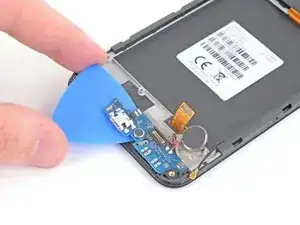
    • Use an opening pick to peel the daughterboard assembly off the frame starting from the left edge.

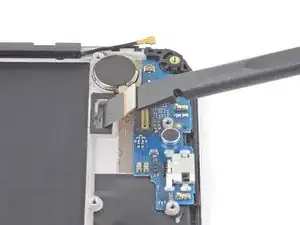
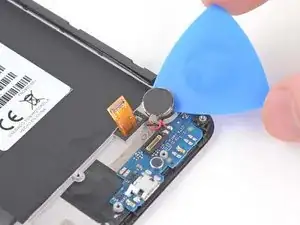
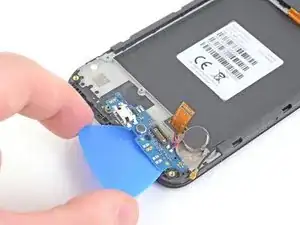
    • Insert an opening pick under the bottom right edge to cut the remaining adhesive.

  16. yf2GQAgllgY6bZTc
    • Remove the daughterboard assembly which includes the vibration motor and the charging port.

Conclusion

To reassemble your device, follow these instructions in reverse order.

Take your e-waste to an R2 or e-Stewards certified recycler.

Repair didn’t go as planned? Try some basic troubleshooting, or ask our Motorola Moto E6 Plus Answers community for help.

Robert Boyd

Member since: 01/02/21

23303 Reputation

0 comments