Introduction
So you managed to break your circle pad and can't play your favorite games? Don't fear, the circle pad can be replaced!
-
-
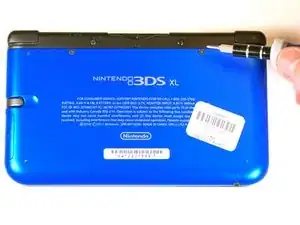
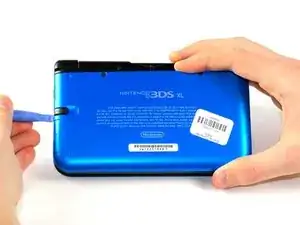
Hold the device so that the cover is facing up.
-
Using a plastic opening tool, pry off the cover starting at the top right corner.
-
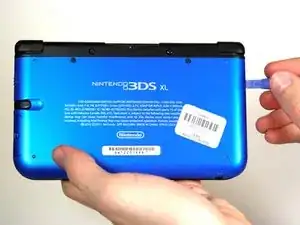
Hold the edge of the cover to ensure it does not reattach.
-
Look for the small section below the stylus compartment. Pry off the cover at that point if it is still attached.
-
Take off the cover of the device and set it aside.
-
-
-
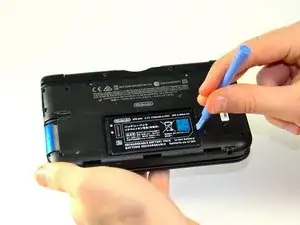
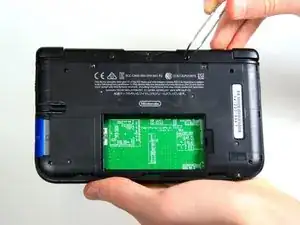
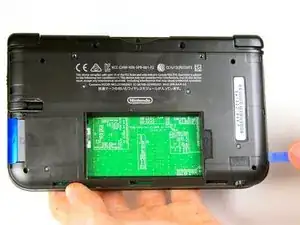
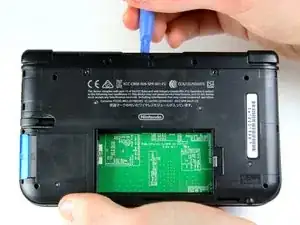
Insert the plastic opening tool into the opening located on the right side of the battery.
-
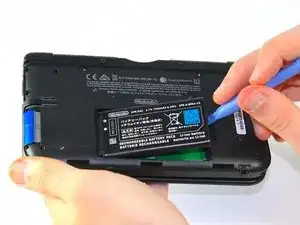
Pry off the battery from the lower casing.
-
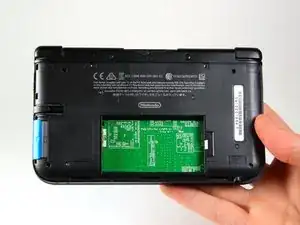
Lift the battery out of the case and set aside.
-
-
-
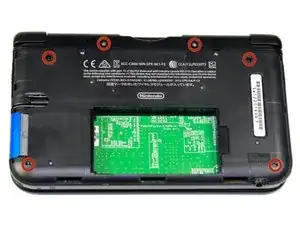
Using tweezers pull out the rubber bumpers that are located at the top of the device on either side of the game cartridge compartment.
-
-
-
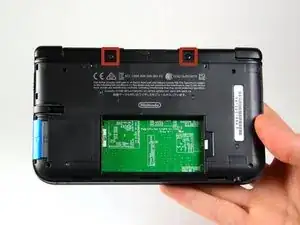
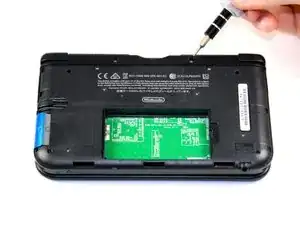
Remove the 2.3 mm screw located above the game cartridge slot with a Phillips #00 screwdriver.
-
-
-
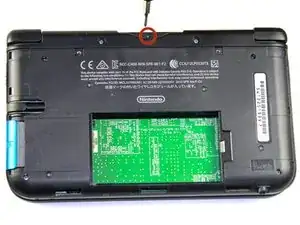
Make sure the SD card has been removed. With a plastic opening tool pry off the lower case starting at the bottom edge and working around the perimeter.
-
Two ribbon cables connect the case to the circuit board. Be careful to not pull the case too hard and rip the ribbon cables.
-
-
-
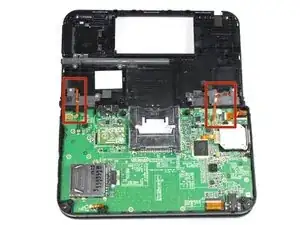
Remove the ribbon cables located underneath the left and right bumpers by prying up the base of the cables with a plastic opening tool.
-
Completely remove the lower case from the rest of the device and set aside.
-
-
-
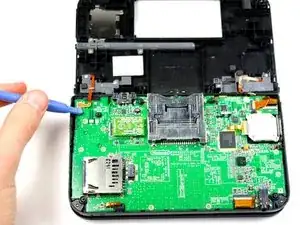
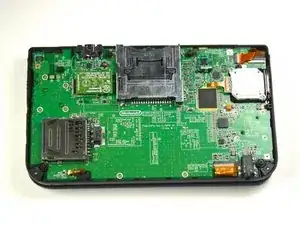
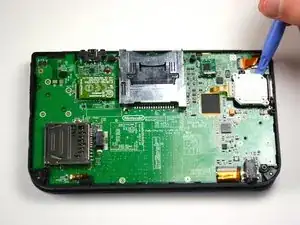
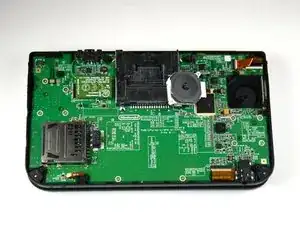
Position the device such that the game cartridge slot is located at the top.
-
Locate the circle pad on the right side of the device.
-
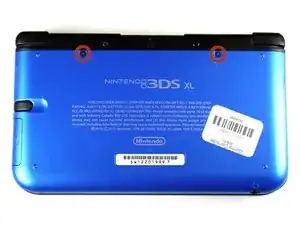
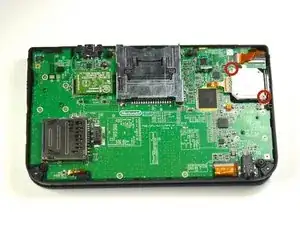
Remove the two 7.5 mm screws on the upper left and the bottom right corners.
-
-
-
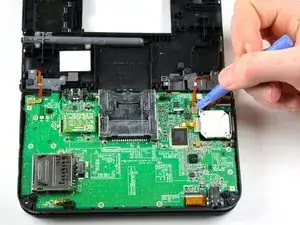
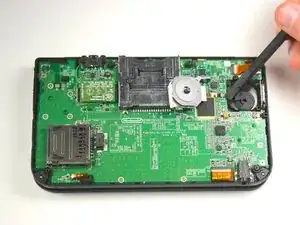
Using a plastic opening tool pop off the circle pad joystick.
-
Do not use excessive force with the plastic opening tool. There is a ribbon attaching the circle pad joystick to the motherboard that will remain attached.
-
-
-
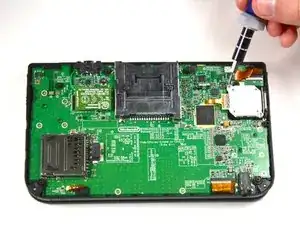
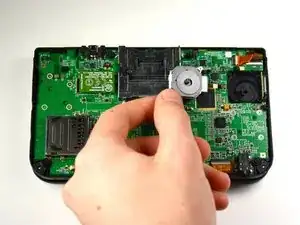
Using the flat head side of the spudger carefully lift up the retaining flap that attaches the circle pad ribbon to the motherboard.
-
Remove the ribbon and circle pad joystick.
-
To reassemble your device, follow these instructions in reverse order.
26 comments
Thank you very much.Perfect repair the circle pad.
The circle pad link:http://www.ebay.com/itm/Genuine-New-Anal...?
Great guide, just upgraded my joystick. Bought my replacement from shapeways. The replacement is metal so it won't break like the last one. Also it's a lot more comfortable.
Anyway highly recommend this replacement:
I'm having trouble removing the plastic case in step 7, it seems it refuses to come apart at the SD card part. What should I do? What is holding it down?
Remove the SD card
My son broke the circle pad on his 3DS XL while playing Super Smash Bros.. I purchased 2 circle pads just in-case from http://www.ebay.com/itm/Genuine-New-Anal...
Excellent replacement, just like the original circle pad. The write-up and pics were very helpful. Highly recommend for anyone needing to buy and replace the circle button on a 3DS XL.
RickyB -
Note: If your top or bottom screen was working before disassembly and doesn't work after reassembly, then it's likely that the connector is loose or dirty or damaged or not clipped or PLACED UPSIDE-DOWN. I had this issue with my Super3DS XL(2015) and it turns out that the reason why my top screen wasn't working after put together, was because I had the top LCD connector upside-down. After I correctly put the connector in, It worked again!
justjustintuber -
what type screwdriver do i use?!? its so small!!!!
Matthew -
I had success using a #00 Phillips head
Jake S -
Can't clip the front of the back cover back in
Macro Man -