Introduction
This guide includes the steps necessary to remove the optical drive in the PlayStation 4 Pro. This is one of the last things that is removable in the PS4 Pro, which means that just about everything else has to be removed first. This guide includes a large amount of disassembly, as well as warranty-voiding steps.
-
-
Flip the console upside down.
-
Use your finger to pull and snap off the plastic cover over the hard drive.
-
-
-
Use a Phillips #1 Screwdriver to remove the single screw securing the hard drive caddy.
-
Pull the hard drive caddy straight out.
-
-
-
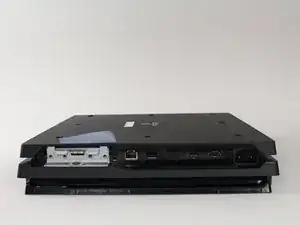
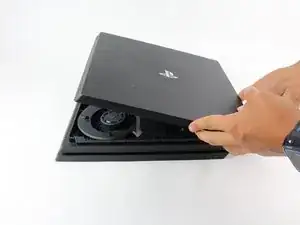
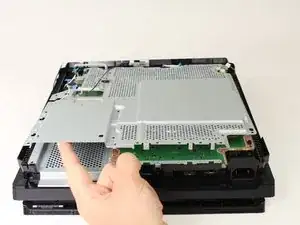
Flip the console right side up.
-
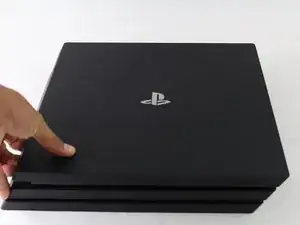
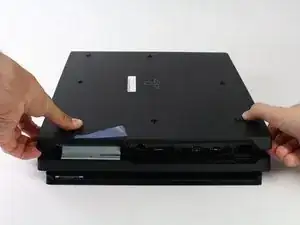
Grip the two corners located at the front of the device.
-
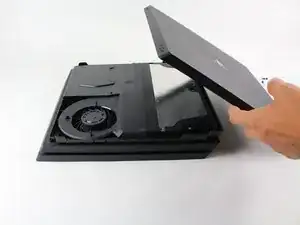
Pull upwards until a loud click is heard.
-
After both corners detach, slide the cover backwards and lift off.
-
-
-
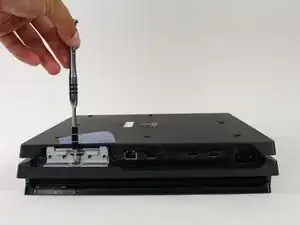
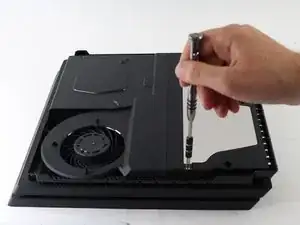
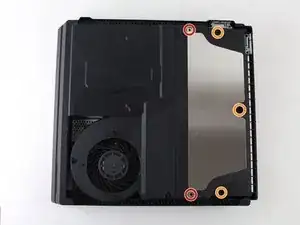
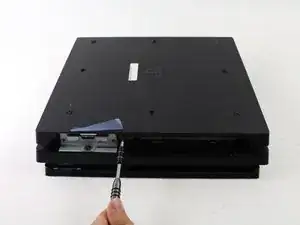
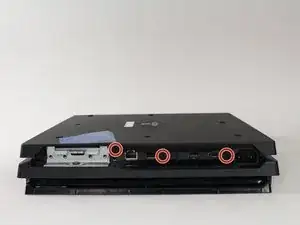
Use a T8 Torx Security screwdriver to remove five screws from the rear of the device.
-
Two 31mm screws.
-
Three 10mm screws for the 7000 models; Two gray 10mm screws (upper and lower screws on the illustration) if the PS4 Pro is a 7100-series model.
-
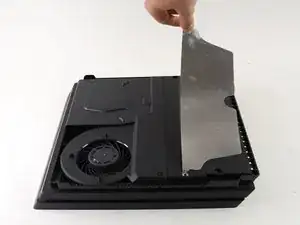
Remove the metal plate by pulling it up.
-
-
-
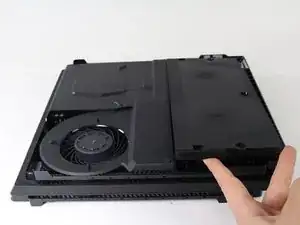
Flip the console over so the bottom is facing up.
-
Use a T8 Torx Security screwdriver to remove the three black 7mm screws in the back panel. (7000-series models only); or one 7mm screw (the middle one) with 7100-series models and the warranty sticker to the left.
-
Remove the bottom cover in the same way as the top cover. Grip the cover on both sides and pull up until it clicks. Then slide the cover off; With 7100-series models, pay attention to the two clips that replace the corresponding screws.
-
-
-
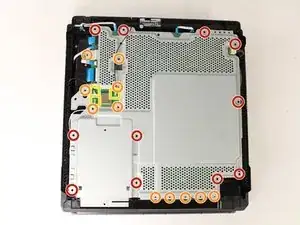
Use a T8 Torx security screwdriver to remove the eleven 10mm silver screws from the metal plate.
-
Use a Phillips #1 screwdriver to remove the eleven 4mm black screws from the metal plate.
-
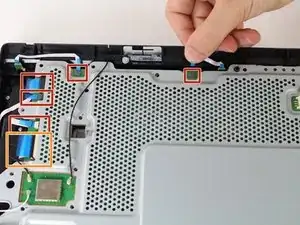
Use a spudger to disconnect the three antenna cables (two black and one white) by prying them straight up from their sockets.
-
-
-
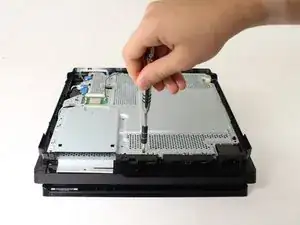
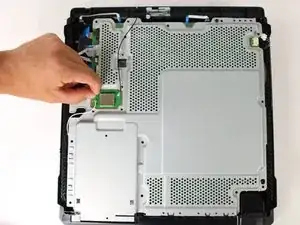
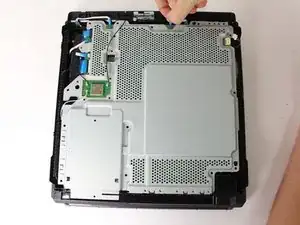
Pull out the five small, blue low profile cables connected to the metal plate.
-
Lift the retaining flap on the ZIF connector of the large ribbon cable.
-
Pull the large ribbon cable from its socket.
-
-
-
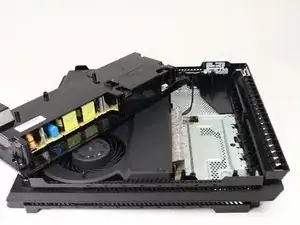
Flip the console over to continue working on the top side.
-
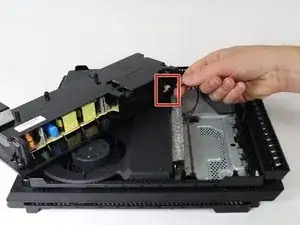
Pull up on the power supply unit and set it on the console.
-
Grip the connector behind the power supply and pull straight out.
-
-
-
Carefully flip the console over so the bottom is facing up.
-
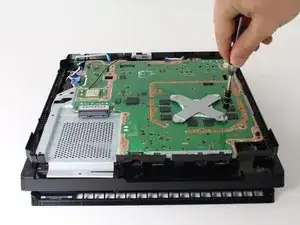
Use a Phillips #1 screwdriver to remove the eight 4mm screws on the metal plate with the X-like symbol.
-
Use a plastic opening tool to remove the metal plate with the X-like shape.
-
-
-
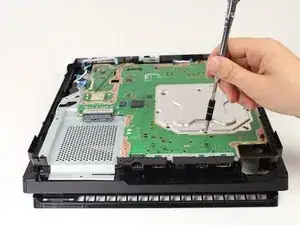
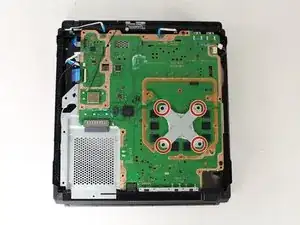
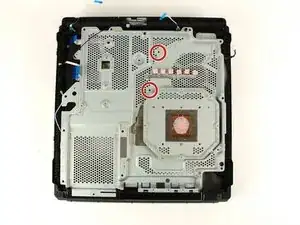
Use a Phillips #1 screwdriver to remove the four 13mm screws on the X-shaped metal plate underneath.
-
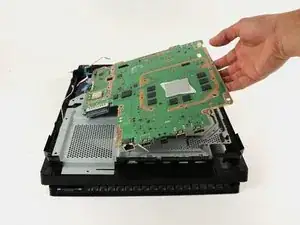
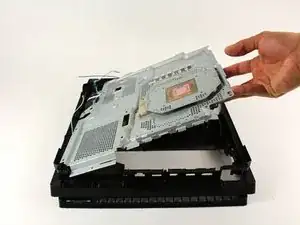
Grip the X-shaped retaining bracket and lift straight up.
-
-
-
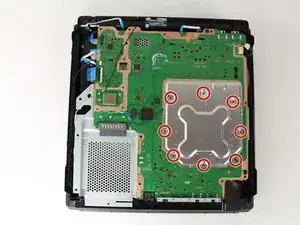
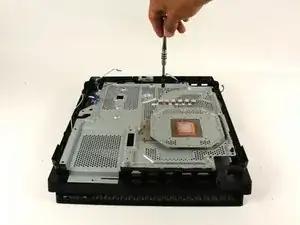
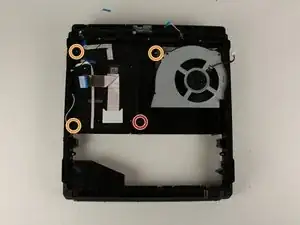
Use a Phillips #0 screwdriver to remove the four screws.
-
One 30 mm screw.
-
Three 6mm screws.
-
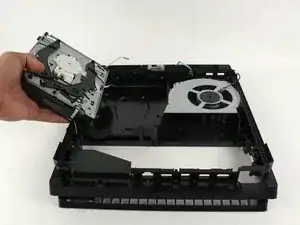
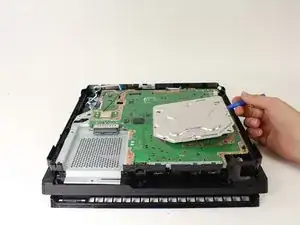
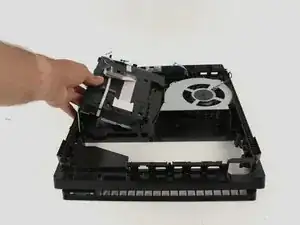
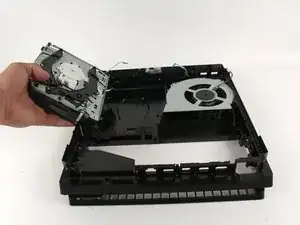
Grab the optical drive and lift up to remove.
-


To reassemble your device, follow these instructions in reverse order.
20 comments
I called an “expert” and they said buying a new drive wont work. I would have to buy a whole new mother board as well…
Vince -
The PS4 Pro does not have a daughter board attached to the optical drive to match up the optical drive model numbers to like the regular PS4. Where do we find what replacement optical drive to buy? Would it be the most recent BDP-025?
David -
I’m currently trying to find a replacement Optical Drive for my Ps4 Pro myself. Apparently, This is really hard to find. Managed to find a used one but the price to me seems a bit high at $123.
Excellent instructions just saved me a lot of dosh. I would recommend using Phillips #00 where #0 is noted however - worked better for me.
Thanks again though!
DON’T FORGET TO HAVE THERMAL PASTE HANDY! It should be added to the “Tools Required” Section. You will NEED it!
Jaquell Chandler -
What if thermal paste is not applied again when remounting ? Will the playstation start and work anyway or not ?
Vincent Bee -
It will start and run normally until you put it under load. Then it will heat up and thermal throttle or it can overheat and destroy itself.
Jeremy Ivey -
I posted this down in another step too, but: if you have a very early North American PS4 Pro, with the exact optical drive shown here - the key way to tell is the very long data cable that’s folded a couple of times, see pictures in later steps - then the replacement drive iFixit offers WILL NOT WORK IN YOUR MACHINE. It has to be a very early model, apparently, but the model number isn’t enough to tell you.
Even if you swap the too-short cables in their replacement with the longer cables on your drive, it still will not work. At all. It’ll just sit there like the drive isn’t even getting power.
So if you do have this drive, what you probably need to do is get a replacement KES-496A Optical Pickup Assembly and replace that within your existing drive. That’s what I had to do after two different replacement drives sent by iFixit failed to work in my system. It worked immediately and I’m back online.
The optical pickup replacement is awfully fiddly, and adds a solid 20 minutes to the repair easily. But it does work.
Dara Korra'ti -
I had originally been told by several people that to properly repair the optical drive within the PS4 Pro (so that the PS4 actually works), you have to replace the Optical Pickup Assembly like you mentioned because the drive is paired with the motherboard. I was surprised to find that iFixit is pushing this repair tutorial when it has a low probability of success for many PS4 Pro models.
Instead, iFixit should be documenting replacement of the KES-496A Optical Pickup Assembly... when that repair has a near 100% chance of success, even though it's a fair bit more fiddly to complete and requires two different teardowns (one for the PS4 Pro and one for the optical drive... needed to install the replacement optical pickup assembly).
commorancy -
Follow-on note. I could be mixing up the original PS4's pairing with the PS4 Pro (which might or might not have device + motherboard pairing). Because I can't find a definitive source confirming if the drive is paired on the PS4 Pro, using a drive replacement might or might not work.
There are a number of commenters below who followed these instructions and found that the replacement drive didn't work after completing the repair. I think I'd still go with replacing the KES-496A Optical Pickup Assembly. That repair is more fiddly, but the optical assembly replacement part is a whole lot cheaper, costing less than $10 in some stores, than buying a full replacement drive at $70.
commorancy -