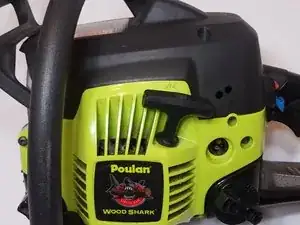
Introduction

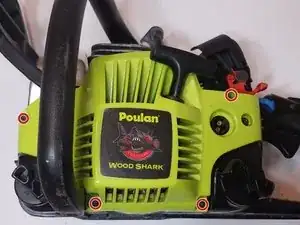
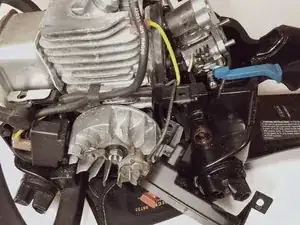
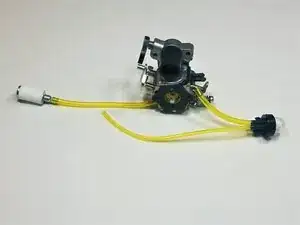
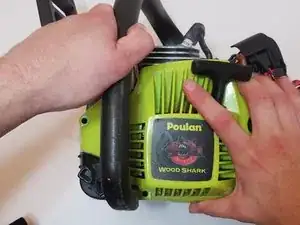
Almost all gas now contains up to 10% ethanol. Ethanol is one of the leading causes of damage to small gas engines. The alcohol can cause corrosion on rubber and plastic parts and can make gas powered yard tools almost impossible to start. I will illustrate how to replace the parts that are most common to fail,the primer bulb and fuel lines. While disassembled I will also illustrate how to replace the fuel filter and air filter of the Poulan P3314 2-Cycle Chainsaw.

  1. 1X5YqnVueDBmiVYh
    1X5YqnVueDBmiVYh
    MP2haHr6kKhkwn2t
    X2BRfTXI1okhvKtR
    • Unscrew the three T25 screws on the top cover.

    • Remove the top cover and set aside.

  2. hZPUwRLILOJqF3HS
    hZPUwRLILOJqF3HS
    MHV4rJtkTQSiZnFB
    • With the top cover off, disconnect the spark plug.

  3. PnvQIVhXOEC5GtDd
    PnvQIVhXOEC5GtDd
    ertklEVR3nAw6sbG
    EMHpJBCxCDsYwUFe
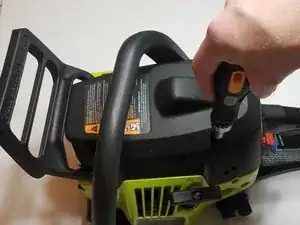
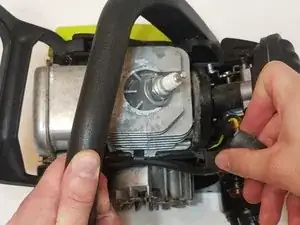
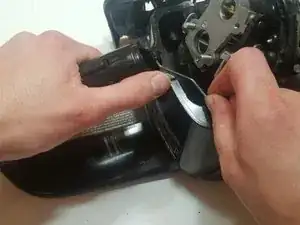
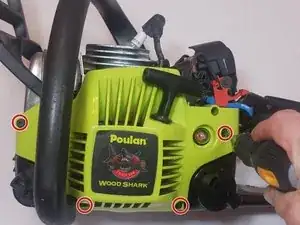
    • Remove the four T25 screws securing the starter assembly to the (side) of the chainsaw.

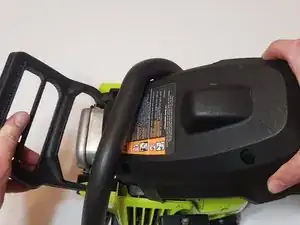
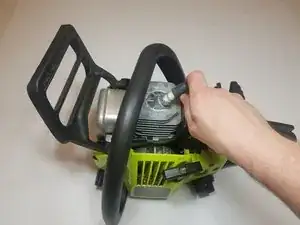
    • Remove the starter assembly and set aside.

  4. 4vccRBXTlyyvTUQ5
    4vccRBXTlyyvTUQ5
    hTfSqYnEbaGnGeWQ
    LSKSJ1LpxMWEvZXN
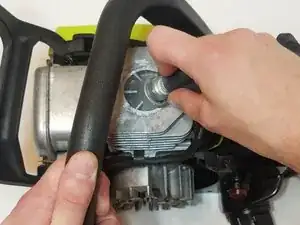
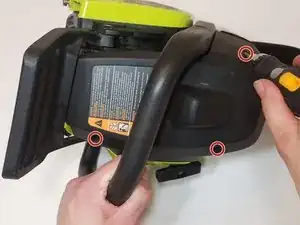
    • Remove the air filter cover and set aside.

    • Remove the air filter from the housing and set aside.

  5. Mi5M5sFeJCBJUr4l
    Mi5M5sFeJCBJUr4l
    atNBWLIFF1gTdUOP
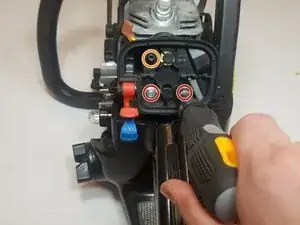
    • Unscrew the single T25 screw securing the air filter housing to the carburetor.

    • Remove the two 5/16"nuts securing the air filter housing to the carburetor.

  6. dOWIjADLR2TH3xZe
    • Use a spudger or flat head screwdriver to disconnect the kill switch wire.

  7. 34x32qeoCTGqkG5A
    34x32qeoCTGqkG5A
    p1cQvo6ebj3Moxw2
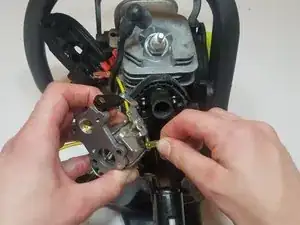
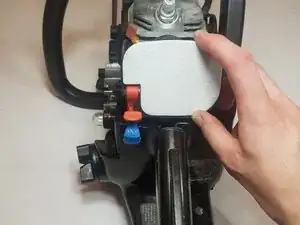
    • Remove the air filter housing from the carburetor.

    • Let the air filter housing rest on the side of the chainsaw.

  8. FUlFIj3gyHgevwaZ
    FUlFIj3gyHgevwaZ
    nEq1YIFjsBDHwHfP
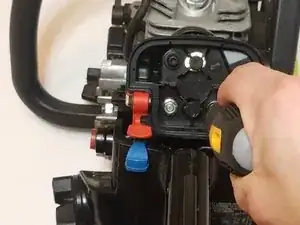
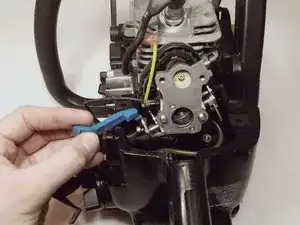
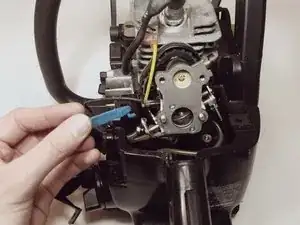
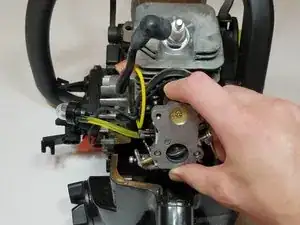
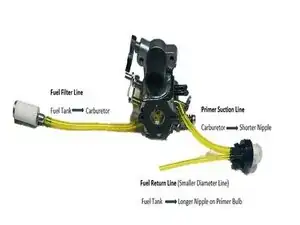
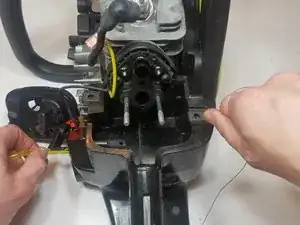
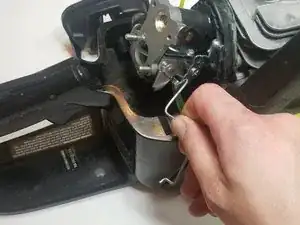
    • Using a flat head screw driver or opening tool to disconnect the (primer-side) fuel line from the carburetor.

  9. OykWxBjUcRGycQTX
    OykWxBjUcRGycQTX
    UTPZBMbqWKARtuNx
    • Remove the choke lever from the carburetor and set aside.

  10. QMBeQxJstepdsRAn
    QMBeQxJstepdsRAn
    wXbhopybewvd6dtl
    YAC4EhCOqLyxJKnC
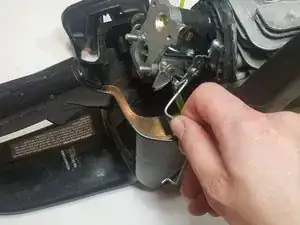
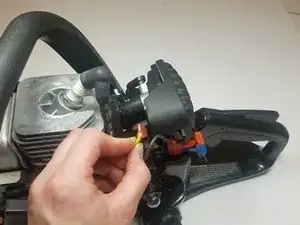
    • Pull and hold the throttle trigger to expose the throttle linkage attachment point (on the trigger).

    • Disconnect the linkage from the throttle trigger.

    • Disconnect and remove the throttle linkage from the carburetor.

    • Set the throttle linkage aside.

  11. YxCJYOo62JYwKslH
    • Slide the carburetor assembly off the mounting bolts and away from the engine.

    • The fuel return line may still be attached to the carburetor. In my case the fuel line was disintegrated. If it is still attached remove with a flat head screw driver or spudger.

  12. GXXqjIZuWcheIYFD
    GXXqjIZuWcheIYFD
    jo1ujmNWKpIlJi5G
    Ryu6sM4euKoC64uT
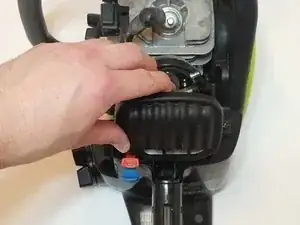
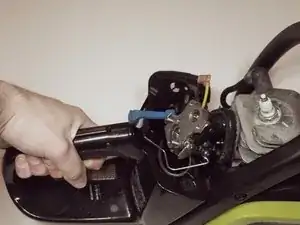
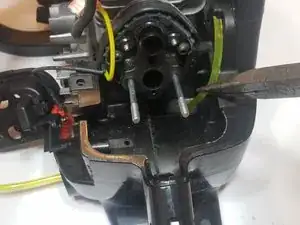
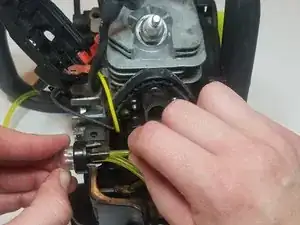
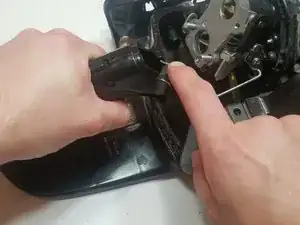
    • Using a flat head screwdriver or spudger to press the tabs on the inside of the primer bulb assembly. (This will release the primer bulb from the housing).

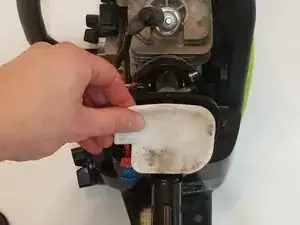
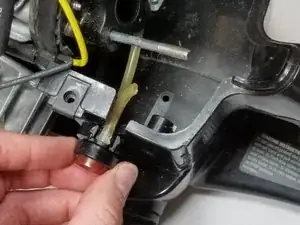
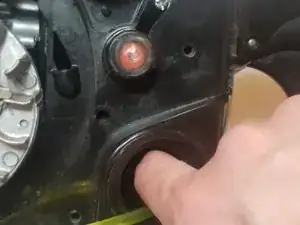
    • Pull the damaged primer bulb out of the engine housing.

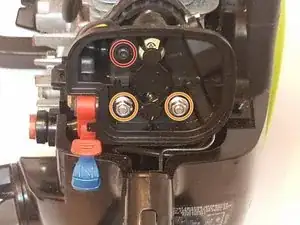
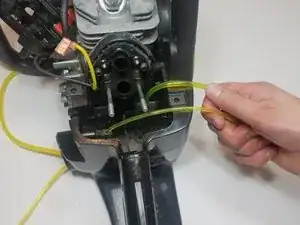
    • Use long needle nosed pliers to disconnect the two fuel lines from the primer bulb.

  13. RevfMCNIirPDOnsZ
    RevfMCNIirPDOnsZ
    wGnYQePMY35AW1Aw
    mK22g2geLvaCfFJM
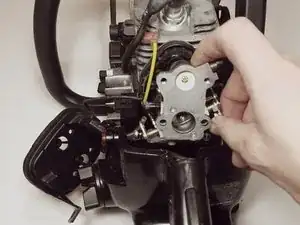
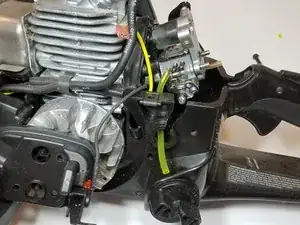
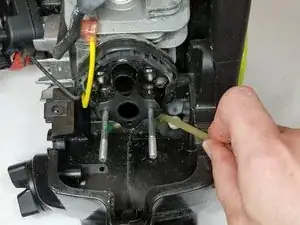
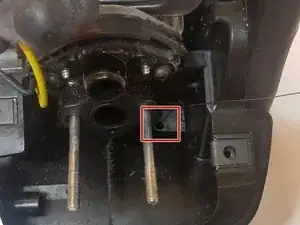
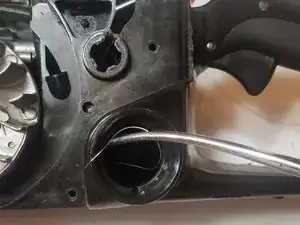
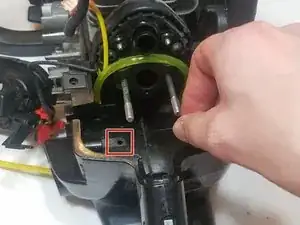
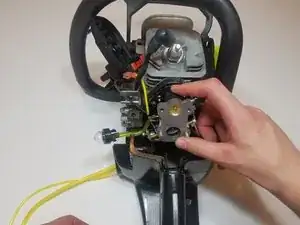
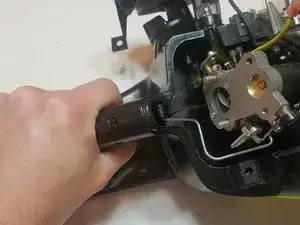
    • If the primer suction line was damaged, slide the carburetor back onto the mounting bolts.

    • Attach one end of the new fuel line to the incoming fuel port on the carburetor.

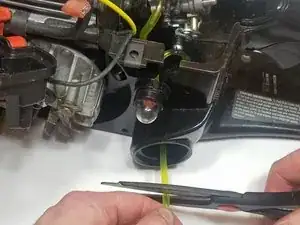
    • Move the fuel line through the primer bulb housing and hold the primer bulb up to the fuel line.

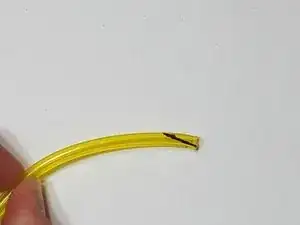
    • Mark desired length and cut to size.

    • If the old primer suction line was intact, you can measure and cut a new piece of fuel line to the same length and attach it to the intake port on the primer bulb and intake port on the carburetor.

  14. gRRVCMDHOmjUgZOH
    gRRVCMDHOmjUgZOH
    Sf3RNKDBqYFCgQAj
    XXBw35CPFRipdSAs
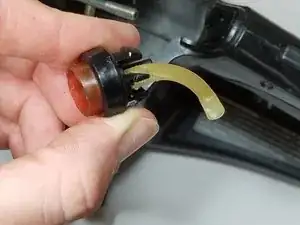
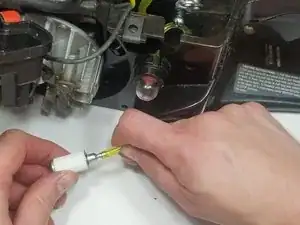
    • Attach the cut end of the primer fuel line to the intake port of the primer bulb (shorter nipple).

    • Slide the carburetor back off of the mounting bolts.

    • Cut and remove the remaining old fuel lines by pulling them through the housing.

  15. 5vMFUeHLVEiOm61j
    5vMFUeHLVEiOm61j
    CjBmlqNHuVMwXxJk
    • Unscrew and remove the gas cap.

    • Pull out and remove old fuel lines and fuel filter.

  16. tBXgkyGICeh53QD4
    tBXgkyGICeh53QD4
    tTf5J56RP2Z4dsTG
    • This is an example of how the fuel lines will attach to the carburetor and primer bulb.

    I want to see how the fuel filter fits inside the fuel tank. I can’t keep it from leaking around the tubing.

    Larry Mayer -

  17. eY21TD6BJPPysvaA
    eY21TD6BJPPysvaA
    RPNiMCbLK5hr5Hmm
    hT3FWbZywepTSsec
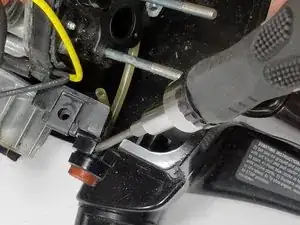
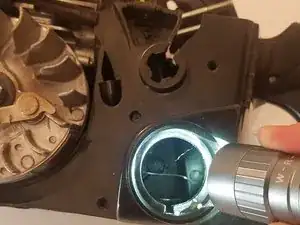
    • Push a piece of scrap wire through the larger hole (fuel filter line).

    • Use a pair of long needle nose pliers or hemostats to grab the other end through the gas tank.

  18. 6GMUg6wOAJIfMWFZ
    6GMUg6wOAJIfMWFZ
    idVnooTyZAMmrnZp
    UTtcBMsF3yZPiBO4
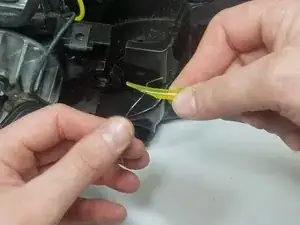
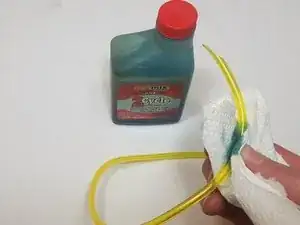
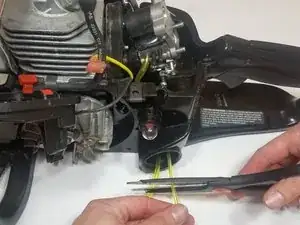
    • Cut a piece of the thicker diameter fuel line at a sharp angle.

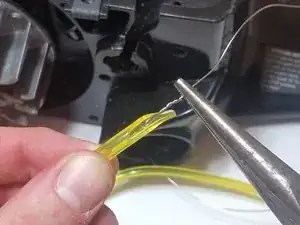
    • Pierce the wire through the fuel line and twist the wire with pliers.

  19. AUHjF6yrqCTbcgFL
    AUHjF6yrqCTbcgFL
    CKn1FmJTOqRILgpT
    • Feed the fuel line through the gas tank while pulling the wire.

    • Use pliers to continue to pull the fuel line through the housing.

  20. XjukwpWVu2d1CqpX
    XjukwpWVu2d1CqpX
    VIUlqkPKFhhLVQMJ
    5CTRIX6ysphmIvAG
    • Feed the wire through the small hole (fuel return).

    • Attach the wire to the cut end of the thinner diameter fuel line as in the previous step.

    • Feed the fuel line through the gas tank while pulling the wire as in the previous step.

    • Pull both fuel lines up through the housing.

  21. h6PmZucFLIFK2oOC
    • Using 2-cycle oil as lubricant on the fuel lines will make it easier to pull them through the housing.

  22. nsYNrjUYodZn4CF2
    nsYNrjUYodZn4CF2
    QQYuxPXZWICmZWso
    • Cut both of the fuel lines flush (removing the angle that was previously cut).

  23. iQWaYCi4uyu6AAQB
    iQWaYCi4uyu6AAQB
    dBmxcDYFN66JqSeu
    suAEbuMJJPLh2cQc
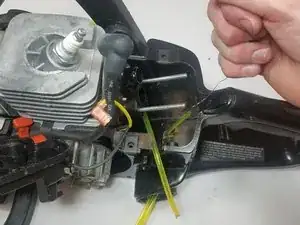
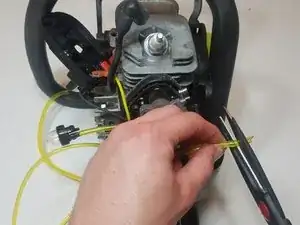
    • Attach the larger diameter fuel line (fuel filter line) to the intake inlet on the carburetor.

    • Attach the smaller diameter fuel line (fuel return line) to the return port on the primer bulb (longer nipple).

    • Slide the carburetor back onto the mounting bolts while pulling out the slack out of the fuel lines from the gas tank.

    What’s the name of that small black tap look piece?

    Jessica Rios -

  24. CjYr5cIUyDXWDIQh
    CjYr5cIUyDXWDIQh
    Gw1ZeYuPdRrFo4iZ
    KLCuU4Eoo63femKc
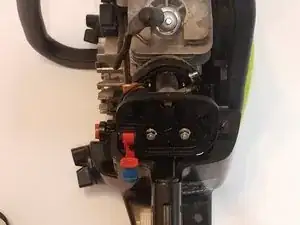
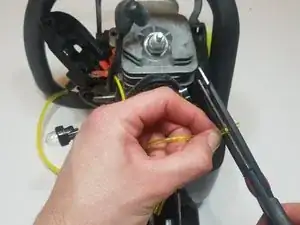
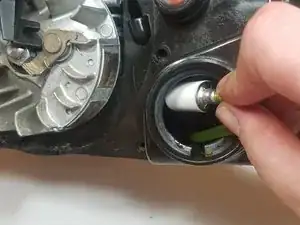
    • Push the primer bulb back into the housing.

    • Cut the smaller diameter fuel line (fuel return line) and push it into the gas tank.

    • The fuel return line should be at the bottom of the tank.

  25. 3sFmi6IXx6qr4PQD
    3sFmi6IXx6qr4PQD
    bU33PHbtYK3QbuF3
    U63KCLIUWTaVPPlX
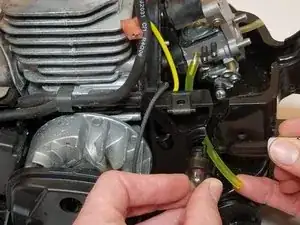
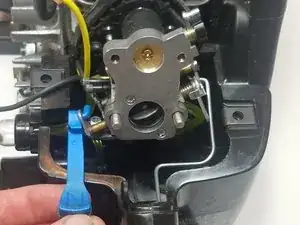
    • Cut the fuel filter line and attach the new fuel filter.

    • Push the fuel filter line into the gas tank.

    • The fuel filter should rest at the bottom of the gas tank.

  26. YFlwgmKYnQNq5WZ3
    YFlwgmKYnQNq5WZ3
    TpuVjkswhpqnZCeE
    abMtRcGKjC3cAmNp
    • Reconnect the throttle linkage to the carburetor linkage.

    • Pull and hold the throttle trigger to expose the attachment point for the trigger-portion of the throttle linkage.

    • Connect the throttle linkage to the throttle trigger.

  27. vsQeIRFMuUsFEiyE
    vsQeIRFMuUsFEiyE
    mPXjDksfx2KxW4jf
    JoeIF1KdfBDYjk6B
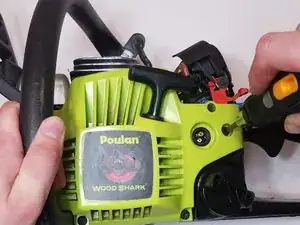
    • Reconnect the choke lever.

    • Slide the air filter housing back onto the carburetor mounting bolts.

    • Secure the air filter housing with the two 5/16" nuts.

    • Secure air filter housing with one T25 screw.

  28. ckXwKhXN64xWuSgc
    ckXwKhXN64xWuSgc
    QNpTWJJpKMXLnPAs
    BoiELIUsVSVPStoq
    • Install the new air filter onto the air filter housing.

    • Install the air filter cover.

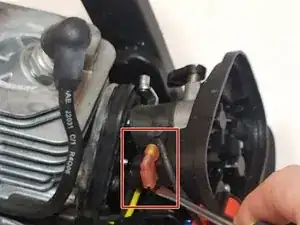
    • Connect the kills switch wire.

  29. RKLkYIigjGW6V5Hm
    RKLkYIigjGW6V5Hm
    5bfDQdc4QXwViBih
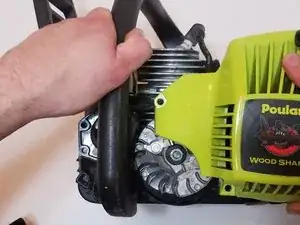
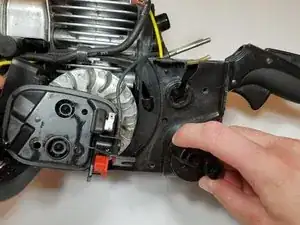
    • Install the starter assembly onto the engine.

    • Secure the starter assembly with four T25 screws.

    • Pull the starter rope slowly until the flywheel engages the starter assembly.

  30. KGBg1QCmAADTDZML
    KGBg1QCmAADTDZML
    3bP2IHcL1ouGLy3v
    • Reconnect the spark plug.

    • Install the top cover and secure with three T25 screws.

    Terrific guidlines! I wasn't able to complete the work in 45 minutes - primarily because pulling the fuel lines through was a difficult task - but your detailed steps helped me make sense of the project. Thanks! - David Garrison

    David Garrison -

Conclusion

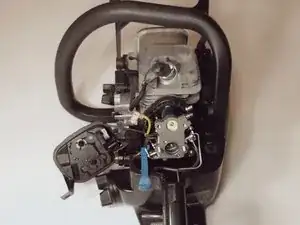
To reassemble your device, follow these instructions in reverse order.

Chad Monteleone

Member since: 19/09/17

1124 Reputation

20 comments

Any idea where I downloaded shop manuals for small engin repairs looking for stihl 039 manual

Daniel -

Yes I would try manuals.lib at the Google play store.

Randy Clawson -

Daniel. Here you go. Hope this works out for you.

https://m.stihlusa.com/WebContent/CMSFil...

Robert Spillman -

Excellent instructions

Thank You

Ron Bishop -

How do you choose the best choose the best product among the ones listed here? <a href="https://onlychainsaw.com/best-scroll-saw... ">https://onlychainsaw.com/best-scroll-saw... </a>

ross jonnes -

Thank You very good .

snowbugca -

Excellent job in describing the process! Thanks!!

Antonio Gutierrez -

Hello, I noticed you might have gotten your fuel lines mixed up. Im not sure if it would make any difference in the operation of the chainsaw.

But during the disassembly stage, you have the thick fuel return line going from the purge bulb outlet port to the big hole towards the front of the fuel tank. Yet during the reassembly stage, you used this same hole for your fuel supply line instead.

The correct routing of the fuel lines is actually the way it was before you disassembled it.

Basically:

1: Thin line from right carburetor nipple gets routed through the small hole towards the rear of the fuel tank and is hooked up to the fuel filter inside.

2: Thick line goes from left carburetor nipple to the short nipple on the purge bulb.

3: And finally, another thick line goes from the long nipple of the purge bulb to the big hole towards the front of the fuel tank.

ajisup -

Hey Chad, thanks a bunch for a an excellent set of instructions. You saved me a lot of time and money!

Judas -

Great information here, I’ll use it to do the same job on my McCulloch 2214AV, it is almost identical to this Poulan.

Greg Bell -

:) very helpful!

joethef -

very clear and well explained, I followed instructions and replaced both fuel lines. The fuel, heat and time just disintegrates these lines. Thanks

Joel Sanchez -

Thank you so much for all the time and effort to make the tough job of replacing fuel lines in these Poulan saws easier. Your thorough step-by-step instruction and photos are really appreciated. Very well done, Sir!

Lynn Wilkens Anderson -

The above article is beneficial for me because here details show how to fix chainsaws. Those people are constructive who have Poulan P3314 chainsaw. Thanks for sharing with us.

Anthony -

Thank you so much for the instructions. It would be helpful to reread the parts talking about where to connect the fuel lines and where the fuel lines are coming from and going to. I understand because I have done this same job on a similar craftsman saw. The carburetor fuel intake is on the right hand side of the carburetor if you are behind the handle as though holding the saw. When the purge bulb is pressed, fuel is purged from the bulb out the long nipple and returns to the fuel tank. When the purge bulb is released, the suction draws fuel from the fuel tank, through the carburetor, and into the short nipple of the bulb. So the path of the fuel is from the tank, through the filter, through the larger fuel line, into the right hand intake pipe of the carburetor, into the carburetor, into the purge bulb, out of the purge bulb, into the smaller fuel line and into the tank. Continually pressing the purge bulb circulates the fuel though the carburetor and back to the tank. Hope this helps someone.

Robert Bradshaw -

I just saw someone addressed the fuel lines in a previous comment.

Robert Bradshaw -

Thank you thank you! The best instructions I have ever found online. You left nothing to chance. You're the best Chad!!

Terry T -

Thank you. Well written. I think I can do this.

Perisa Lague -

Great pictorial instructions.

Got my old Poulan going again.

Thank you

James DeHaven -

Very well done, really made it easy to do with photos and explanations.

Thank you

Jeff

Jeff -