Introduction

This guide includes a complete teardown to reach the pump motor for cleaning or replacement. If the unit was bought seconded hand, this guide will allow the user to check and clean all the parts in the ResMed AirSense 10.

  1. CPHuQelAhJULjQjL
    CPHuQelAhJULjQjL
    woq6ZGfewKc1Phtq
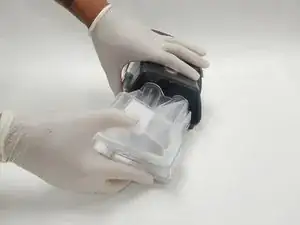
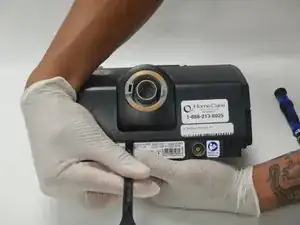
    • Position the ResMed Airsense 10 with the water reservoir facing towards you.

    • Grip both the top and bottom of the water reservoir and pull it straight out and away from the device.

  2. PJFCuxvHTjyFeUGw
    PJFCuxvHTjyFeUGw
    pD1YHALW1DRfEYii
    jQXW3rBnVAMREv2p
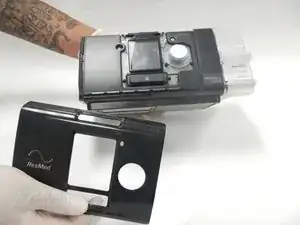
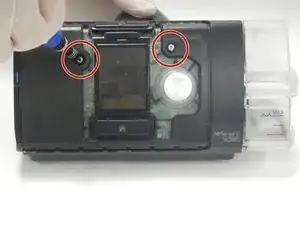
    • Position the ResMed Airsense 10 with the screen facing you to remove the front cover plate.

    • Place your finger under the indent beneath the home button and pry the front cover plate off.

    • This should only require medium pressure.

  3. 5p3HRQcm5Gge2GCL
    • Remove the two 14mm Torx T10 screws that were exposed by removing the front cover plate.

  4. hg6wqWUcrshJ1KCN
    hg6wqWUcrshJ1KCN
    4iXxjhqoncDrQOMZ
    jk422iGXZG2Ko211
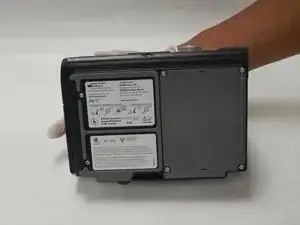
    • Rotate the device to face the bottom of the ResMed Airsense 10.

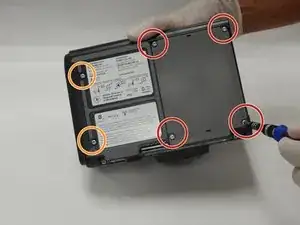
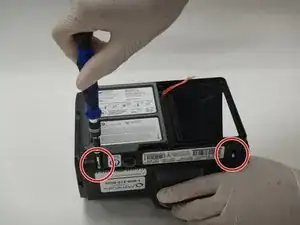
    • Remove the four 10mm Torx T10 screws, then place the screws and the plastic heater plate cover to the side.

    • Remove the remaining two 14mm Torx T10 screws.

    Suggestion: The 4 screws for thermal do not need to be removed to access the motor nor the connector to thermal be removed. Only remove the two screws 14mm long opposite to the 4 10mm screws

    Alain Butzberger -

  5. wYEceK1Lco2OPy1g
    wYEceK1Lco2OPy1g
    HJNfVLLERa5poQp1
    enS5VHigpw1N1CDC
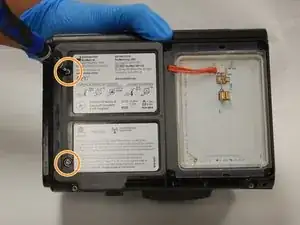
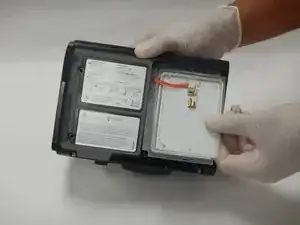
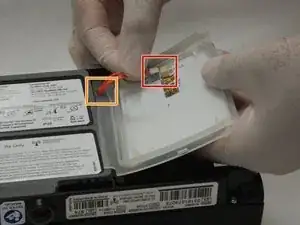
    • Once you have removed the cover of the heating plate, disconnect the orange wire from the fuse.

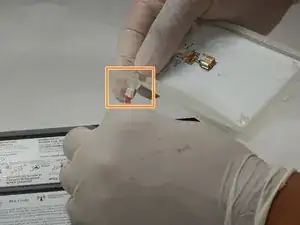
    • Carefully pull the orange wire through the silicone gasket.

    • Fully remove the heater plate from the ResMed Airsense 10.

    Step not needed to reach the motor

    Alain Butzberger -

    Please remove this step as that it is not neccessary to complete this work

    Steven Hicks -

  6. EePt2jV5UiQmMi2t
    • Remove the remaining two 14mm Torx T10 screws holding the frame together.

  7. Ghj66jgQKfQZkonm
    Ghj66jgQKfQZkonm
    HtVZ4QrdHIl6B3JK
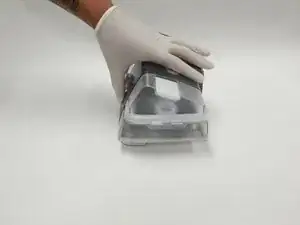
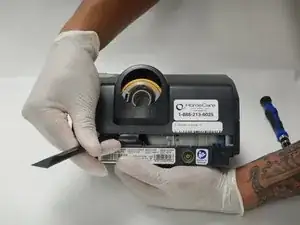
    • Orient the ResMed AirSense 10 to face the rear of the machine. The air outlet should be facing towards you.

    • Use the plastic spudger to pry the casing of the ResMed AirSense 10 off of the unit.

    • Fully remove the casing from the ResMed frame.

  8. wdY6rTVMpmhMMMfe
    wdY6rTVMpmhMMMfe
    wEfGTkavCDkTbOjF
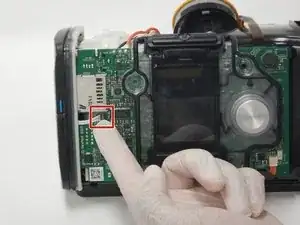
    • Position the ResMed AirSense 10 with the screen facing towards you.

    • Carefully remove the 4 pin wire connector located to the left of the screen.

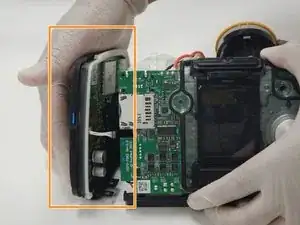
    • Fully remove left panel of the ResMed.

    when removing this clip lift up from the wire side slightly then gently pull out.

    Thom -

    Please add the direction where force should be applied. I broke the connector because this visually looked like it should slide outward.

    Steven Hicks -

    The connector on the other end is a lot easier to remove, on side panel

    adquezada -

  9. ToZtOfuewWQAK2kx
    ToZtOfuewWQAK2kx
    YyQS4BgQ2OuUCAhp
    WBUKhYg5svVpCVKS
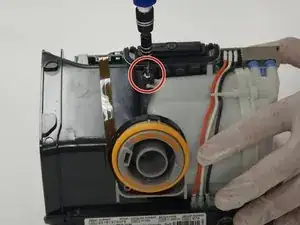
    • Position the ResMed AirSense 10 with the air outlet facing you.

    • Remove the 14mm Torx T10 screw that is located between the air outlet and the front screen.

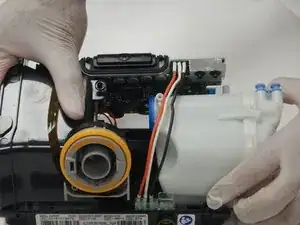
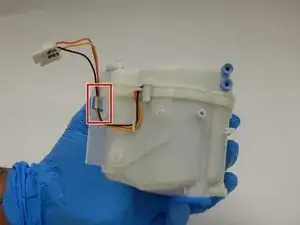
    • Remove the wires from the pump casing's hook.

    • Carefully start to remove the pump casing from the Resmed AirSense 10 until the wire connector is exposed.

  10. XLfoxTQAA6qJGRwF
    XLfoxTQAA6qJGRwF
    tZAmPaiDpJLXvtrC
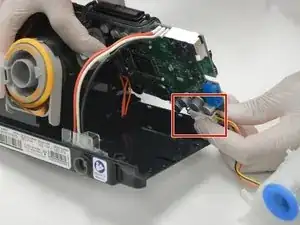
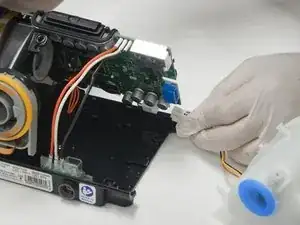
    • Unclamp the connector for the wires that connect the pump casing to the motherboard to fully disconnect the pump.

  11. 5rajbODjZXDFpQr3
    5rajbODjZXDFpQr3
    ZECQJGDRWlANHkIU
    kuOpgVF5p1Ij6URl
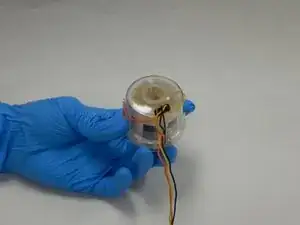
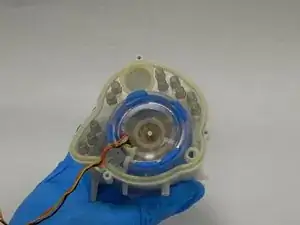
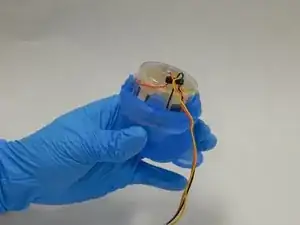
    • Orient the pump casing with the wires facing towards you.

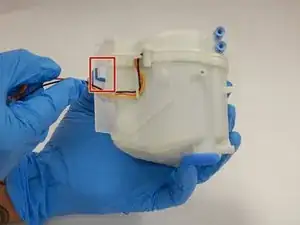
    • Unhook the wires from the outer most clip.

    • Then remove the plastic retainer from the pump casing.

    Anyone know the air pump part number or where I could get one?

    Timothy Belleson -

  12. IVl2RUVq3xBorY6E
    IVl2RUVq3xBorY6E
    PDLnklQURB3kWiLK
    uxFweuh3S5DsnqPH
    • Remove the blue silicone buffer to right corner.

    • Remove the wires from the remaining hooks.

  13. VuAZpiZE5GjJOyGy
    VuAZpiZE5GjJOyGy
    xBTgCeRHVRhO1Rql
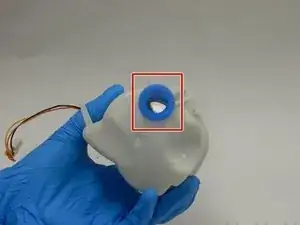
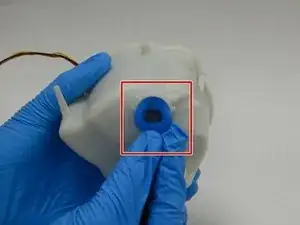
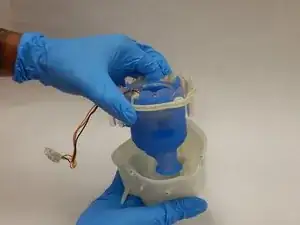
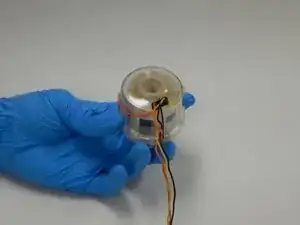
    • Orient the pump casing to face the outlet port.

    • Push the outlet nipple into the pump housing.

  14. fqOxZDtKFqGB6KoB
    fqOxZDtKFqGB6KoB
    cKK5UDigGIDKnZOx
    1sHDvqAdCYpFALEO
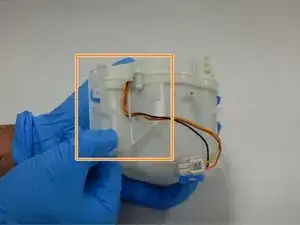
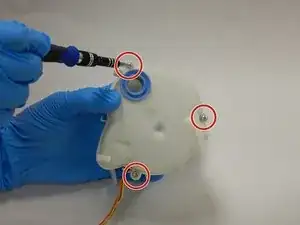
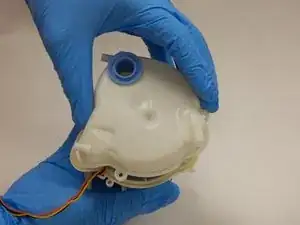
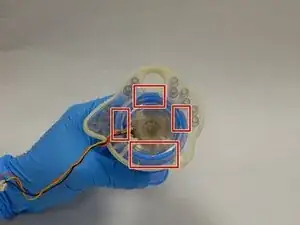
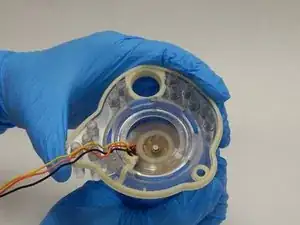
    • Orient the pump casing to face the three T10 torx screws.

    • Remove the three 14mm Torx T10 screws.

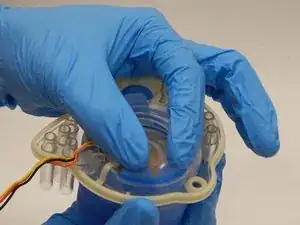
    • Lift off the top of the pump casing.

  15. YdZNpWvOBffqimK6
    YdZNpWvOBffqimK6
    mJV1Pcj3KMx1fDqK
    sxbTYUKdDlYOGV5J
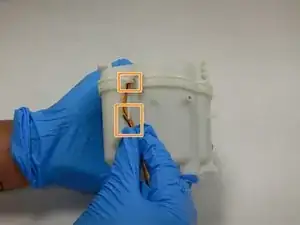
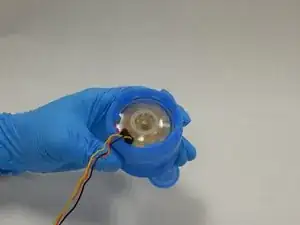
    • Remove the pump assembly from the pump casing and face the pump assembly with the mounting plate facing you.

    • With the pump assembly out of the pump, there is a mounting plate that needs to be removed to access the pump.

    • There are 5 rubber ridges connecting the mounting plate to the rubber sock encasing the pump.

    • Push the ridges through the holes in the mounting plate.

  16. jGQCHLlYwyKYqSIt
    • Separate the mounting plate from the rubber sock.

  17. OQgLhrRRJcFoybAm
    OQgLhrRRJcFoybAm
    DDfQ3rNV1SsJLYiv
    qskLvMUJDQ3N45rv
    • Pull off the rubber sock to expose the pump.

    • Do not damage the wires while removing the rubber sock.

    • The exposed pump can now be cleaned and inspected for damage.

    Hola, soy de Chile y necesito comprar un motor para reemplazar el que está averiado y no aparecen proveedores, si es posible publicar alguno estré agradecido

    edgapereza -

    Can the motor itself be disassembled for deep cleaning? My wife took hers on vacation with us and now it's got an unbearable febreeze smell we can't get rid of. I disassembled everything except the motor itself and thoroughly cleaned all the components like you advised, so the only culprit left is the motor itself. Any suggestions?

    Larry -

    I have a brand new motor for sale. My cost was $238.00. Interested? Mike.whittemore@hp.com

    Mike -

    This is the supplier I used. I also will validate that the replacement worked for me.

    Steven Hicks -

    How do you reset hour meter on the Resmed Airsense 10 after you replace the motor?

    Fred Franks -

    Hi Jasey, did you ever open the pump motor itself? I got a cpap machine that must have been in a fire. The maschine is ok but everything was full of soot particles, I was able to clean neary everything but the pump motor ist glued together and I dont know if the motorcase breaks if I open it nevertheless with a knife or sth.

    A tipp is appreciated, cause a new one from C costs 95$ and I prefer not to buy in C if possible.

    Thanks Chris

    Carl Haupt -

    Here is a description by someone who managed to open the motor:

    https://www.apneaboard.com/forums/Thread...

    Michael Lachmann Tamarlin -

Conclusion

To reassemble your device, follow these instructions in reverse order.

Jacey Cobb

Member since: 16/09/20

1193 Reputation

31 comments

Thank you @jaceyt ! This was spot on.

glove2006 -

Where can i buy a replacement pump?

Shayne Braid -

Alibaba sells the pump. Everyone else is OOS.

Travis Verner -

Where can i buy replacements?

christecnico -

Step 1, find a replacement motor???

jglazer -

The AirCurve 10S looks very similar. Is motor replacement in this unit the same process.

Bob R -

The problem isn’t so much the steps here (but, thanks—I found this after I had done it). The problem is that the clear-plastic fan/motor case cannot be cracked open for cleaning (as near as I can tell). I cleaned as best I could reach with a Q-tip, but to no avail. So, replacement is the only option. :-(

Russell Bateman -

Where or how does one acquire the replacement motor/pump assembly? I have looked at every ResMed supplier website I can find with no success.

bmw-ktm -

Where can you actually find a motor? My friend REALLY needs one.

Geoffrey Van Horn -

I replaced the motor with a guaranteed Resmed Original part, but the machine ran alot quieter but was lazy under load. Has anyone got any suggestions. This sounds like built in obsolescence……………………….in the software???

scottcon -

what was the source of the replacement ? Resmed seem reluctant to provide.

dave jones -

Where may I purchase a new motor for ResMed AirCurve 10 s?

Melanie Knupp -

What is the large blue connector on the other side of the SD card? Any way to reuse any of the parts for other projects?

ba600 -

I found Jacey Cobb on facebook a couple of months ago and contacted him to learn where he got a motor but he has not replied. If anyone knows where to acquire one I would be very grateful.

bmw-ktm -

Is this possibly the cause of a loud whining noise that ramps up and down as you breathe? It definitely sounds like an electric motor ramping up and down.

Rocco Williams -

Mine died a slow death of loud screams over 3 weeks. Looking for replacement motor, but have not found it anywhere. Recall hampering my replacement as it’s just out of 5 years. I’m turning gray again, I too any dying a slow death!

John D’Ginto -

Now, due to ‘COVID’ the supply chain leaves these ‘backordered’ and still can’t find parts, like, the motor. Has ANYONE located parts? There Ought To Be A Law!!!!

PCARRINGTON -

Whining noise started on mine in September, tore it down to clean but also found I couldn’t open the motor casing to deep clean or replace bearings. Spent next 3 weeks waiting for dr. appt. as Apria told me I needed a new prescription before they could replace it. By the time all paperwork got back to Apria, I was put in queue behind many others waiting for machines, was told 6to8 weeks(from 11/15). Followed up yesterday to make sure I was still in queue,was told it could be another 4-6 weeks.

Currently have machine in a plastic box surrounded by pillow bunting inside, with outside wrapped in 2 blankets. Holes cut for Hose and Power Cord. Whining noise still penetrates all that, keeps us both up at night.

Very frustrating that replacement motors are not available anywhere, and that motor casing cannot be opening to clean inside. Now considering using a Dremel to cut the plastic casing open and then Super Glue back shut after cleaning. Ridiculous, feel like I’m in 70”s USSR or current Venezuela!

Chris Micheau -

Where to get its motherboard

John Mohd -

Any idea about its motherboard?

John Mohd -

I found used, genuine replacement motors for the ResMed AirSense 10 here on eBay:

https://www.ebay.com/itm/265571430435?ch...

Sebastian -

where can i buy areplacement motor for resmed machine

George Dixon -

where can i buy replacement moyor

George Dixon -

Found this listing for a “new” motor. Unfortunately more than I’ve got to spend at the moment. Hope it helps someone else though.

https://www.dotmed.com/listing/cpap/resm...

Corey Jackson -

is the RESMED Air Sense AirCurve S10 Motor and the AirSense 10 AutoSet the same?

Tony Goold -

This guide needs to be adjusted when describing what directions to pull the wires. A connector from the modem to mother board broke because it was pulled the wrong way.

Steven Hicks -

If you own a ResMed AirSense, you may follow the detailed instructions here to swap out its pump motor. The text is well-written and includes detailed instructions with illustrations. If you need to fix your CPAP machine, this piece, written by what seems to be an expert, will be a big assistance.

For More Info:-https://thecpapsource.ca/

Cpap Source -

Ottime foto. Cambiato la pompa delle mia Resmed Airsense10 Autoset con una ordinata da Aliexpress. L'unica difficoltà che ho avuto è stata il punto 8: staccare lo spinotto..magari potevi spiegare meglio come fare. Per il resto top!

Geo Chiesi -

- Under "Introduction" the reader should be reminded to use the Magnifying "+" glass that can be seen when we hover the mouse over the picture. Step 8 would take advantage of the words "EXTREMELY CAREFULLY ..." as this connector is EXTREMELY FRAGILE. "Only extremely gently push the black connector out" (to the left on the picture). The maximum enlargement of the left picture on Step 8 MUST BE SEEN. The glove hides part of the connector. A movie and more details on the precision gesture needed for removing it without damage would be welcome.

- My unit gives a message to the effect that the motor has run passed it's maximum life (I used it more than 20k hours) ... but this is no problem, it still works fine.

N.B.: When I reached the motor, I decided not to go any further skipping Steps 15-16-17. I could see that the inside (blower) was not very dirty (definitely not disgusting) and that for an occasional usage (2nd bedroom) it could stay the way it was. Upon reconstruction the unit worked fine.

Thank you.

Michel -

Does anyone know how to reset the Unit Usage Hours (Motor Used Hours Count) ?

Michel -

The job went well after fixing a few whoops during reassembly. What I can't figure out is how to reset the timer now that there is a new motor in the CPAP. You might want to let your viewers know how to do this. I plan to just ignore the warning now that I know there is a new motor in my machine.

Sulo Vaisanen -