Introduction

How to replace the keyboard on a Samsung Captivate Glide.

  1. FoW1HxGfJJptvkXG
    FoW1HxGfJJptvkXG
    uKcjE3tMSlZi6SVs
    tSXjsEPAwGu1vmDg
    • Remove back cover using fingernail or plastic opening tool. The cover pulls up and off.

  2. V1IyAYWbsLdZVwvK
    V1IyAYWbsLdZVwvK
    tfjihCywYTXRTdL6
    • Remove battery with plastic opening tool or finger.

  3. xTCETVVsRceJHXuZ
    xTCETVVsRceJHXuZ
    3OlWPkpvhYM3SYPA
    • Remove the seven screws from backplate using the #00 screwdriver.

  4. GLGqOQA3UpOPHXOF
    GLGqOQA3UpOPHXOF
    GtGtnMWPBnEKMjeK
    uKpOKvPPtvwsDYy1
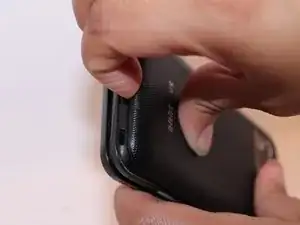
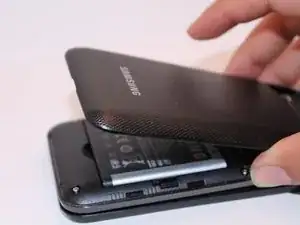
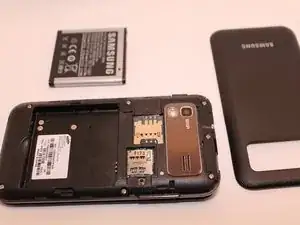
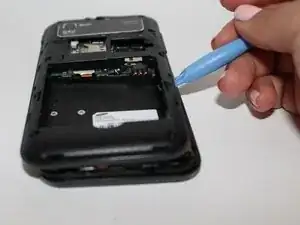
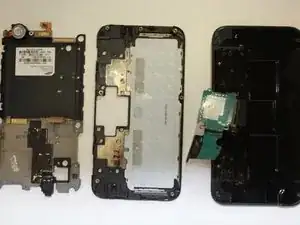
    • Remove the back plate using the plastic opening tool.

    • There is a lip on each side, and both must be pried up.

    • You can work your way around the edges after prying the two sides.

  5. qR1YKZkaLT1YcMEY
    qR1YKZkaLT1YcMEY
    Il2XYXWyJuWCKPMF
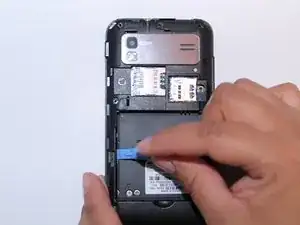
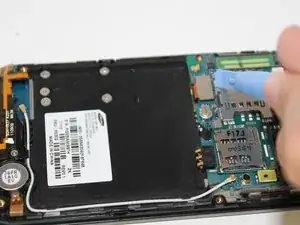
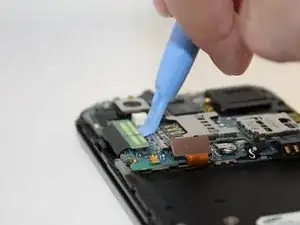
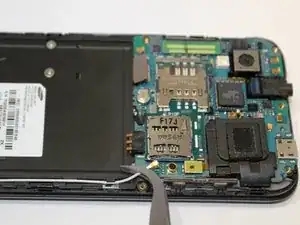
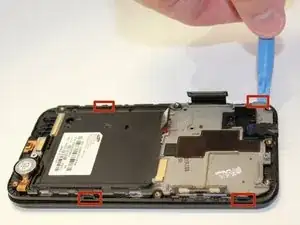
    • Use the plastic opening tool to detach the two tabs connecting the motherboard to the base of the phone.

  6. lGXFCxuyejQsbBt6
    • Disconnect the antenna cable from the motherboard using tweezers.

  7. lRUknAx2Un2EGBUU
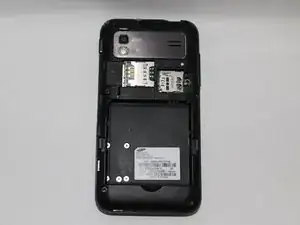
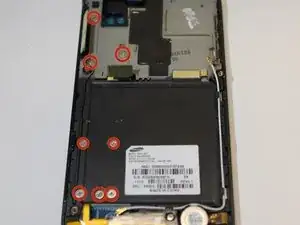
    • Remove the single screw connecting the motherboard to the base of the phone by using the #00 Phillips screwdriver.

  8. CQ5OJ4OKxXRO3W5w
    CQ5OJ4OKxXRO3W5w
    5haaiLX2NdUIqgUN
    • Lift the motherboard out of the base of the phone.

  9. Cx4sF2faltdPMgEf
    Cx4sF2faltdPMgEf
    pQUXkNVG6asqlOVn
    • Remove the eight screws using the #00 screw driver.

  10. PItjlPHIZFGTQDPO
    PItjlPHIZFGTQDPO
    wlph61PwPjthBkvY
    • Remove blue tape using the tweezers.

  11. AG3rRDga5PbeLO4k
    • Remove screws using the #00 screwdriver.

  12. 6BJCSUvCcKdiefyL
    • Using the plastic opening tool, remove the back plate by prying on the four main points.

    • You may encounter difficultly at certain points. Work the plastic opening tool along the edge to keep back plate from closing again.

  13. IduJBYAWFqe5QOvo
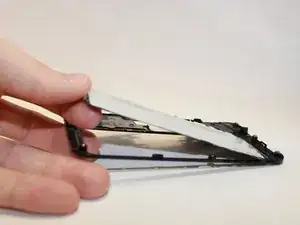
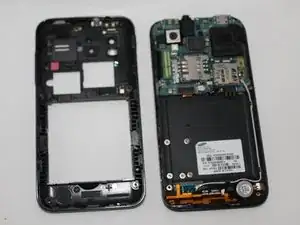
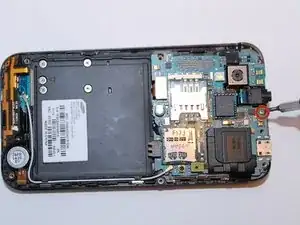
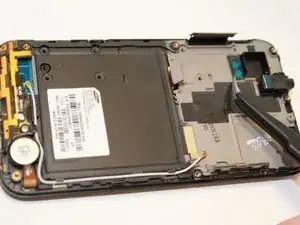
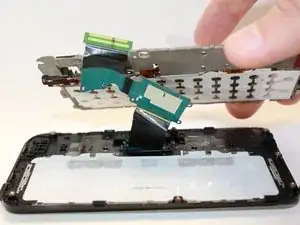
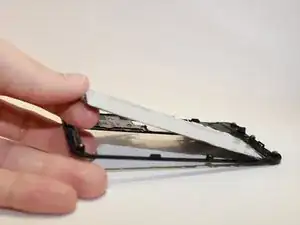
    • Lift the back plate.

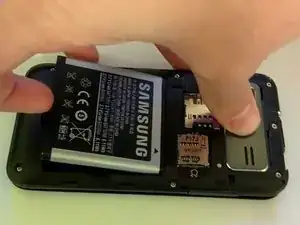
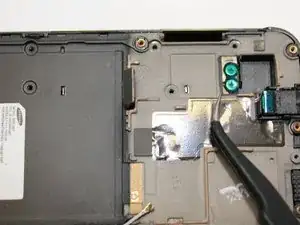
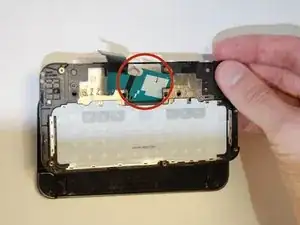
    • To remove the attached flex cable, gently peel the flex cable connecting to the back plate.

    • Flex cable is attached to the back plate with an adhesive.

  14. VBAj2pxqVPlykpUJ
    VBAj2pxqVPlykpUJ
    GG6ad6AfBkbJRG1k
    KPAlNMJlQN4ZAeFP
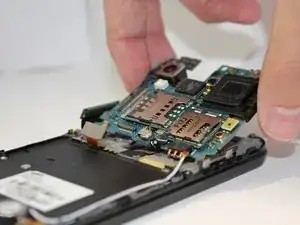
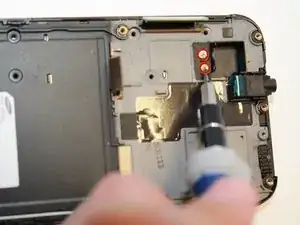
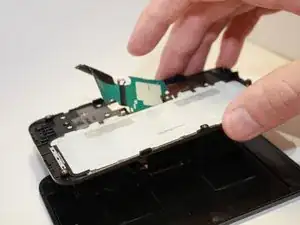
    • Slide the flex cable through the slot.

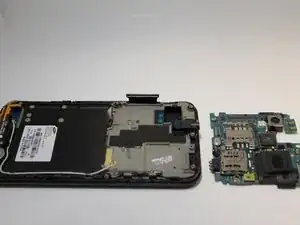
    • Set the front plate down. Now you have free access to the keyboard.

  15. LsxDvTHeUC3agSk5
    • Manually lift the keyboard and replace with new keyboard.

    • Make sure the new keyboard is placed with the keyboard letters facing down, and the white back facing up.

Conclusion

To reassemble your device, follow these instructions in reverse order.

Jessica Martinez

Member since: 25/09/14

251 Reputation

0 comments