Introduction

Use this guide to replace your Captivate's motherboard.

  1. EybUoyOHCfFVhKId
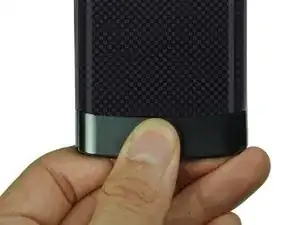
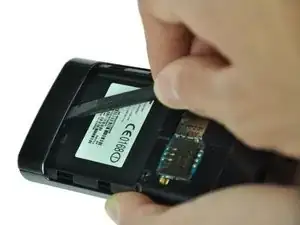
    • Remove the back cover by pressing on the bottom section of the phone and sliding the bottom piece downward.

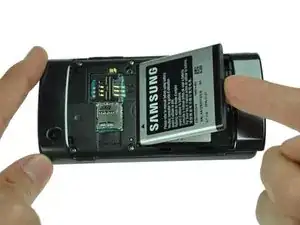
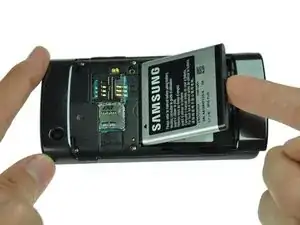
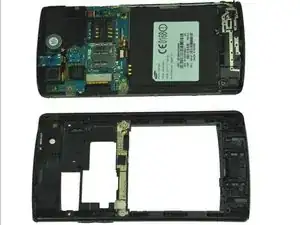
    • Lift up the back cover.

  2. QTmnfmmV1NUlLDEt
    • Place your finger on the bottom of the battery and lift to remove.

  3. dZLFWq1tnZfZ3pMw
    • Replace the old battery with the new one.

  4. jXmfv2gShBUAliBW
    • Insert the spudger underneath the bottom section of the phone.

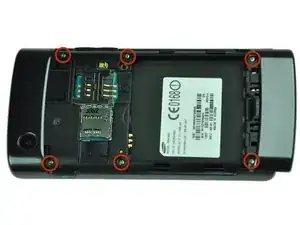
    • Gently lift and push the spudger to slide the bottom section down to reveal two hidden screws.

  5. JBrMmkHFGr6MQu2B
    • Remove the six 4.5mm #000 Phillips screws.

  6. 5X2vNmDSgLFUaNuK
    5X2vNmDSgLFUaNuK
    FCrTFGPC6qYKQbeT
    ajWddd55oyIbwOFq
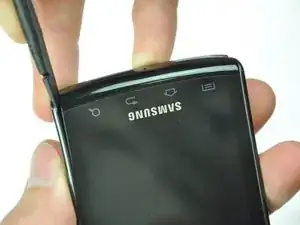
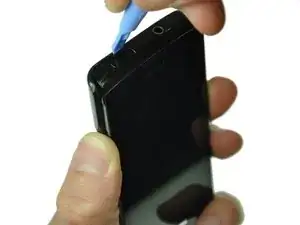
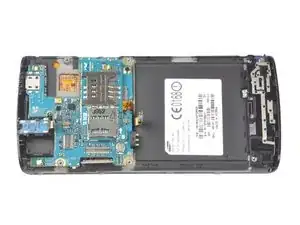
    • Starting at a bottom corner, use the spudger to separate the rear case from the front display.

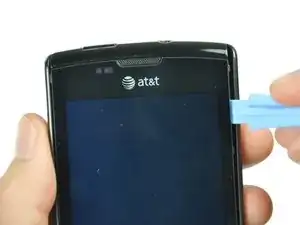
    • Move the spudger towards the top on both sides. The plastic opening tool is easier to use for this step.

    • Be careful when detaching the top. Free each side, stopping short of the center of the cover. Apply backward pressure on both corners with a finger applying pressure on the center, and slide the whole back cover toward the bottom of the device. Note: forcing the cover can result in cracked plastic.

  7. 5cFqIQlECQFFjDQp
    • Separate the rear case from the phone.

  8. v6oqowFvObPkJIRP
    v6oqowFvObPkJIRP
    eV1Jdq6B3fExLpPD
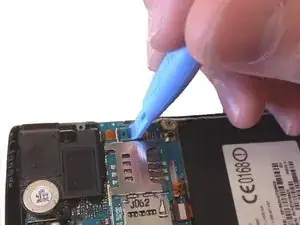
    • Use a spudger tool to pry up the antenna cable from the connector on the motherboard.

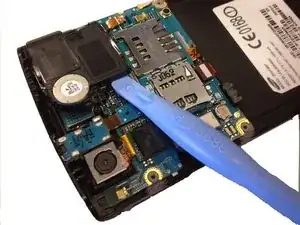
    • Pry up the other end of the cable from the connector on the antenna array.

  9. faeSiGuIvVVG16eu
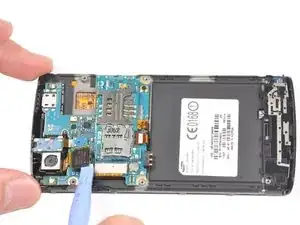
    • Use the Phillips 00 screwdriver to remove the single screw holding the speaker assembly to the LCD.

  10. iHy6yiALTVnVTQr3
    iHy6yiALTVnVTQr3
    QfpFHuaVnCrnoNwW
    • Use the plastic opening tool to lift the bottom tab of the plastic ribbon cable connector. Be careful not to use excessive force, you are only releasing the tab that holds the cable in.

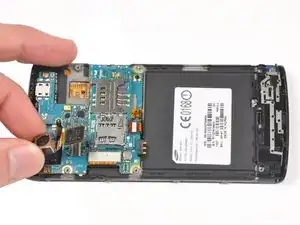
    • Pull out the ribbon cable.

    • Use a spudger or plastic opening tool to lift up the speaker, and use your hands to remove it.

  11. K1qZKFHSBYtUaTWd
    K1qZKFHSBYtUaTWd
    vjugaCY4NDAF6NCE
    • Lift up the black NEC chip with attached ribbon cable using either a spudger or plastic opening tool.

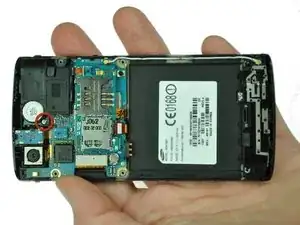
    • Gently lift the camera assembly out of the plastic housing.

  12. J21AIIObsnvarwHA
    J21AIIObsnvarwHA
    awPOZDvJHtHuRrUU
    jkDfPFb1WjlYDxdH
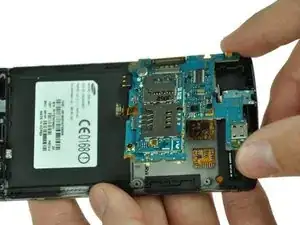
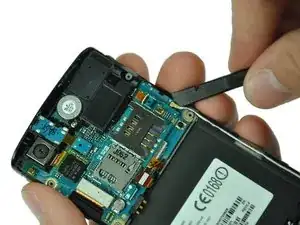
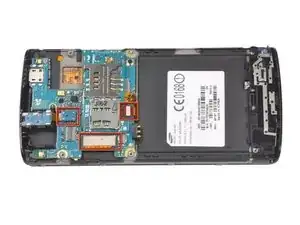
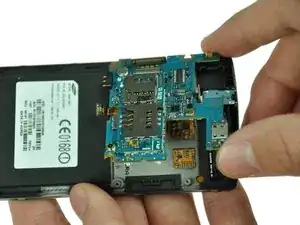
    • Use a spudger to disconnect the three highlighted connectors.

    • Pry straight up and be careful to pry against the connector, not the socket on the motherboard itself.

  13. WhGRBqgGYSIBcYYE
    • Use your fingers to lift up the logic board from the assembly.

Conclusion

To reassemble your device, follow these instructions in reverse order.

Christopher

Member since: 06/10/11

643 Reputation

0 comments