Introduction

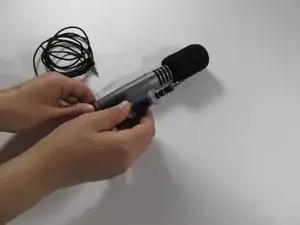
This guide will show you how to dissemble the microphone. Before you start you need to have a set of screw drivers (Philips head #00, #2, #0). To reassemble the microphone just reverse the steps.

For names of the microphone parts, please click below:

Microphone Parts' Manual

  1. 2YlGH5m6gXrCYDYJ
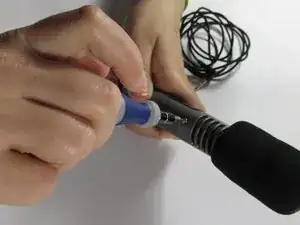
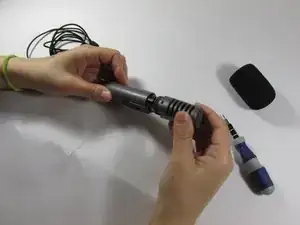
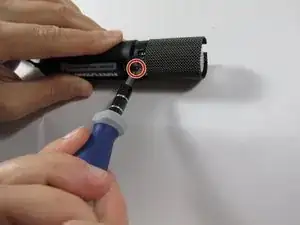
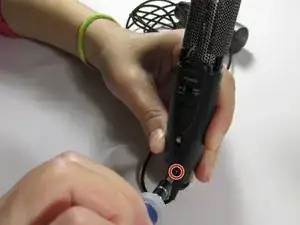
    • Using the Phillips #00 screwdriver, remove the screw securing diaphragm to the base of the microphone.

  2. tXfG5Cil4LkMIQeY
    tXfG5Cil4LkMIQeY
    cPc6sxejrkP4hANI
    • Separate the microphone into two pieces to reveal the internal shield cover.

  3. ApNhJUoK2LyKFEdD
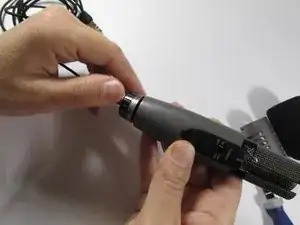
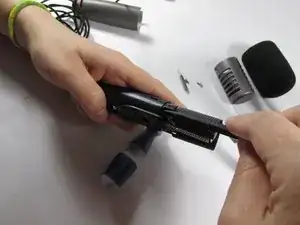
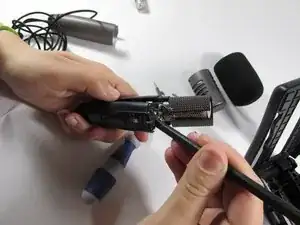
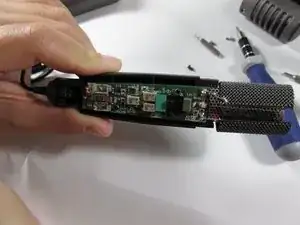
    • Unscrew the base of the microphone in a clockwise motion and separate the bottom and top of the microphone.

  4. EU6JQP2bfOERTkV6
    • Using a Phillips #2 screwdriver, remove the screw directly above the battery.

  5. M1rnmxPom5DfMxbD
    • Use a Phillips #0 screwdriver to remove the black screw near the bottom of the microphone.

  6. hXKprlg5A1KfgKcN
    hXKprlg5A1KfgKcN
    ed24jw2oKDPjBCyk
    Kq6dJUF5Jv6MqYgq
    • Use the heavy duty spudger to detach the grip area from the microphone.

Conclusion

To reassemble your device, follow these instructions in reverse order.

Kefaya

Member since: 23/01/14

364 Reputation

0 comments