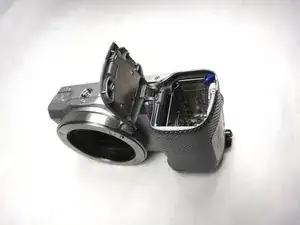
Introduction

The removal of the top panel involves the removal of the front case to be able to reach the screws necessary for the removal of the top panel.

  1. LKPoiSsXP3Ao6MkS
    LKPoiSsXP3Ao6MkS
    AiqePoWkB4HCq4d5
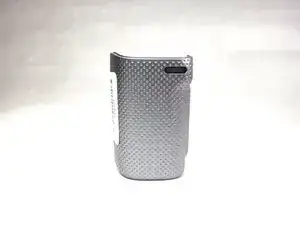
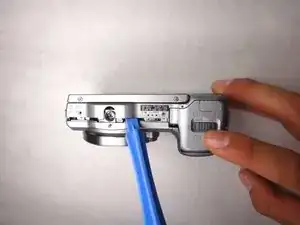
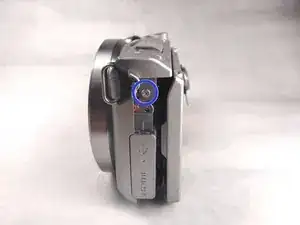
    • Open the battery pack door by moving the slider to "OPEN".

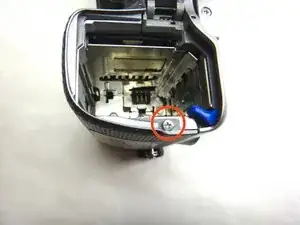
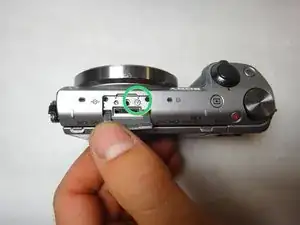
    • Remove the 3.25 mm silver screw inside the battery pack with a Phillips screwdriver.

  2. TWCYMgRVmNIAXeE3
    • Remove the 3.25 mm exterior screw with a Phillips screwdriver.

  3. DiPOA4KvKSAowjKr
    DiPOA4KvKSAowjKr
    fICxkLUqPpV3xtkT
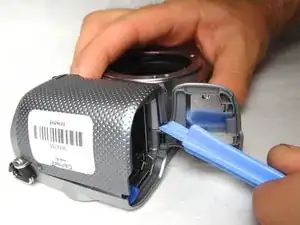
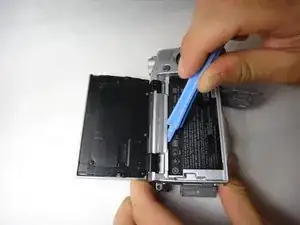
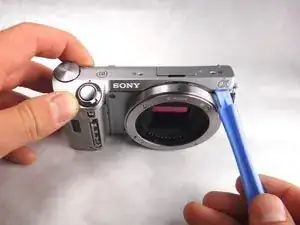
    • Use the spudger to raise the corner of the case from the camera.

    • One component of the front case should now be separate from the camera.

  4. WscRpGKWn5mNIN1t
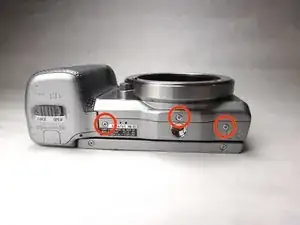
    • Remove the three (3.5 mm) screws from the bottom of the camera with the Phillips screwdriver.

  5. nDfBy5FVmVW1BRX3
    • Open the HDMI port, and remove the the two (3.5 mm) Phillips screws exposed on that side.

  6. AWNMQMlFEXZvexWq
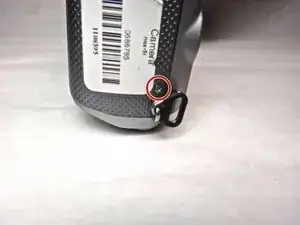
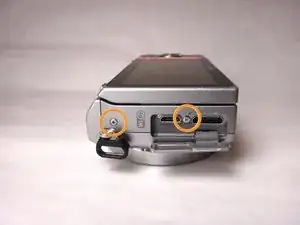
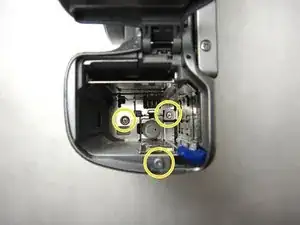
    • Remove the two 4mm screws from the interior of the battery pack, and one 3.5mm screw from beside it.

    We already removed the screw next to battery lock. The one close to blue plastic lock.

    Harbert Wolfstein -

  7. mANZrW3li6YfmLJE
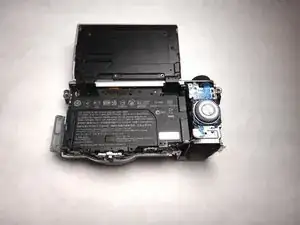
    • Looking at the bottom of the camera, use the spudger to lift the rear case away from the camera body.

  8. XL5jT6MFbEhFjHYX
    XL5jT6MFbEhFjHYX
    YauX3jYbtSM6Guda
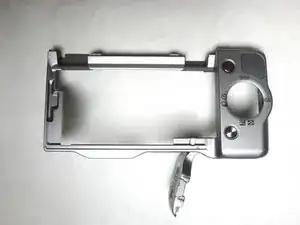
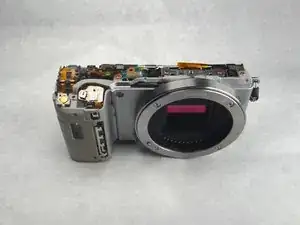
    • Using the spudger again, carefully pry from the top of the camera to remove the back frame.

    • The back frame is fragile, so use the spudger gently.

    Pull the back pannel up starting at the bottom of the frame. There is a little hinge at inside the frame the top that will move up and make it much easier to remove the back panel (almost without effort)

    meertdavid -

    The most difficult part of this disassembly is this plastic part. Very thin, flimsy and tend to easily break. Pay extra attention when prying this frame, especially the top part, between the screen hinges.

    Harbert Wolfstein -

    Update to my previous comment:

    Remove the top case part where the shutter button, play button etc so that flimsy plastic frame can come out easily.

    Harbert Wolfstein -

  9. yXdLUvJs3kvxCNbr
    • The back case should now be removed and look like this.

    Does this part contain battery stopper?

    Gennady -

    I guess not. battery stopper is on the body.

    Chau Jieying -

  10. Gre5cV6QjMrSTfNn
    • Remove the 3.5mm phillips head screw underneath the flash port

  11. gjH14KGVEUugwhMP
    • Remove the 3.5mm phillips head screw on the top left of the camera.

  12. M6Ae1ylWPtYAnBfv
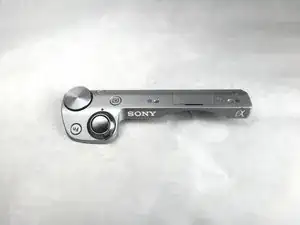
    • Use the spudger tool to go around the seam of the top panel. The top should easily lift off.

  13. DVB6DAUUfVmacUXK
    DVB6DAUUfVmacUXK
    acml4oRyu2UVdCSS
    • This is what the camera and top panel should look like after you have completed the guide

Conclusion

To reassemble your device, follow these instructions in reverse order.

Steven Fronczak

Member since: 08/04/14

322 Reputation

One comment

Hey Steven! This is all wrong! That's not the wright order: actually the top panel is the first part that can be removed, you don't need to tear down the rear panel and the front handgrip.. (it also may cause the damage of the rear panel!).

So, in order to remove the top panel just follow this order:

STEP 2

STEP 5 (Just the upper screw (not that one between HDMI and USB port)

STEP 6 (Just the two 4mm screws)

STEP 10

STEP 12

Its a lot easier ;)

Daniele

Daniele Fior -