Introduction

Prerequisite-only guide! This guide is part of another procedure and is not meant to be used alone.

Use this guide to remove the back cover from a Steam Deck. Instructions and procedures within this guide are unique to and only used on the battery replacement guide.

  1. AbyPsiOHIyu5DtQP
    AbyPsiOHIyu5DtQP
    yJCSYPAsUL23w26A
    T1GAZSKCFq2VDTvk
    • Turn on your Steam Deck and allow the battery to discharge completely before starting your repairs, as a charged lithium-ion polymer battery can be dangerous if accidentally punctured.

    • As an extra precaution, Valve recommends putting your Steam Deck into battery storage mode within the BIOS before starting any internal repairs. Read how to do that here.

    • Unplug any cables still connected to your Steam Deck.

    • If you have a microSD card installed, make sure to remove it before opening the Steam Deck. If you attempt to remove the back cover with it still installed, it could snap right in half.

    • During your repair, it can be helpful at times to lay the Steam Deck face-down into its case to protect the thumbsticks and prevent wobble.

  2. bpUGGPG32OkLXnC4
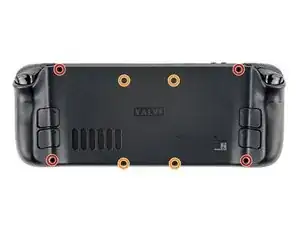
    • Use a Phillips driver to remove the eight screws securing the back cover:

    • Four 9.5 mm screws

    • Four 5.8 mm screws

    • Despite the standards, Phillips screwdrivers can vary in size and shape—two drivers labeled as the same size may fit differently in the same screw. Use the size that fits the snuggest into the screw head.

    • Throughout this repair, keep track of each screw and make sure it goes back exactly where it came from to avoid damaging your Steam Deck.

  3. 6jtVcFtMGa5ZMqcF
    6jtVcFtMGa5ZMqcF
    Ux5LEj3JfJlkmQMQ
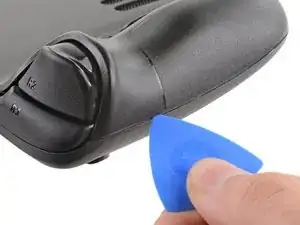
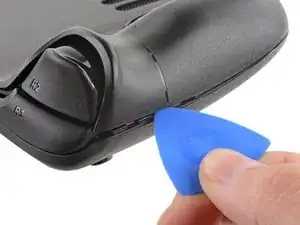
    • Insert an opening pick into the thin gap between the back cover and the front shell, along the edge of the right grip.

    • If you're having trouble inserting your pick at the grip seam, try starting at either the top or bottom long edges first, then slide the pick towards the grip.

    • Pry up on the back cover to release it from the locking clips.

  4. 6IvIWWqEXPTqW1XB
    6IvIWWqEXPTqW1XB
    1FxwYDjIGOAOCZT2
    KpIx4YIAZrDH1b5T
    • Once the clips are disconnected from one edge, the rest disconnect easily.

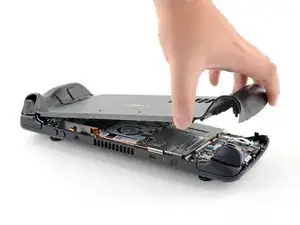
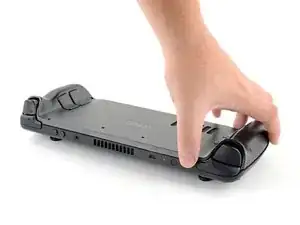
    • Grip the back cover at the opening you just created and pull it up and away from the device to unclip the long edges.

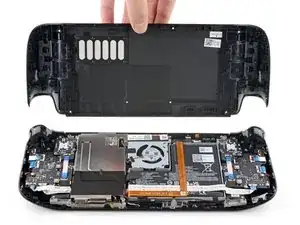
    • Remove the back cover.

Conclusion

To reassemble your device, follow these instructions in reverse order.

Take your e-waste to an R2 or e-Stewards certified recycler.

Repair didn’t go as planned? Try some basic troubleshooting, or ask our Steam Deck answers community for help.

Carsten Frauenheim

Member since: 10/03/20

95769 Reputation

0 comments