Introduction

This is a guide to replace your devices surflink port. This is a simple and short guide that doesn't require many tools. You may need to replace the surflink ort if it is unresponsive, but don't worry as this guide will only take a short amount of time.

  1. disBkJLYKsWyOnFC
    • Remove the rubber cosmetic strip along the outside edge of the back plate with tweezers.

  2. DymSIV2GPBF4IXwp
    DymSIV2GPBF4IXwp
    lkFYS5RPvf51M4NF
    • Remove the two rubber feet on the lower case with an opening tool.

  3. BQeCc2EHYUb4frIq
    • Remove the two screws with a T3 Torx screwdriver.

  4. c3A3HPFhTiu26TnT
    • Remove the seven screws securing the lower case with a T3 Torx screwdriver.

  5. kRIiVor6o5EqdNoD
    kRIiVor6o5EqdNoD
    diJVsnGVIsMcPrlE
    • Lift the lower case gently and set it above the device.

    • Take care not to strain the battery cable as you move the lower case.

  6. Gvn6r4ECNvqRSHDf
    Gvn6r4ECNvqRSHDf
    5bYNswAE1yRwwxwR
    • Disconnect the battery cable by lifting the pull tab until it "clicks."

  7. qLK1alHQg4KvQVuZ
    qLK1alHQg4KvQVuZ
    YymYT2wttG4LEHJj
    EjlYeWFmdCwBXQaI
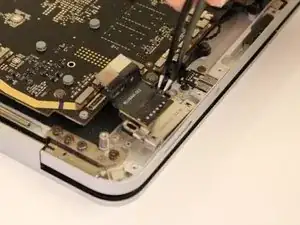
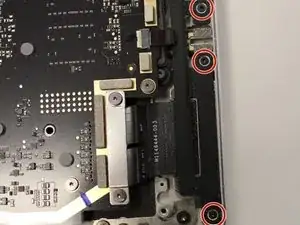
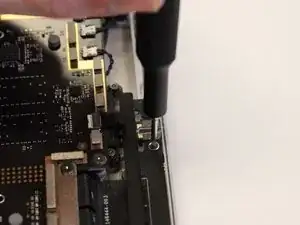
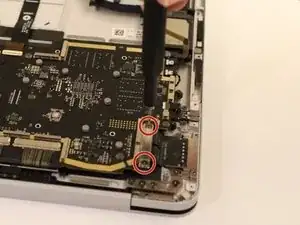
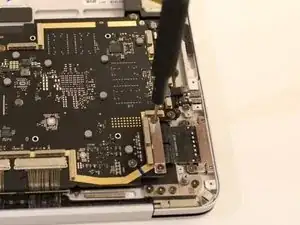
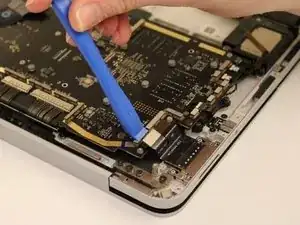
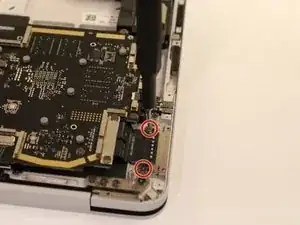
    • Remove the left I/O bracket by unscrewing the the three M1109237 screws with your T3 Torx Screwdriver.

  8. 4y4QOOky4XGXpwCt
    4y4QOOky4XGXpwCt
    JhnSuee2x2jDVNRZ
    • Remove the two M1149393 screws that secure the ribbon cable with your T3 Torx screwdriver.

  9. uLVVNeckn5kuTEoI
    • Lightly disconnect the flat-top connector by lifting it straight up with an opening tool.

  10. oycMGyqUSTBCdAaO
    • Remove the two M1149393 screws that secure the Surflink port with your T3 Torx screwdriver.

  11. 6SchKcFFcWE2jKMB
    • Lift the surflink port out and up with your tweezers.

Conclusion

To reassemble your device, follow these instructions in reverse order.

Nate Ball

Member since: 14/02/23

615 Reputation

0 comments