
Introduction
Do you want a bigger hard drive or a second SSD? Follow this guide to replace your hard drive.
-
-
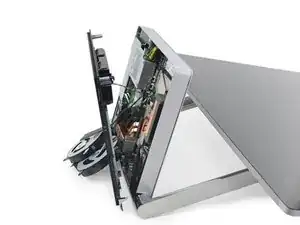
Lay the Surface face down on a padded surface
-
Remove the four rubber feet at each corner concealing the Torx screws
-
Remove the four Torx screws under the rubber feet.
-
Two screws on the upper corners are longer than two screws on the lower corners.
-
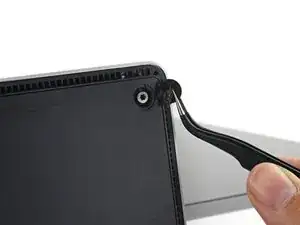
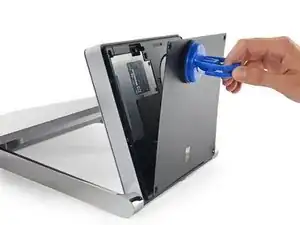
Attach suction cups to the bottom cover and then pull on the suction cups to free the bottom cover.
-
-
-
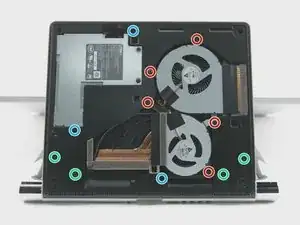
Remove five torx screws holding the two fans to the midframe
-
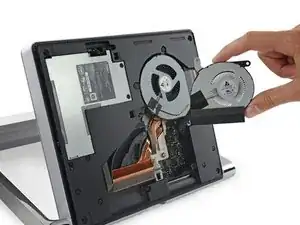
Remove the two fans
-
Remove four large torx screws holding the midframe
-
Remove four small torx screws holding the midframe
-
-
-
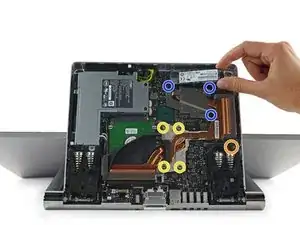
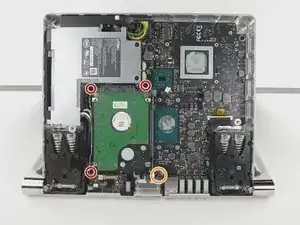
Remove four spring loaded torx screw labeled 1 to 4
-
Remove three torx screw labeled 5 to 7
-
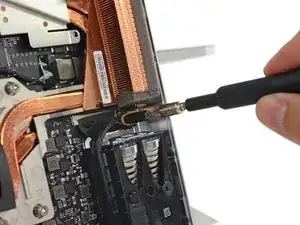
Remove 5mm hex mounting post
-
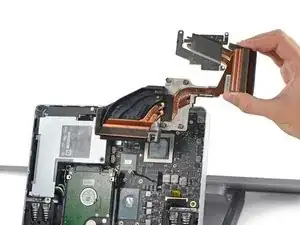
Use a spudger to remove the heatsink assembly from the motherboard
-
-
-
Remove three torx screws holding the hard drive brackets
-
Remove 5mm hex mounting post
-
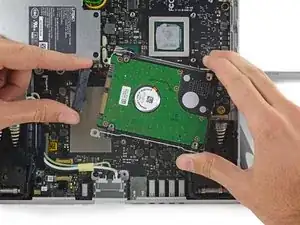
Remove the hard drive and disconnect the SATA/SATA power cable
-
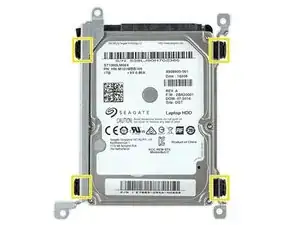
Remove four torx screws holding the hard drive brackets to the hard drive
-

To reassemble your device, follow these instructions in reverse order.
13 comments
Thank you for this step by step guide to replace the "Hard Drive" Here are a few measures that I took before drive replacement:
1) have to turn off drive encryption
2) I cloned the drive to the new SSD drive (I used Samsung 850 PRO 1TB) using Acronis True Image
3) Replaced the drive followed your instructions.
4) Turned ON the Surface Studio and success! no issues and better performance.
Does changing to a SSD drive cut down on the fan noise?
vanstar7 -
Does changing to a SSD drive cut down on the fan noise?
vanstar7 - January 15
No, fan noise level does not change, the heat that is been produced comes mostly from the processor.
I upgraded to to a SATA SSD 2TB and a M.2 NVMe SSD 1TB and wrote my experience here:
Hi Cesar, When I load the RST_AHCI “Intel Chipset SATA RAID Controller” drivers, downloaded from https://www.microsoft.com/en-us/download.... It doesn´t recognize my m.2 ssd 64gb/Go. I have a Surface Studio core i5. I don´t know what else to do to install windows in that disk.