Introduction

Battery dead, or not holding a charge? Follow this guide to replace it with a new one! Note: This guide requires soldering.

  1. XvXTq16eI1hk6jf1
    • Make sure the master switch is "OFF" before disassembly, to avoid an electric shock.

    • Flip the watch over with the back facing up.

    can you add some infomaton on what kids can do to fix it

    Kehinde Abiodun -

  2. G1RJlrYb3vNUIKkk
    • Remove the four 6.0 mm screws on the back plate with the Phillips #00 screwdriver.

    I can't get the last two screws off!

    Grant Garbe -

  3. W5wMmGAUfCPAWMuu
    • Gently pull the back plate from the watch casing.

  4. aRkGrp4sxDofQlrJ
    aRkGrp4sxDofQlrJ
    VJ4pBJ4iV2OGXiwm
    • Lift the master switch from the circuit board.

  5. AL3UEDAvKiaAqkXm
    AL3UEDAvKiaAqkXm
    2XBHASxIknUcXLXq
    • The speaker wires are fragile. They may break if excessive force is used to remove the circuit board.

    • Removal of the circuit board requires soldering.

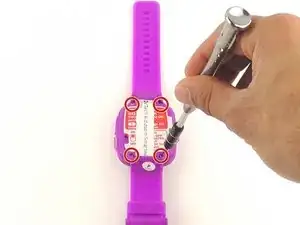
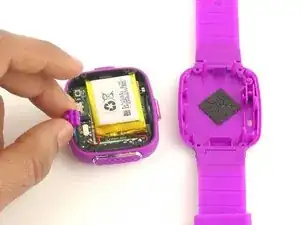
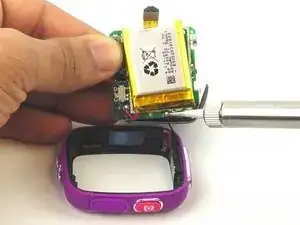
    • Gently push on the display from the front, near the camera. The circuit board and display will pop out through the back.

  6. fYsuBfU32VVVNdWT
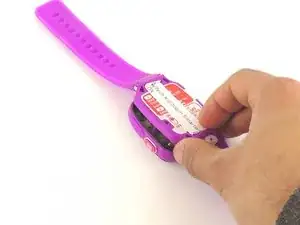
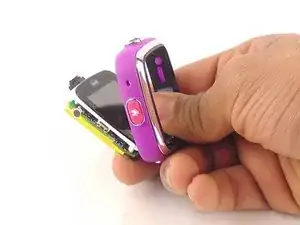
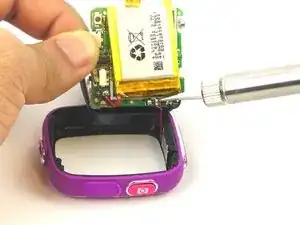
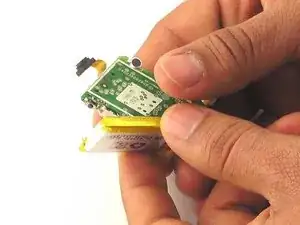
    • Lift the circuit board carefully from the casing, without breaking or detaching the speaker wires at the bottom of the circuit board.

  7. fYnTfXlbyGdEPXYu
    • Note which wire is connected to which lead before continuing. There are no markers on the circuit board to indicate where each wire belongs.

    • De-solder the black speaker wire from the circuit board.

  8. HxJKpsRHRbARsUM4
    • De-solder the red speaker wire, as in the previous step.

  9. jep4m2n3AU2I3vYC
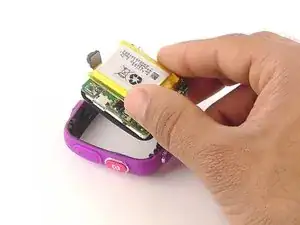
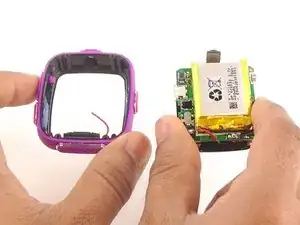
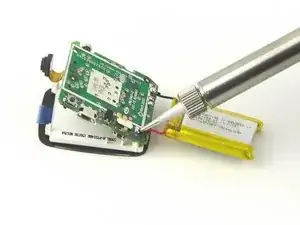
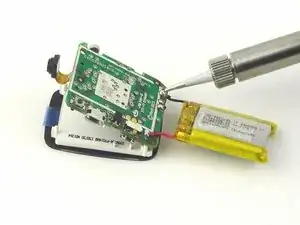
    • Wait for the solder to cool down and solidify, then remove the circuit board from the casing.

  10. hNH2BviwtWw1Ejdb
    hNH2BviwtWw1Ejdb
    6JcPKt55k1NclUhh
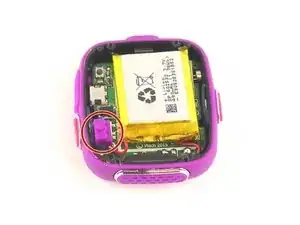
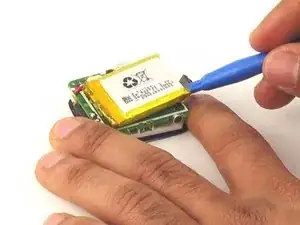
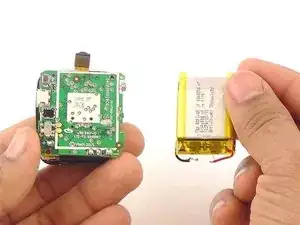
    • Using the plastic opening tool, gently pry the edges of the battery away from from the circuit board.

    • There is a thin layer of adhesive holding the battery to the circuit board. This will remain sticky after prying.

  11. LQoTxBoZTQn6L5rd
    • De-solder the red battery wire from the circuit board.

  12. deOZxoavSpDUBPld
    • Repeat the de-soldering for the black (ground) wire.

  13. cQYaJk5nYqnROEKS
    • Pull the battery free, and wait for the solder to cool before handling further.

Conclusion

To reassemble your device, follow these instructions in reverse order.

Navin Ramkishun

Member since: 20/01/16

247 Reputation

One comment

Where did you bought the battery?

funkysoulbrother -