Introduction
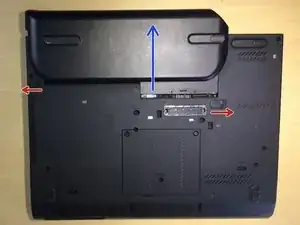
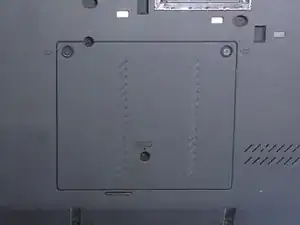
Both of the X230T's RAM slots are located on the bottom of the laptop, underneath a compartment held in by two screws.
This laptop is compatible with DDR3 SODIMM or DDR3L SODIMM running at 1333 MHz or 1600 Mhz.
-
-
Start by removing the battery from the laptop. The battery should be removed to prevent damaging the motherboard when the RAM is installed and removed.
-
Slide the latch on the left to the left, and hold the other latch on the right to the right.
-
Slide out the battery, it should come out effortlessly.
-
-
-
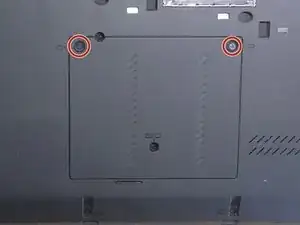
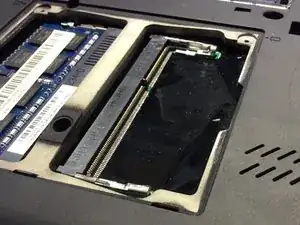
Undo the two screws that are circled, then, pry the RAM cover off by placing your finger nail or a spudger between the laptop and the RAM cover and puling up.
-
-
-
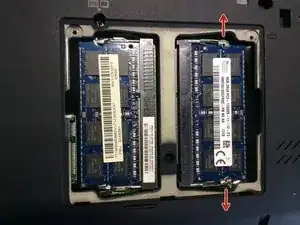
Remove the two clips from the RAM by pulling them slowly in the direction shown by the red arrows. When both clips are released, the RAM will lift up at a 45 degree angle (picture 2).
-
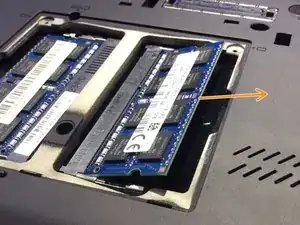
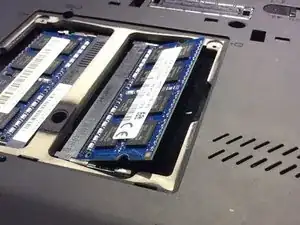
Once the RAM is at the angle as shown in picture 2, remove the RAM by pulling it out of the computer, as shown by the orange arrow.
-
-
-
To install the RAM, insert the new RAM with the notch on the RAM lining up to the notch on the slot. Slide the RAM in on a 45 degree angle as shown in picture 1.
-
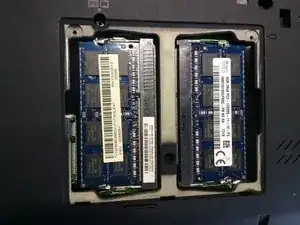
Firmly push down the RAM until it is locked in place by the clips on either side. The clips will move around the RAM when the RAM is being inserted.
-
Put on the cover with the clips going in to the bottom edge of the cover first, then, tighten up the screws on the RAM cover.
-
Install the battery in to the computer, making sure the locking clips are engaged, and power the computer on.
-
To reassemble your device, follow these instructions in reverse order.