Introduction
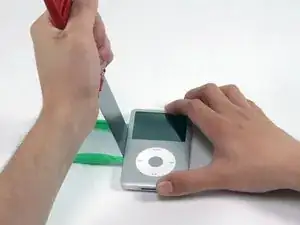
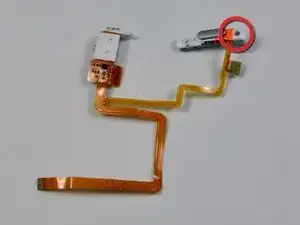
No audio? Replace the headphone jack!
Unable to unlock? Replace the lock switch, which is an integral part of the headphone jack sub assembly.
-
-
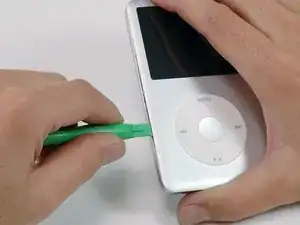
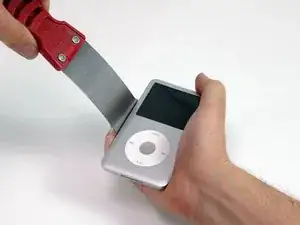
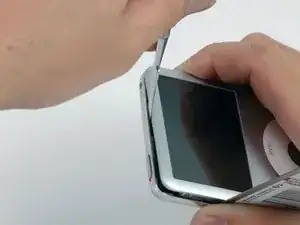
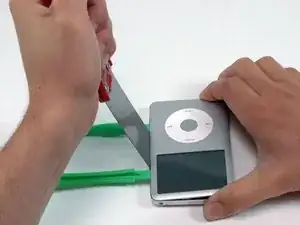
Insert another plastic opening tool into the seam between the front and back of the iPod, leaving at least 1.5 inches of space between the two tools.
-
-
-
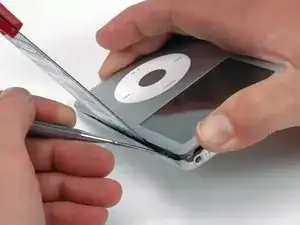
At an angle, carefully insert a putty knife about 1/8 inch into the seam between the two opening tools.
-
Once the putty knife has cleared the lip of the rear panel, pivot the putty knife so that it is vertical, and carefully (but firmly) wiggle it straight down into the gap between the opening tools.
-
-
-
Push with your fingers on the rear panel behind the putty knife to minimize bending. Slowly flex the putty knife, as shown in the picture, to ensure that most of the metal tabs on this side of the iPod are disengaged.
-
-
-
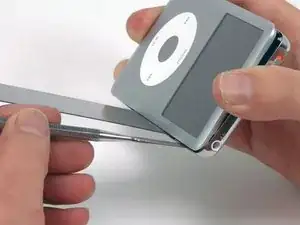
Remove the putty knife from the iPod and reinsert it closer to the corner of the iPod, using the same wiggle method as before.
-
-
-
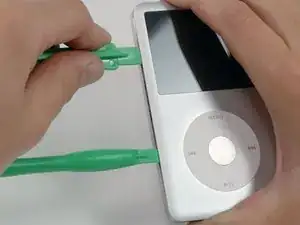
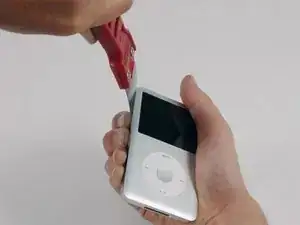
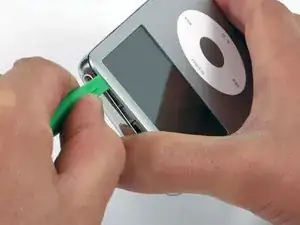
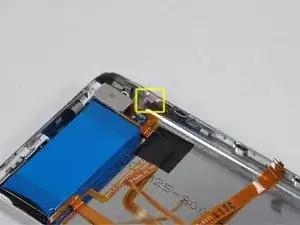
Between the lock slider and headphone jack, insert a plastic opening tool into the seam between the front and back of the iPod.
-
-
-
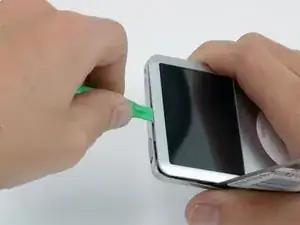
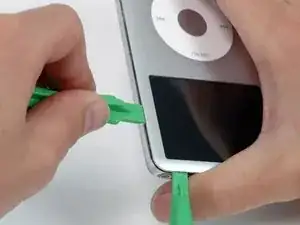
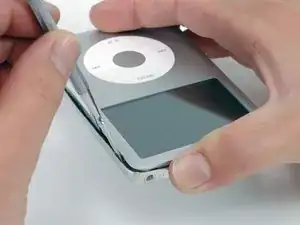
Near the center of the display, carefully insert a metal spudger into the gap created by the plastic opening tool.
-
Using the metal spudger, disengage the single clip on the top of the iPod.
-
-
-
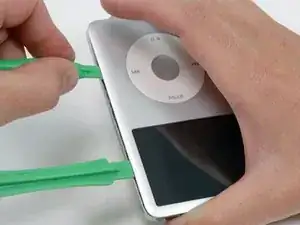
Near the other top corner, insert an opening tool into the seam between the front and back of the iPod
-
-
-
On the other side, insert an opening tool into the seam between the front and back of the iPod.
-
-
-
Remove the plastic opening tool from the top corner and insert it into the seam between the front and back of the iPod, leaving at least 1.5 inches of space between the two tools (as done on the other side).
-
-
-
At an angle, carefully insert a putty knife about 1/8 inch into the seam between the two opening tools.
-
Once the putty knife has cleared the lip of the rear panel, angle the putty knife so that it is vertical, and carefully (but firmly) wiggle it straight down into the iPod via the gap between the plastic opening tools.
-
Push with your fingers on the rear panel behind the putty knife to minimize bending. Ever so slightly flex the putty knife to ensure that most of the metal tabs on this side of the iPod are disengaged.
-
-
-
Continue to push up on the front panel with the metal spudger until the metal clip releases.
-
-
-
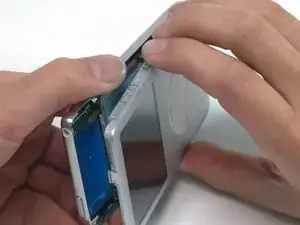
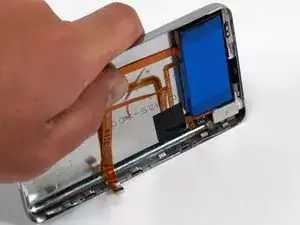
Grasp the front panel assembly with one hand and the rear panel with the other.
-
Gently (GENTLY) disengage the remaining clips on the rear panel by pulling the tops of the front and rear panels away from each other (think of the bottom of the iPod as a hinge), taking great care not to damage the ribbon cables holding the two halves together.
-
-
-
Use a spudger to lift the retaining flap holding the connector cable.
-
Slide the orange battery ribbon out of its connector.
-
-
-
Place the rear panel next to the iPod, being careful not to strain the orange headphone jack cable.
-
-
-
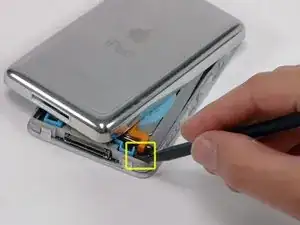
Lift the hard drive up with one hand so you can access the headphone jack ribbon beneath.
-
Use a spudger to flip up the plastic tab holding the headphone jack ribbon in place. The tab will rotate up 90 degrees, releasing the ribbon cable.
-
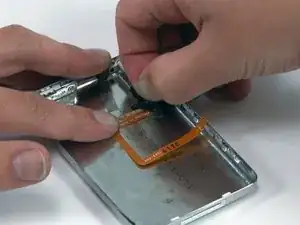
Slide the orange headphone jack ribbon out of its connector.
-
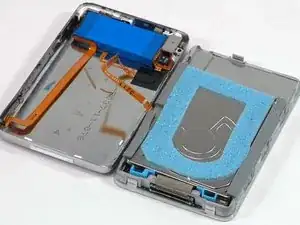
The rear panel is now free from the iPod.
-
-
-
Now to repair the damage caused by liberating the internal parts of the iPod Classic! It is highly likely that at least one of the metal clips in the rear panel has been bent upward. These clips must all be pointing downward in order to reinstall the rear panel.
-
-
-
Take the broad, flat side of the metal spudger and push the clip down, taking care not to tear the thin metal rail from the rear panel. Alternatively a pair of flat pin nosed pliers can be used to reduce risk of slipping and damaging the headphone jack.
-
-
-
On a clean, hard surface, lay the rear panel on its side. Carefully but firmly push down on it, rolling the entire lip side back into its proper spot.
-
-
-
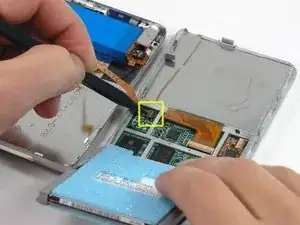
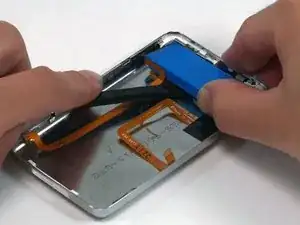
Use a spudger to lift the battery and the attached orange cable out of the iPod. If you have a 160 GB iPod, the battery will be thicker than the one pictured.
-
-
-
Use one hand to hold the orange ribbon cables in place, and peel up the black tape securing the cables to the rear panel with your other hand.
-
-
-
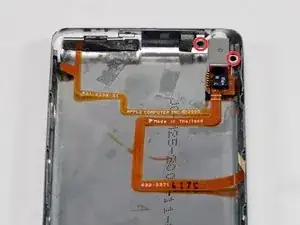
Remove the two black Phillips screws securing the headphone jack to the rear panel.
-
These are SMALL! Be sure you have a size 00 screwdriver on hand
-
-
-
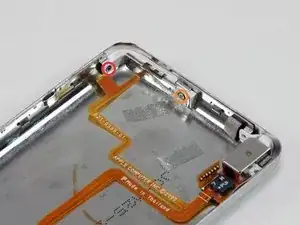
Remove the following two screws:
-
One black Phillips screw securing the hold switch near the corner of the iPod.
-
One silver Phillips screw securing the other side of the hold switch.
-
-
-
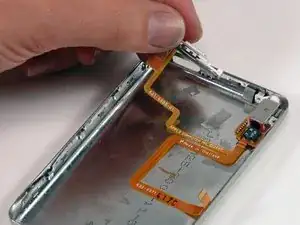
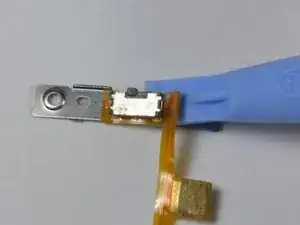
Lift the hold switch free from its housing on the rear panel. Don't remove the hold switch completely at this time, because it is connected to the same cable as the headphone jack.
-
-
-
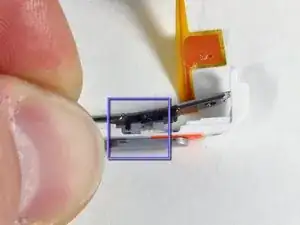
Slide the headphone jack out of its housing on the rear panel.
-
Lift the headphone jack and hold switch assembly out of the iPod.
-
-
-
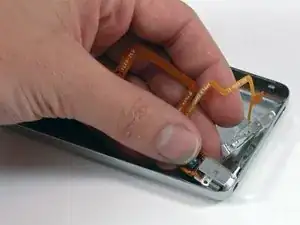
If your replacement part does not include the plastic hold switch, follow the next steps to transfer the plastic hold switch to your new headphone jack.
-
Remove the single Phillips screw nearest to the hold switch.
-
Lift the plastic portion of the Hold switch away from the orange ribbon cable.
-
-
-
Use the small iPod opening tool to carefully peel the orange ribbon cable and attached black Hold switch up from the metal backing.
-


Before you snap the case shut, be sure to test the device to ensure that it's working properly.
To reassemble your device, follow these instructions in reverse order.

37 comments
This worked a charm for me! If you take it slow and steady, and keep all the warnings in mind, you shouldn't have too much trouble :)
my battery clip came out but i connected the cable to it and pushed it back on no problem
just wanted to say a big thank you to the guys/girls at ifixit for the guide my ipod classic is working better than ever!!!
patrick -
Actually, there are only 11 metal clips. From the face side:
On the top, only 1 clip centred 35mm from LHS. Avoid the first 30mm on the LHS, and the last 20mm on the RHS
On the RHS there are 4 tabs centred at 20mm, 40mm, 65mm and 85mm from the top. Take great care to avoid the topmost 15mm
On the LHS there are 4 tabs centred at 20mm, 40mm, 65mm and 85mm from the top
On the bottom, there are 2 tabs, each one 10mm in from the edge.
Also, I bought 2 spudger bars with the battery, and found them invaluable. The plastic ones supplied are nearly useless
astutebs -
Okay, I’m a noob, what’s an LHS…I assume it’s “Left..H…S" and RHS is “Right…H…S”, but please elucidate.
Miguel FC -
Left Hand Side
Right Hand Side
darren_chalk -
take your time, be patient, it’s hard but you can do it. Watch other videos from youtube for battery replacement for your model to supplement this written procedure - particularly with regard to releasing the battery ribbon connector. I have the hardest one to crack open I and got it done and I’m 63 years old with bad hands…..my ipod classic now works good as new!!!!!!
Donald Diebold -