Introduzione

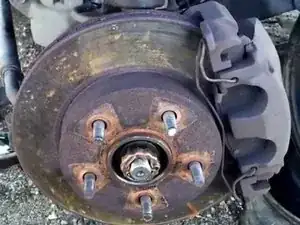
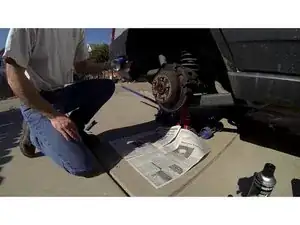
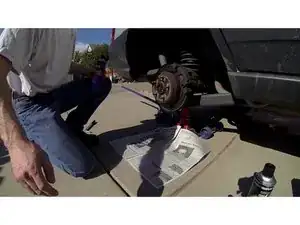
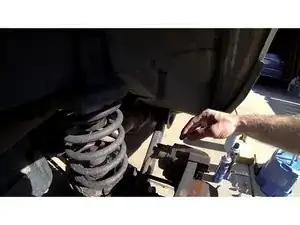
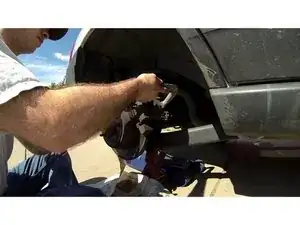
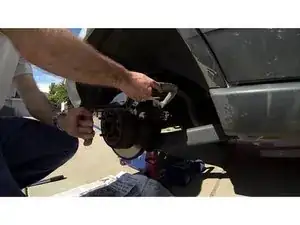
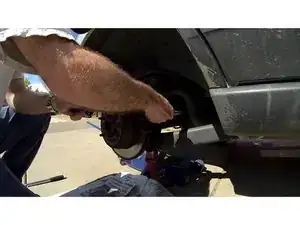
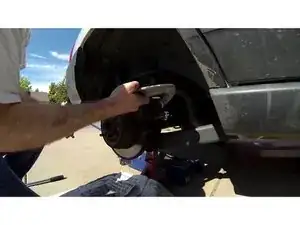
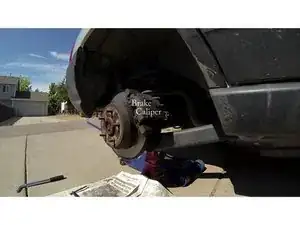
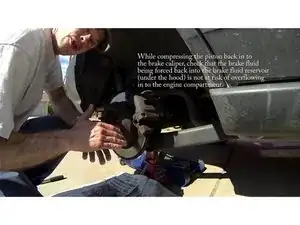
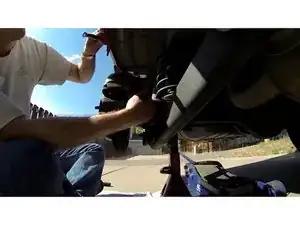
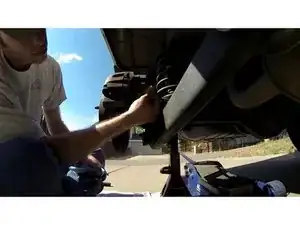
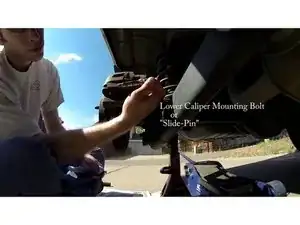
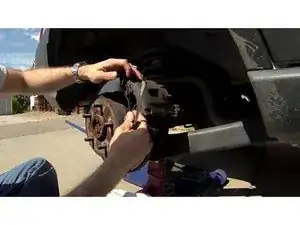
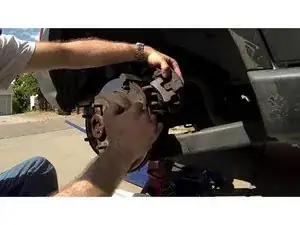
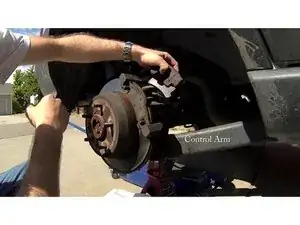
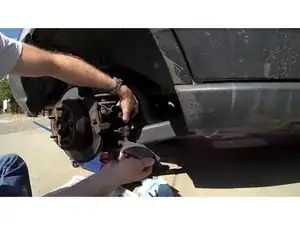
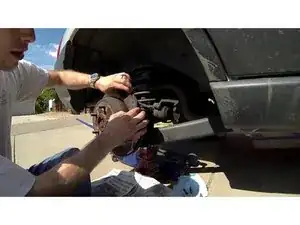
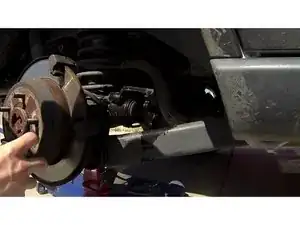
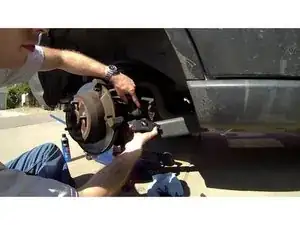
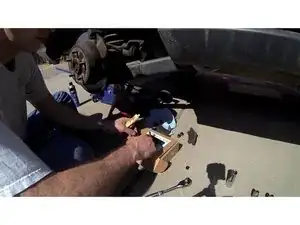
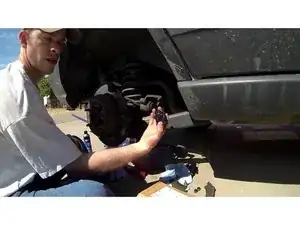
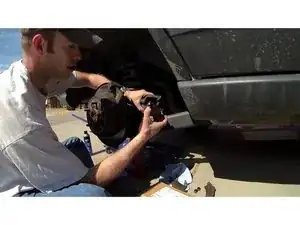
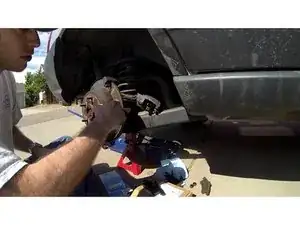
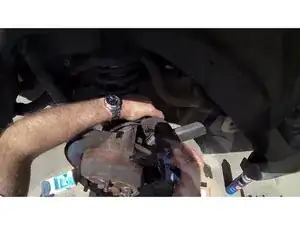
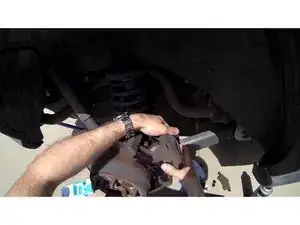
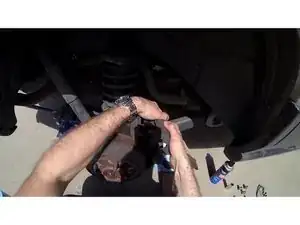
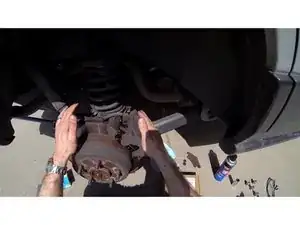
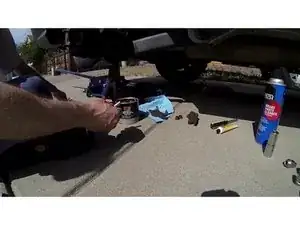
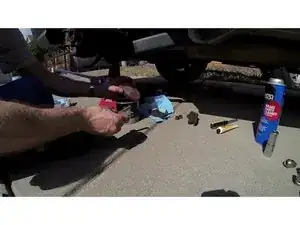
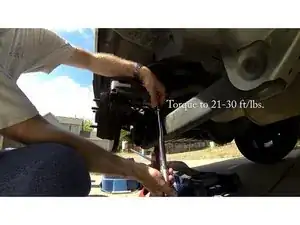
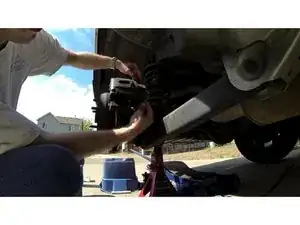
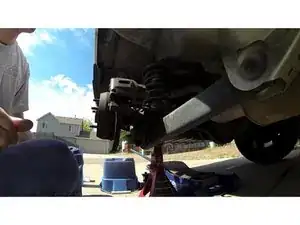
If you are experiencing poor braking performance and or a noise when braking, then it may be time to replace your brake pads.

Applies to most Jeeps with disc brakes, including Cherokee (front), all Grand Cherokees, Liberty, and Wrangler.

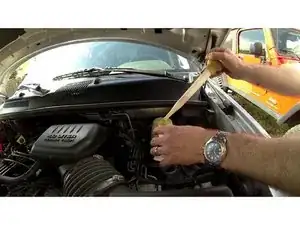
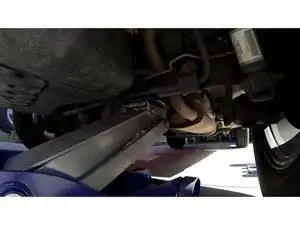
Follow this video tutorial by YouTuber FreedivejeepHD to complete the replacement yourself.

  1. xBiZTjeH6ZyglB65
    • With the transmission in park, firmly set the parking brake

    • source.

  2. 15gO55ZIwanCSIuL
    15gO55ZIwanCSIuL
    Vcty6wNtdRw6qwBw
    • Open the hood and locate the brake fluid reservoir at the back of the engine compartment

    • source.

  3. VFfmgYtYSJsYECWT
    • Open but do not remove the cap

    • source

    • This allows the brake fluid to be forced back into the reservoir while compressing the brake caliper piston during the removal process

    • source.

  4. aJV1HLblHKvGpxgf
    • If the brake fluid level is at or near the full mark, make room in the reservoir by drawing off enough fluid with a turkey baster to bring the level down near the add mark

    • source.

  5. mqRoWfbkbBDW5sfU
    • Before jacking the wheel and tire assembly off the ground, loosen the lug nuts about one quarter turn each

    • source.

  6. 3f4XyHIZMNYST1OI
    • Carefully jack one side of the axle high enough to get the respective tire an inch or two off the ground

    • source.

  7. cLJZtM3paWfg6FVu
    • Position your jack stand under the axle tube between the lower control arm mount and the sway bar bushing bracket

    • source.

  8. RRQyyCC2C4rNAlyd
    • Carefully lower the axle onto the jack stand, ensuring it will be stable and secure

    • source.

  9. nXrE3vHMeP1Oo51s
    nXrE3vHMeP1Oo51s
    mnhnKgRg4JrPMGsY
    • Remove the lug nuts and the wheel and tire, setting them out of the way

    • source

    • Be sure to put the five lug nuts in a place they won't accidentally be kicked across the floor

    • source.

  10. ynJkIaUCcUl2RJNM
    • Before removing the old brake pads, spread newspaper below the work area

    • source.

  11. TC5FD6QX1jlRLrAo
    TC5FD6QX1jlRLrAo
    efJDZqKlEjMDDHSm
    • Using a brake cleaning solvent of your choice, remove all brake dust residue from the work area

    • source

    • Wear safety glasses during this step

    • source.

  12. CXnQMxVjhme2fJI6
    • After the solvent has flashed off, remove the two protective caps that cover the brake caliper mounting bolts

    • source.

  13. kJOU5Z1JRIyV1KoL
    kJOU5Z1JRIyV1KoL
    wF3XwV1GNdmrPLvJ
    • To remove the brake pads, first compress the brake caliper piston back into the brake caliper using a large C-clamp

    • source

    • Place the top of the clamp on the far side of the brake caliper and the bottom part of the clamp on the backing of the brake pad nearest you

    • source.

  14. UbqBtYLtTDfEXaXP
    UbqBtYLtTDfEXaXP
    xSWQECek2CwB3pXf
    sSYkChASMDDq3baM
    • As you tighten the C-clamp, the brake caliper piston will be forced back into the brake caliper, allowing clearance to remove the brake caliper assembly off of the caliper mounting bracket

    • source.

  15. mbVGMyZtNQqMSVFt
    • Check the fluid reservoir underneath the hood so that you don't overflow the fluid reservoir with brake fluid and spill it into your engine compartment

    • source.

  16. lgl4myZAHCkxwCCn
    lgl4myZAHCkxwCCn
    RMSWUKaoawLCZsnD
    4nSdT6eShYO6o6Jk
    • Using a 7mm Allen attachment, remove the upper and lower caliper mounting bolts

    • source.

  17. blW6i5YYEM5v6OiZ
    • Gently pry the little clips off with a screwdriver

    • source.

  18. 6kppVZVadSqDsYtx
    6kppVZVadSqDsYtx
    NNNByNbfKeqOISSL
    t3PS3q1HZALMwEjo
    • Remove the caliper, inner brake pad, and outer brake pad

    • source

    • Do not let the caliper hang by the brake hose

    • source; instead, place it on the control arm after removing the inner brake pad

    • source.

  19. POhEvlawaE1SOKud
    • The outer brake pad just slides off through the grooves in the caliper mounting bracket

    • source.

  20. II3uUPhPQKYVxTnW
    II3uUPhPQKYVxTnW
    y4sIjsHvTbQIH1EZ
    YcIHvrbeng4CceTT
    • Clean the brake caliper and caliper mounting bracket of any braking residue

    • source.

  21. QIaECBa2l3xg2wxs
    QIaECBa2l3xg2wxs
    qvhF1OBpFTguCWMK
    hxdgBMGug66vtoDY
    • Apply anti-squeal compound to the backing of the new brake pads

    • source.

  22. mtJwekddipAjlSEt
    • Reinstall the new brake pad in the caliper

    • source.

  23. dQKVtZH13Ya3OHsg
    • Apply a small amount of anti-squeal compound to the caliper mounting brackets

    • source.

  24. gKHZcYSuCb6bXDOr
    gKHZcYSuCb6bXDOr
    keIgSy3OldVT6AwO
    KlGl5sbWxexBjwFs
    • Install the new outer brake pad by sliding it into the respective grooves of the caliper mounting bracket

    • source.

  25. kdP4SiZMMAU5T1OO
    kdP4SiZMMAU5T1OO
    TjFHL1OInmRSglUN
    4fe4yAMwglWSk31t
    • If the brake piston is not retracted enough to allow for the additional width of the new thicker brake pads, installing the brake caliper can be more difficult

    • source.

  26. JJOURZS5IKdjlgJv
    JJOURZS5IKdjlgJv
    XDXOVRiOiM5SfmrV
    FhY6PZY1sOfvPVXm
    • Clean the caliper mounting bolts off with solvent and paper towels

    • source.

  27. 4lU61F5IvjjLeDKm
    4lU61F5IvjjLeDKm
    unBl1Zc4hCYN4fV1
    OpApBG61ALr2Rqwg
    • Apply a thin coat of high-temperature disc brake grease to the smooth sliding surface of the bolts before reinstallation

    • source.

  28. JWTZDpfcATtqcLRQ
    JWTZDpfcATtqcLRQ
    ZKJETmu4OyqeqLuC
    xQXGuO3p2YUeL61o
    • Tighten the bolts to between 21 and 30 foot-pounds using a torque wrench

    • source.

  29. eMnX5L53m4wojOPH
  30. ISEuNhHQMLtFPbpV
    • Reinstall the wheel and tire assembly

    • source.

  31. RWilr1RxoPwGDb4G
    RWilr1RxoPwGDb4G
    gFNnToSSOUpikEjh
    p2SlEXNIM2SZVUBV
    • Tighten all five lug nuts in a star pattern, torquing to 95 foot-pounds with a torque wrench

    • source.

    • After lowering the vehicle to the ground, re-torque the lug nuts to 95 foot-pounds.

Conclusione

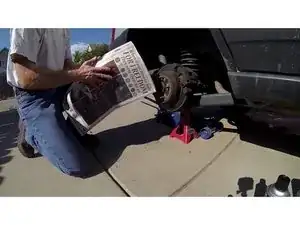
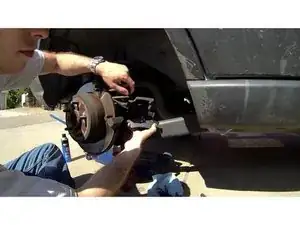
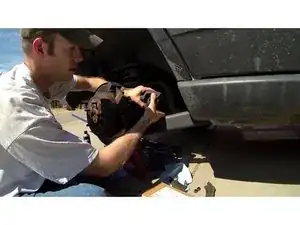
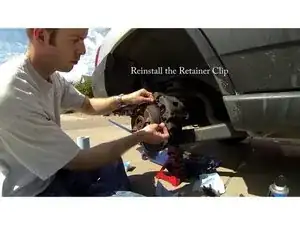
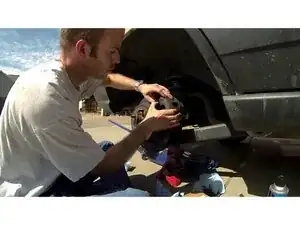
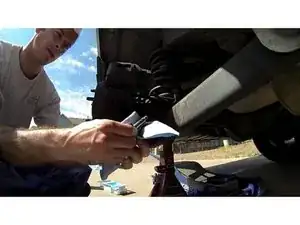
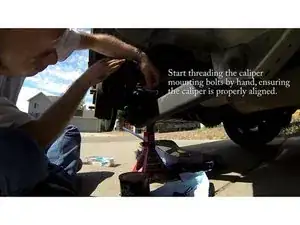
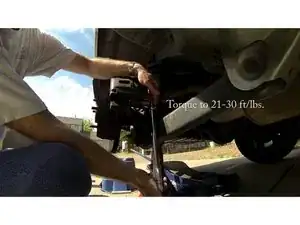
To reassemble your device, follow these instructions in reverse order.

eCuration

Membro da: 19/05/17

376693 Reputazione

2 commenti

So there is the option for the teves or akebono on these jeeps…what I am assuming is the teves have the wire that has to be detached as shown in this video, correct? I’d like to verify before I purchase the wrong parts and have to return the parts. Any help that you could provide to me would be great, thanks.

harrye04 -

Very good video overall. May I suggest #1) use a breaker bar to loosen and remove lug nuts, always pushing DOWN on bar instead of pulling UP . Pulling UP compresses your spine and can aggravate or injure folks, especially us older grease monkeys. #2) we usually do not replace brake pads without regrinding brake rotors first, but overall a VERY good video. Oh and nitrile gloves are a great way to protect hands from solvents ect. Thanks!! T.N.

anewmantnt -