Introduzione

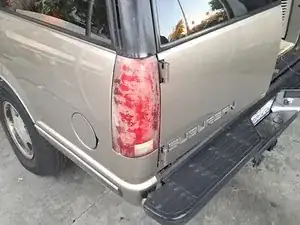
If your 1999 GMC Suburban’s brake lights aren’t working, you can utilize this guide to replace them. While not as widely known as the Chevrolet version, GMC produced a Suburban from 1937 to 1999.

Brake lights help other cars see that you’re slowing down or stopping. Without properly functioning brake lights, other drivers may have difficulty anticipating your movements, increasing the risk of a car crash, especially at night.

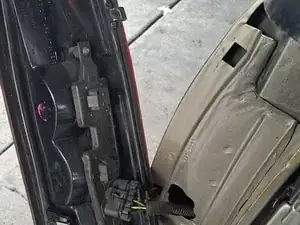
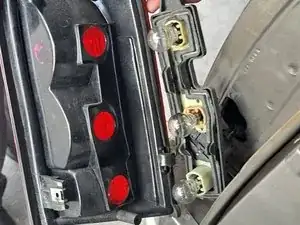
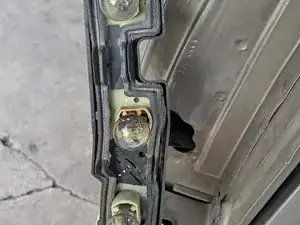
Step 5 requires you to remove the bulb from the socket. The bulbs are made of glass so handle them with care to avoid shattering them. In addition, avoid touching the glass with your hands, as the oil and salts on your fingers can cause a hot spot on the bulb, leading to a reduced lifespan. To prevent this, wear nitrile gloves. The bulbs tend to burn out around the same time, so if one goes out the others will follow soon after. When you replace one bulb, it is a good idea to replace all of them at the same time to avoid repeating the repair multiple times in a short period.

Before you begin, turn off your car, put it in park, and engage the emergency brake.

  1. yEO1kCBI1a3YRo5H
    yEO1kCBI1a3YRo5H
    3hIH4ZctLJukOISN
    DBX5EdWhIOhyrJXJ
    • Select the side of the car you would like to work on first.

    • Open the trunk doors.

  2. imyCCA36fAqHIhuL
    imyCCA36fAqHIhuL
    ByJEJxogCnR5gK1J
    BIV4epnTUl2T2dLh
    • These two holes have screws inside of them, unscrew them to get the brake light out.

    • The screws that will be removed for this step are "Round washer head pozi-drive tapping screw tail lamp assembly M4.2-1.41 x 20mm"

  3. RMGWoZFOmUVoFsFj
    RMGWoZFOmUVoFsFj
    t2tL3QrTEN2Ukvgd
    NtjIZlYeV1mCliJW
    • When removing the tail light there are little hooks with holes that are used to hold them in place as shown in the first photo.

    • The tail should already be loose from the previous step so pull it out slowly by turning it on its side and then pulling forward.

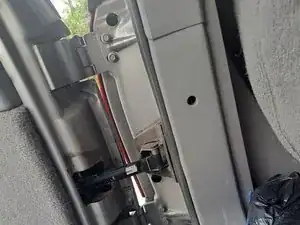
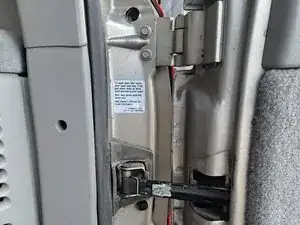
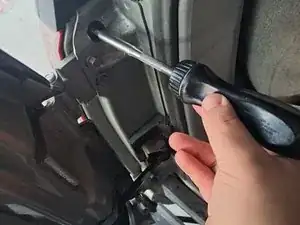
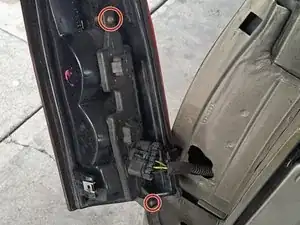
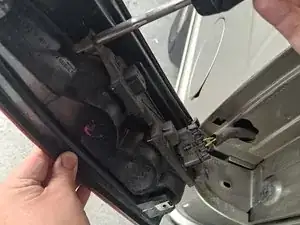
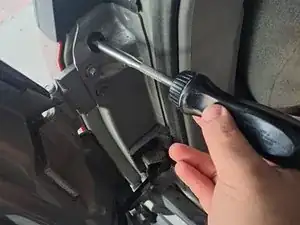
    • Use the 7 mm socket to unscrew the two bolts securing the brake light housing to the tail light assembly.

    • The screws in this step are "Rexka 30pcs M4.2-1.41 x 20mm".

  4. QDWERBvRsWepwfk4
    QDWERBvRsWepwfk4
    pqE1kKi1ItE5TqFH
    • After taking off the screws take the brake lights out and find which one isn't working.

  5. djICQuUMcWlTZHNN
    • With the actual light, unplug them by pulling them out but not with too much force.

    • If you don't feel comfortable gently pulling them out, slowly wiggle them out.

    • Now plug the new light bulb(s) in place of the ones that don't work.

    • Please be careful with how you remove the bulbs because they are made of glass.

  6. Wx31LAwcmaTucaWs
    Wx31LAwcmaTucaWs
    6rTeGfkLNkDq2Emx
    • Now put everything back together and put all the screws back on and in the right places (make sure the screws are on tight).

    • In addition, the steps are the same on both sides and is a fairly simple and fast process.

Conclusione

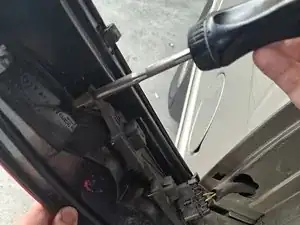
To reassemble your device, follow these instructions in reverse order.

Marcos Shipley

Membro da: 25/10/23

133 Reputazione

0 commenti