Introduzione

If you have problems with the laptop heating up, or the cooling fans need to be replaced or repaired, use this guide to remove and replace your laptop’s cooling fans.

  1. xROnipd3bMyyLfMd
    • Turn off the laptop and disconnect all device cords.

  2. TdN2sqSnFGLSRrCL
    • Flip the laptop over so the bottom is facing you.

  3. SAu1fy2ApvJhs5VR
    SAu1fy2ApvJhs5VR
    rCXOifHtFABvI6qS
    deqxK2yeuQcw6FAs
    • Use your finger or a spuger to pull the battery release switch.

  4. IrfZYF6GgRUtW1hL
    IrfZYF6GgRUtW1hL
    NScGuWC4LJFG5pMJ
    1eLjS5TOnBLg2LCP
    • Remove the battery from the laptop.

  5. EC1MCZRRdOOGrexp
    EC1MCZRRdOOGrexp
    ZCYRugQuXhNnkYMC
    • Remove nineteen screws from the back panel using a Phillips #0 Screwdriver .

  6. OEsvnH4qcSY65uvh
    OEsvnH4qcSY65uvh
    KPl3DjJr2QpGFv2v
    daQYEBhck441ysGG
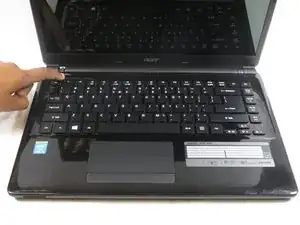
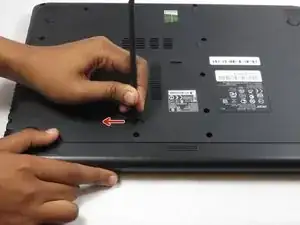
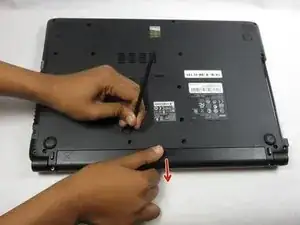
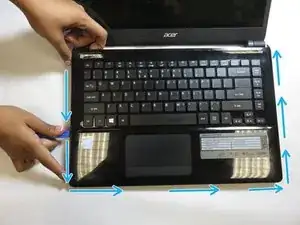
    • Run the plastic opening tool across from one corner to another along the edge.

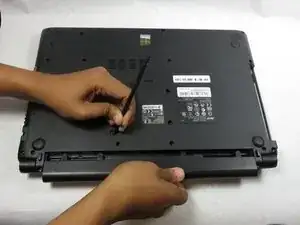
    • Separate the keyboard panel gently.

    • Lift the keyboard slowly from the laptop but do not lift completely because there are ribbon cables attached.

  7. IYHfKQrNsoKnFDTR
    IYHfKQrNsoKnFDTR
    1TXxMiWxJ1hGiCIw
    • Disconnect the two keyboard assembly ribbon cables from motherboard.

    • To release small ribbon cable, use spudger or fingers to flip gray bar along edge over.

    • To release larger ribbon cable, use pry tool or spudger to slide white plastic clip forward.

  8. twMixr5kKSxPCAOe
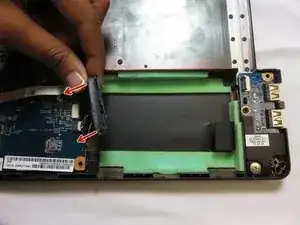
    • Pull up the release tab beside the hard drive.

    • Disconnect portion of ribbon cable that is covering the hard drive.

    • Handle the ribbon carefully. Do not break the metal contact.

    • While reconnecting the ribbon after replacing a new hard drive, face the blue side with a label up. Make sure the black line beside the sticker is not crooked, so that the ribbon is tight.

  9. LBeDsVPMpXMJyZ21
    • Remove the hard drive screw using Phillips #0 Screwdriver.

  10. UL1GlkYh66gWraOD
    • Pull the hard drive out gently. Be aware that it is connected to the adapter.

    • Gently remove adapter by pulling on both ends simultaneously to separate it from the hard drive.

  11. EtRQlPevX1PvJwSb
    EtRQlPevX1PvJwSb
    phkgkYu6mIal4kWQ
    4FU55iwgOlqRrE5U
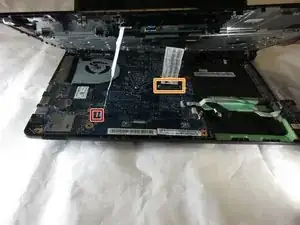
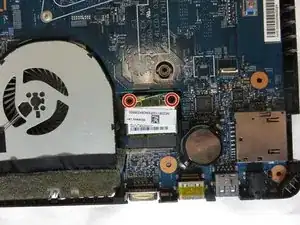
    • Remove additional screws that can be found on the motherboard.

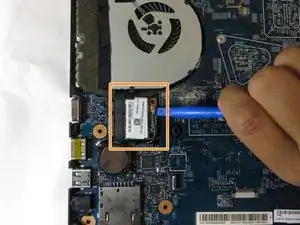
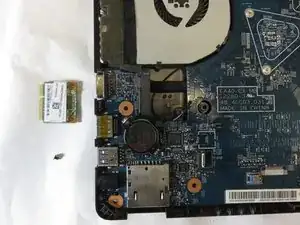
    • Remove the green wifi card from motherboard.

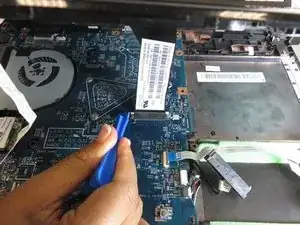
    • Use spudger to disconnect the fan and motherboard from laptop.

  12. gTSPqhddMZuxja5h
    gTSPqhddMZuxja5h
    KmUqmiMSpKYyNM55
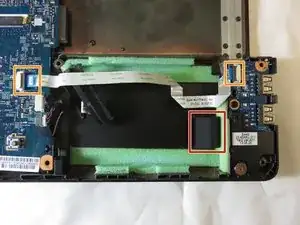
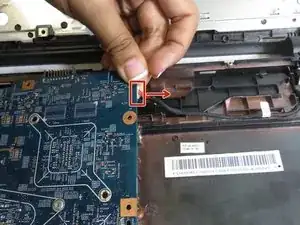
    • Remove the cable attached to motherboard.

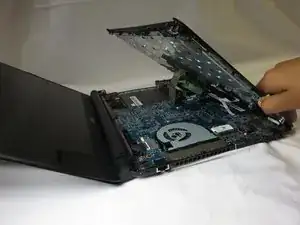
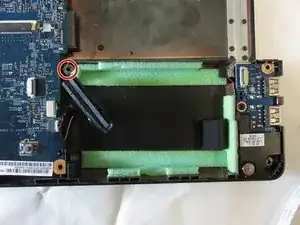
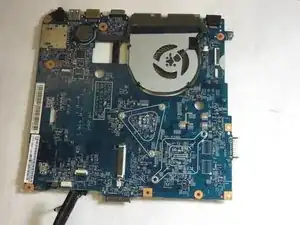
    • Gently lift and remove the motherboard from the laptop.

  13. FL2QnasY66KDINru
    FL2QnasY66KDINru
    roslD4PxWGd2pL1V
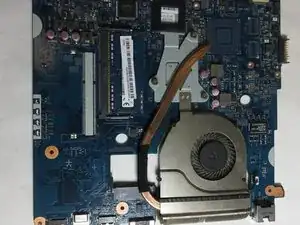
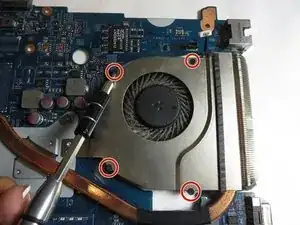
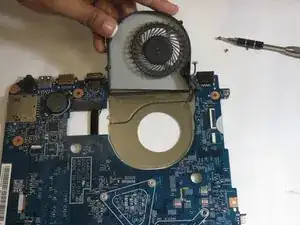
    • Flip the motherboard and fan piece over.

    • Remove the four screws using the Phillips #000 Screwdriver.

  14. bmqFhJg4aG3jsMbR
    bmqFhJg4aG3jsMbR
    u1BTZNPCxVGNbQdj
    AoYUZMKMfH3YEO4L
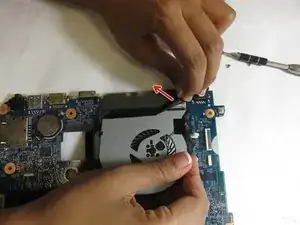
    • Flip the motherboard over and slowly remove the tape holding the cooling fan down.

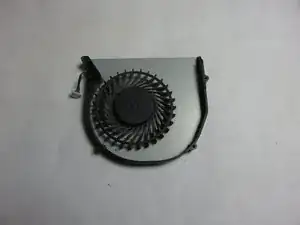
    • Use a spudger to remove the top of the fan from the base of the fan.

    • Remove the cooling fan component from both the tape and the motherboard.

Conclusione

To reassemble your device, follow these instructions in reverse order.

Faith Lobaton

Membro da: 22/10/18

497 Reputazione

0 commenti