Introduzione

  1. Ci1emy66YxoULWo2
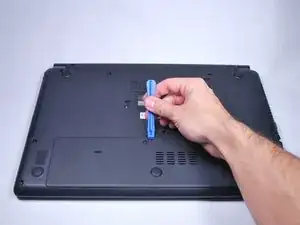
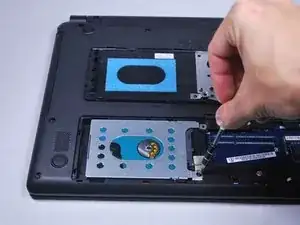
    • To release the battery, depress the battery release with a nylon spudger. Hold the latch down and slide it over.

  2. cuGAhIN6J62ZLpTA
    • Firmly grab hold of the battery and slide it out of the laptop.

  3. JgiZoOkQ1L3ReOPO
    • Remove the M2.5x8 screw with a PH1 screwdriver.

  4. lwDbYN4DalHEJipF
    • Use the plastic opening tool to pop off the small back cover.

  5. YARXjvM22xPd3SYA
    • Use a PH0 Phillips screwdriver to remove the screw securing the hard drive.

  6. 1LrxWBPbonqC32NF
    1LrxWBPbonqC32NF
    ityaLXRJucgaosgG
    • Use a nylon spudger to slightly pry up the hard drive near the screw holes.

  7. UwND5nuoqc153EHP
    UwND5nuoqc153EHP
    HhDtQeYKycmMP6EZ
    BdbDcPKeYCGjECT4
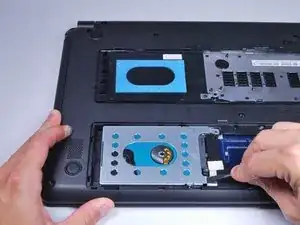
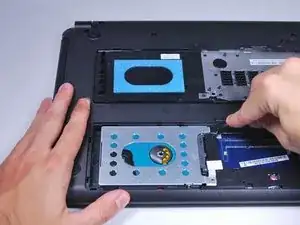
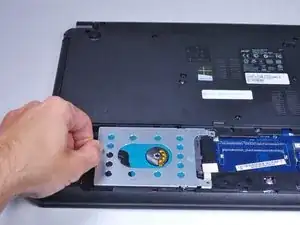
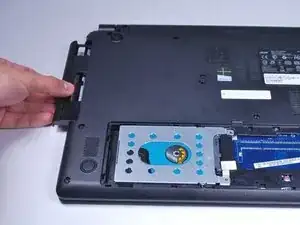
    • Grab hold of the plastic tab and pull the hard drive away from the connectors. This will release the hard drive.

    • The hard drive connector is fragile. Handle with care.

  8. cGuRMZKMpoJQOOcy
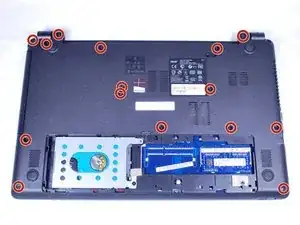
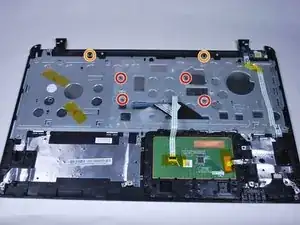
    • Remove the fourteen M2.5x8 screws highlighted in the picture with a PH0 Phillips screwdriver.

  9. Fk5IGTjtRaEJnCNB
    • Slide out the disk drive tray.

  10. Ln2MYAjl2oj6hvgR
    • Use the plastic opening tool to gently pry open the laptop.

  11. 6O5mh5hGiJKcawAN
    6O5mh5hGiJKcawAN
    CViuqaAP5xjtkxCc
    JdT11lWTW1DGiIAw
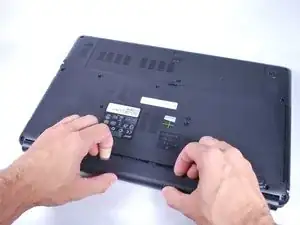
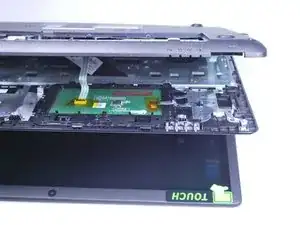
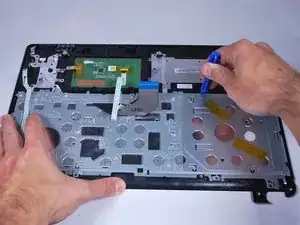
    • Rotate the back cover up a little to reveal the cables connected to the motherboard.

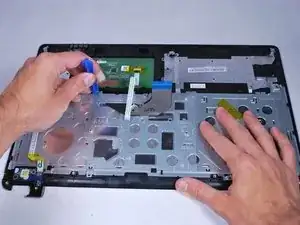
    • Unplug the cables by sliding them out of their receptacle.

    • The connectors are very small and fragile. Handle with care.

  12. kAAXiiASiCpWFVxr
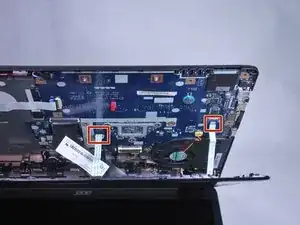
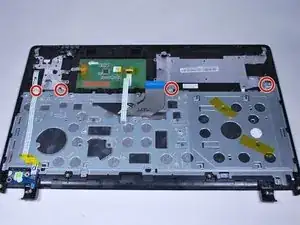
    • Remove the four center panel M1.6x3 screws with a PH0 Phillips screwdriver.

    • Remove the two M2x3 screws with a PH0 Phillips screwdriver.

  13. YfnnMLcAuFNNgiKa
    YfnnMLcAuFNNgiKa
    NkfkQcqM2EAMwEmh
    LsJXjTteJGr6mWnV
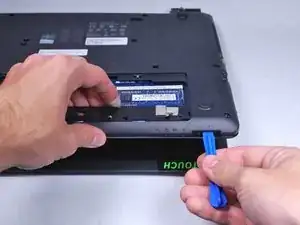
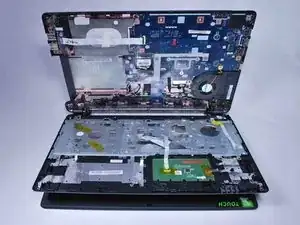
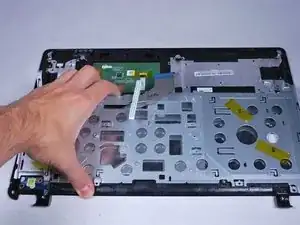
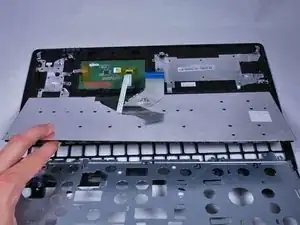
    • Use the plastic opening tool to slide the metal part out to release it from the retaining tabs.

  14. dGX6TKrH5MtBIkUe
    dGX6TKrH5MtBIkUe
    ypgRvJsLlTgpILFU
    • Peel off the foil adhesive stuck to the keyboard.

  15. GTTK12KSonqmrhXN
    • Remove the keyboard.

Conclusione

To reassemble your device, follow these instructions in reverse order.

Caleb lindsay

Membro da: 11/04/16

778 Reputazione

0 commenti