Introduzione

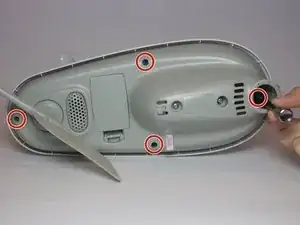
This step is required to replace the wind cups and solar panel. This section of the repair only requires a screwdriver.

  1. ZNsNxWNdq2HbfSGU
    ZNsNxWNdq2HbfSGU
    vD6w2suZwYLiK5Xb
    TOoRScvG6KuJ452O
    • Remove the battery compartment lid by lifting upward.

  2. aZgwxARfltbU1Wi5
    • Pull the ribbon to eject the 2 X AA alkaline batteries.

  3. kMdJwaJucelbVtCZ
    kMdJwaJucelbVtCZ
    WQCjbNKgIIUdYKBV
    3wdIOHru2uJ2feMX
    • Once the batteries are removed, it is safe to proceed.

  4. yUEWAYaGA6wbRZ2d
    • Remove the four 0.8cm screws that attach the bottom panel to the device

    • An extended driver is needed to reach 3 of these screws. If you are using the 64 - bit driver kit you can extend the driver by inserting the driver PH1, (Phillips size 1) into the size 4 hexagonal adapter.

  5. OB4JBpvydr3frJef
    OB4JBpvydr3frJef
    OUIHndUIQutdsvoF
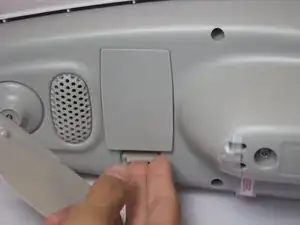
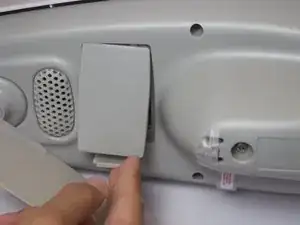
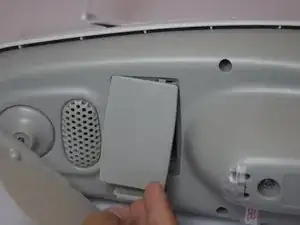
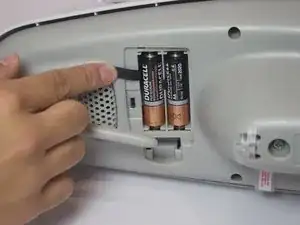
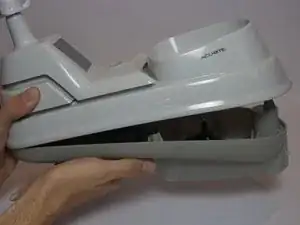
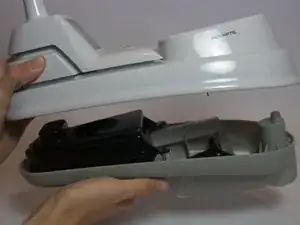
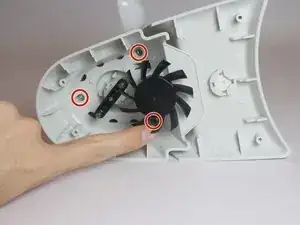
    • Gently lift the top section of the weather center away from the base. With all the screws removed it should lift off easily.

  6. Hf6FaPrXkNGPEAaG
    • Remove the four 0.8cm screws inside the case located near the fan using the J1 screw bit.

  7. 6jkUZnuOfQlnNiWi
    • Remove the three 0.8cm screws inside of the solar panel housing.

  8. 11dmbJuUmTfikDEG
    11dmbJuUmTfikDEG
    H2J2qTwypmoTC5SF
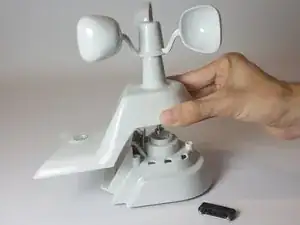
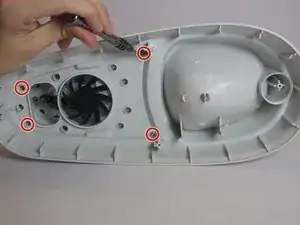
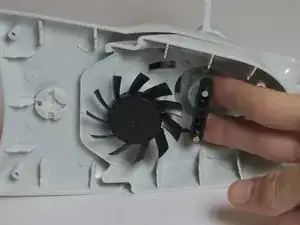
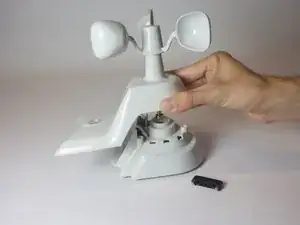
    • Gently twist and pull the black magnetic axle until it comes off. Hold the wind cups still in order to remove the axle easily.

    • Do not apply too much force to the axle or the wind cups. Light twisting or wobbling it side to side should loosen it enough for the axle to come off easily.

  9. tXcQ2rrsWeBR2pt1
    • Carefully slide apart the two parts of the solar panel housing.

Conclusione

To reassemble your device, follow these instructions in reverse order.

Henry Lwin

Membro da: 15/09/16

180 Reputazione

0 commenti