Introduzione

This guide will show the procedure for removing each segment of the pump rod. It can be used to replace the entire rod, or just to replace a single pump rod segment.
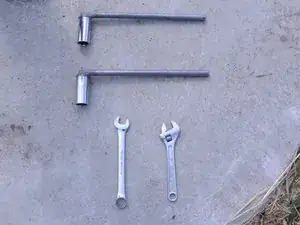
  1. FhPbCTNvohW3y6Ce
    FhPbCTNvohW3y6Ce
    waXx4TtWIhXF1BnF
    • Assemble the required tools, including the Afridev tool and crescent wrenches.

  2. gJrvuPQEkX1UumLA
    gJrvuPQEkX1UumLA
    FYeV5eQbwykFiGWJ
    qUA1IloNsXRdp26B
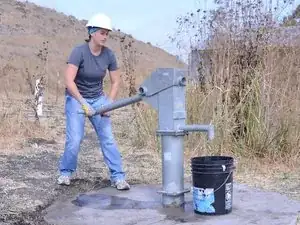
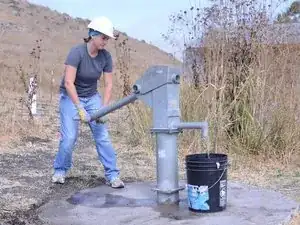
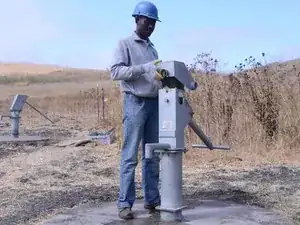
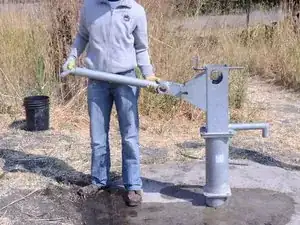
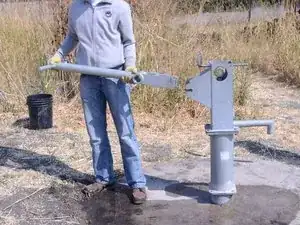
    • Perform a water test on the pump, by raising and lowering the handle a full 40 strokes. A properly performing pump will yield greater than 10 liters.

  3. IWA1LIds4LCSOdNf
    IWA1LIds4LCSOdNf
    C5MEHDf2OafhsRHo
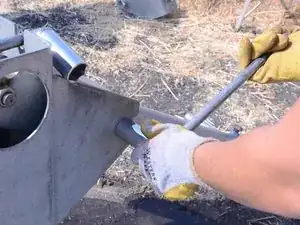
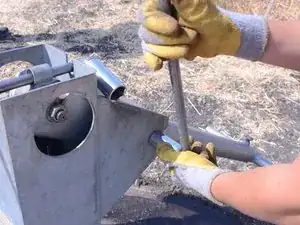
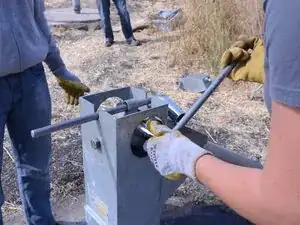
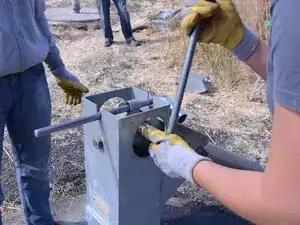
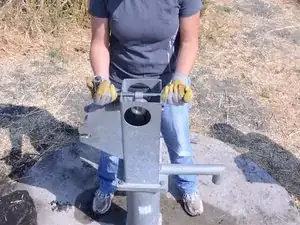
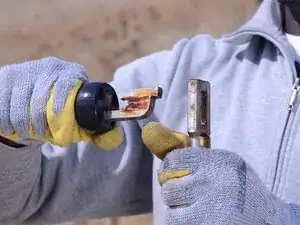
    • Loosen the bolt on front of the face plate with the Afridev tool.

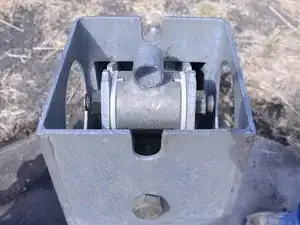
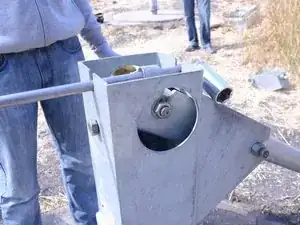
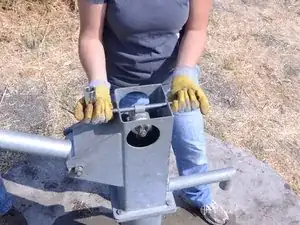
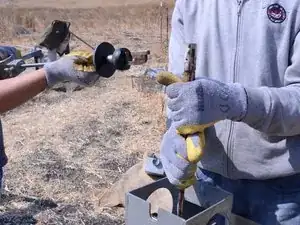
    • Remove the plate from the pump by lifting it straight up.

  4. wrEawT23OkuYMc5y
    wrEawT23OkuYMc5y
    5kDOChRTUEaaIsdJ
    rqq3ijWHpeFkjHXJ
    • Insert the T-handle into the top cylinder of the exposed pump rod.

  5. pgG5VmlTyhKxOHpw
    pgG5VmlTyhKxOHpw
    amyGDp5JbAlFaHAL
    • Loosen the 2 bolts on either side of handle.

    • It is not necessary to remove the bolt at this time; however, take caution to not let the bolt fall out of the handle.

  6. BGMVmB3GKVkfVQfk
    BGMVmB3GKVkfVQfk
    aXnBFwWQVSLgXX5L
    TnOOubFGMJtHHG6p
    • Loosen the 2 bolts on either side of the head to remove the handle from the pump rod.

    • It is not necessary to remove the bolt at this time; however, take caution to not let the bolt fall out of the handle.

  7. nNxmxoNQDVDXMcFG
    nNxmxoNQDVDXMcFG
    dHqn6KCLWQk2ChXC
    • Lift the handle to a horizontal position.

  8. pYELvZHDGJE6VNQX
    pYELvZHDGJE6VNQX
    hPRlGvX4RbcN5Sgh
    COKQQcdWLsbMls5D
    • While one person lifts up on the T-handle, remove the bolt and connection pieces.

  9. KhlCA6Mptm4bGw3N
    KhlCA6Mptm4bGw3N
    jjgUiFhJ1QsRn4Y5
    N5HOJbGvWS1kZUJx
    • Remove the bolt and connection pieces from the handle.

    • Set the bolt pieces in a sanitary place, such as a bucket, to prevent contamination.

  10. vc35hWOSsVT6mRVV
    vc35hWOSsVT6mRVV
    ZOSLdTRFFOLG5KFC
    • Remove the handle from the pump.

    • Be sure to set the handle in a sanitary place to prevent contamination.

  11. fKaRXnbxuKtDXYJl
    fKaRXnbxuKtDXYJl
    5TRXmYEXSPHQg6yW
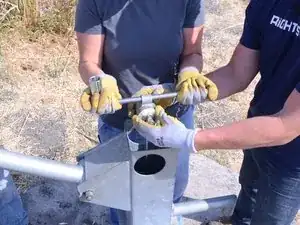
    • Grab firmly on the T-handle and lift the pump rod straight up.

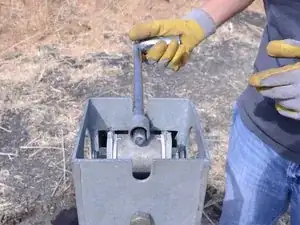
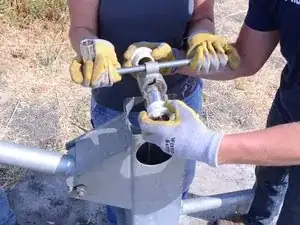
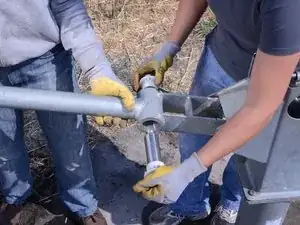
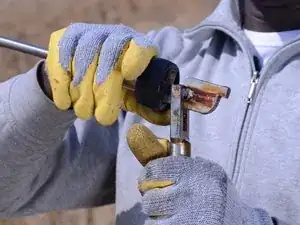
    • Expose the first connection of the pump rod, and support the portion below the connection.

  12. MqPNnBxCohePfr1l
    MqPNnBxCohePfr1l
    GSGQ1WLlSCR4JaYr
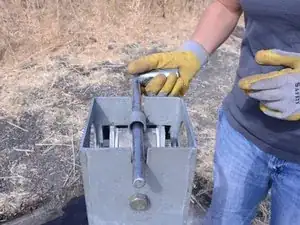
    • While holding the pump rod below the first connection tightly, lower the first portion of the rod to a horizontal position.

  13. 5HAXoRm4L2YnLRQo
    5HAXoRm4L2YnLRQo
    lBYGVRO5RJUsVBGA
    AZgsmJJTAOSgoG3Z
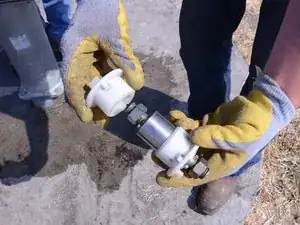
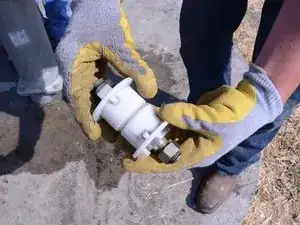
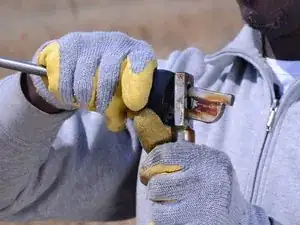
    • Unhook the first connection by pushing it out and down, then pulling it away from the rest of the rod.

  14. kuvbcanDV5QGYlXR
    kuvbcanDV5QGYlXR
    NZH2g1GH6Z2sSKlA
    McjjH4DbstuHfPOG
    • Repeat steps 11-13 for the remaining sections of pump rod.

    • Be sure to set the pump rod segments above the ground to avoid contamination.

Conclusione

To reassemble your device, follow these instructions in reverse order.

Jake Devincenzi

Membro da: 18/04/11

117210 Reputazione

0 commenti