Introduzione

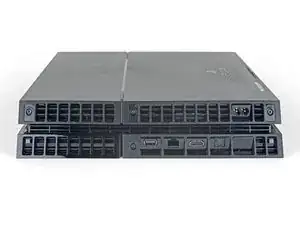
Questa è una guida prerequisita! Questa guida è parte di un'altra procedura e non va seguita da sola.

  1. 21LJYnUT534diPkY
    • Rovescia la PS4 disponendola con il retro rivolto verso di te.

  2. kywHHmkOcswPFDjm
    kywHHmkOcswPFDjm
    g3p1nmGqDLvNYlwD
    HVJTWJOoL6cUcoBS
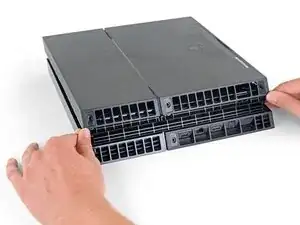
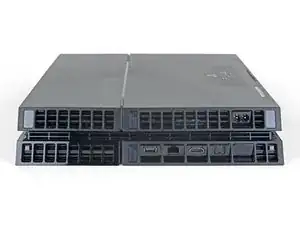
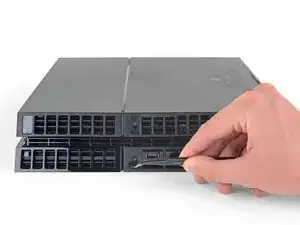
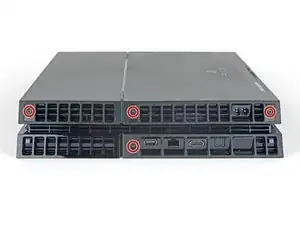
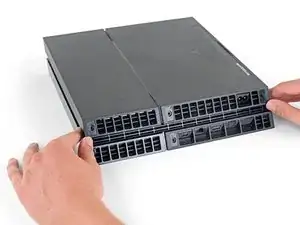
    • Usa le pinzette per rimuovere i due adesivi al centro del retro della PS4 per esporre due viti della scocca.

  3. QGDNpTn4LrZHSr2F
    QGDNpTn4LrZHSr2F
    MLVk3bQRWjJpjhKh
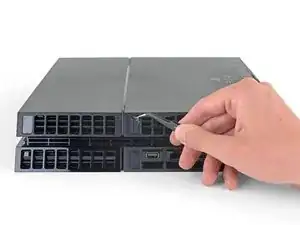
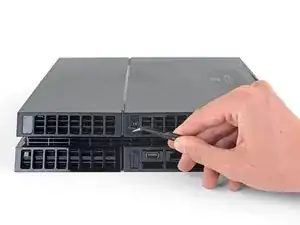
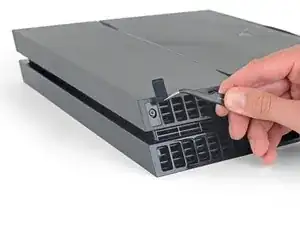
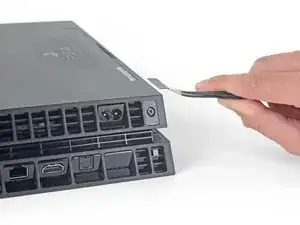
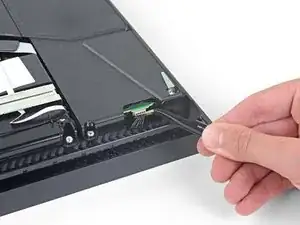
    • Usa delle pinzette per rimuovere con delicatezza le cover delle viti che trovi in ciascuno dei due angoli, esponendo altre due viti.

    What If my PS4 doesn't have the two screws on the side

    Michael Jimenez -

    I should imagine that plastic cover will come off?

    How did you go?

    Cary B -

  4. EoWfJjtMRGNijIDA
    EoWfJjtMRGNijIDA
    kPwQlcOBVwv2PxuA
    • Rimuovi le 4 viti Torx Security da 7.2mm dal retro della PS4.

    I only have two screws, those in the middle of the console.

    Oscar Martinez -

    Have you removed the plastic covers mentioned in the previous step? That will expose the other two screws.

    Sam Omiotek -

    same, here. there are only the middle screws, no covers or screws on the sides. and it sits pretty tight

    Johannes Müller -

    turns out 12XX models are different. Look at this for reference: https://www.youtube.com/watch?v=Hpr0z0ve...

    Johannes Müller -

    This video guide is very useful, thank you. The disc drive itself is different than this ifixit guide too

    UnitedShoes -

    Yes there is slight variations between the first models, and the second gen and on models. I have an original and only has the two screws in the middle, removal of the cover remains the same.

    Mary Westphal -

  5. kbpHqgpXdtdVifwo
    kbpHqgpXdtdVifwo
    gtKNupdgQ44yDPVf
    • Solleva la scocca inferiore con le mani e rimuovila.

    • La scocca inferiore è bloccata in posizione da clip di plastica. Può rivelarsi necessario applicare una forza apprezzabile per rimuoverla.

    sur la version 2 de l ps4 fat il n'y a que les 2 vis du milieu. Comment défaire le boîtier ?

    nlvolle -

  6. coGRVtdMr6vYQIWw
    coGRVtdMr6vYQIWw
    BGP5HaSrJNavVLaN
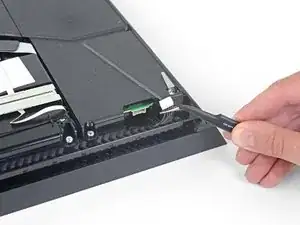
    • Usa delle pinzette per estrarre, sollevandolo, il cavo dell'alimentatore e disconnettere l'alimentatore dalla scheda madre.

    • Se il connettore non si stacca, utilizza con delicatezza uno spudger per scollegarlo.

    This part looks dangerous. There should be a flag/warning not to destroy that cable yes?

    Shawn -

    I second Shawn's comment. That cable seems to be very fragile, and one of the wires snapped on mine while removing the cable. It wouldn't have bothered me so much, if it wasn't a pain to find a replacement for it.

    Matt Gaia -

    The tweezers used here, do not cut it. Not enough grip.

    I had to use a set of needle nose pliers to remove this.

    Cary B -

    Power supply connection stuck. I don't want to damage it

    Nick Alex -

    What you need to do here is be patient. Do not pull the wires. Get some fine nosed pliers, wiggle the white connector from left to right in small movements and edge it out slowly. You can also use your nails one finger at each edge of the white connector to do this.

    David Harkness -

    Its really hard but i managed it with both of the tweezers/pincers at the same time


    1. Keep in mind to pull not too hard on the wires and make step 2 and 3 simultaneously!

    2. the straigt and wider tweezer to pull the white connector itself
    (top and bottom grip)
    3. the small and angled tweezer to pull the wires carefully
    (as shown on the picture above)

    dinkelberg01 -

    Another option, is to remove the screws holding it down, leave the cable in place and lift it out carefully, revealing the other end of the connection. The hidden side of the connection wire is easier to get a handle on.

    Mary Westphal -

    I concur with David, some patience and a lot of wiggling did it for me despite the stubbornness of the connection. Does seem like this one varies a lot in how difficult it is to remove.

    hazelrat -

    My connector wouldn't budge no matter how much I wiggled it. I solved it by lifting the power supply out and disconnect the connector at the other end (mainboard end)

    _I_ -

Conclusione

Per riassemblare il tuo dispositivo, segui i passi descritti in ordine inverso.

Porta i tuoi rifiuti elettronici a un riciclatore certificato R2 o e-Stewards.

La riparazione non è andata come previsto? Prova la nostra comunità Risposte per trovare aiuto nella risoluzione dei problemi.

Confronta la tua parte di ricambio con quella originale: potrebbe essere necessario il trasferimento di alcuni componenti o la rimozione di protezioni adesive dalla nuova parte prima di installarla.

Sam Omiotek

Membro da: 25/02/19

71885 Reputazione

0 commenti