Introduzione
Through this guide, you will be shown how to disassemble the headset Astro A40 TR Plus Mixamp M80 and its motherboard, saving your headset and you the cost of replacement of the whole product.
A motherboard is an important component of the headset that improves the performance for many things, like audio. The audio is determined by the soundcard on the motherboard. Having a faulty motherboard can result in poor audio quality, especially if you use your headset in high volume.
Before beginning this guide, check to see if there is any dust in the headset audio port of the computer. If so, you can try and use an ESD-safe brush or small dust blower to take out the dust. Make sure to test different headset chords with your audio port to be sure the problem is only the dust.
After plugging in your headset to the computer and you still hear a background hissing sound, or notice an overall change in the audio quality, then you’ll need a motherboard replacement.
Ricambi
-
-
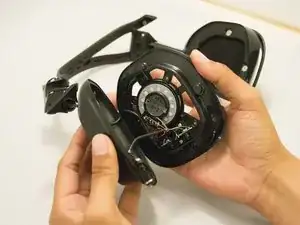
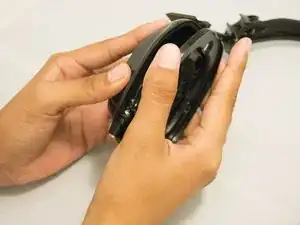
Use your hand to firmly grasp the cushion and remove it from the speaker.
-
Repeat the process for the other side if needed.
-
-
-
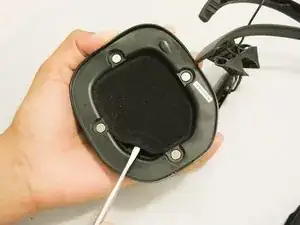
Slide the plastic spudger beneath the dust cover of the speaker.
-
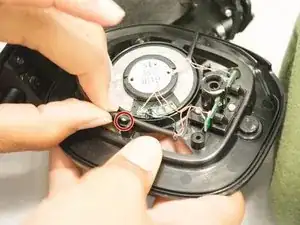
Lift the dust cover up with the plastic spudger.
-
Using your fingers, completely remove the dust cover from the speaker.
-
-
-
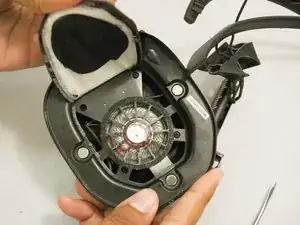
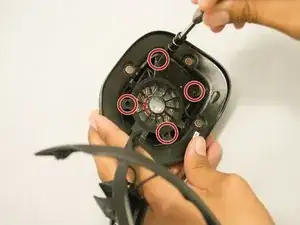
Remove four 5 mm screws from the speaker protector using a JIS #1 screwdriver.
-
Use your hands to remove the speaker protector.
-
-
-
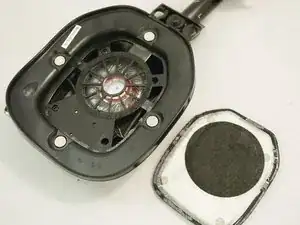
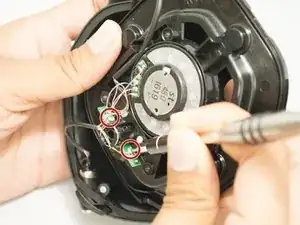
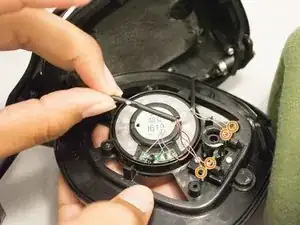
Use your fingers to hold the wire located by the covered part and gently lift it out of its cradle.
-
Carefully use your fingers to disconnect the colored wires connected to the motherboard.
-


To reassemble your device, first ensure the new replacement motherboard has been installed (by going through the directions in reverse), and then by retracing the steps backwards. This will ensure that your headset will be properly reassembled.