Introduzione
Authors note: For small spaces like the one in this guide (roadkill coffee table a friend was throwing out), setup will require additional material to successfully work around issues like how much you can have visible in the space due to issues like short surfaces and being limited by material choices like glass.
How to build:
*2x pieces of wood (15mm recommended, 12-13mm workable with short screws)
Authors note: I used 18.7"Wx29"L scrap wood I had from an old desk that was 12mm thick.
*Flat braces (L shape or flat style used on desks)
*Optional: Protective back sheets
SOFTWARE WARNING: The software portion will likely age out before any other areas in this guide as a byproduct. As such, there will likely be discrepancies in this area as this guide ages and software releases from Adobe and others are released. I will keep up the best I can, but will likely leave old screenshots for extended periods.
PLEASE READ: this guide does not cover how to configure lights like LED video lights from companies like SmallRig, Genaray, Meiki (and other brands); my goal with this guide is to show how to setup a low-cost setup with significantly better performance. While dedicated photo/video LEDs are much better, these are expensive at ~$60+ and many require dedicated stands (~$20-38) or a tripod. While some of these are cheaper upfront if you forego the in-box power adapter, the cost can still add up if you need to buy these.
UNLESS you score a deal on these panel lights from a photo studio, eBay (or a classified site), they tend to be significantly more expensive. As such, this guide uses a different setup: 2 >90 CRI LED bulbs and reflector lights. These are not as good as a dedicated LED, but are much cheaper.
WHAT IS THE CATCH? While cheaper, the performance is nowhere near as good as a 12-18V studio LED, particularly regarding light spread and CRI*. Most photo/video LED panels are 95+ CRI and much more color-accurate but are priced to match outside of lights which do not include a power supply like Mieke.
*Only an issue with big box stores. 90CRI bulbs are available but are not commonplace. Check the color temperature as these stores do not sell a lot of "daylight" bulbs compared to "Soft white" bulbs.
Note: This guide does not cover basic photography techniques. Refer to these existing resources:
Strumenti
Ricambi
-
-
Smartphone: The camera you already have. For the most part, many have cameras which are good enough (or are "P&S quality"). While not as good as a Mirrorless or DSLR camera, image quality is generally good enough.
-
Mirrorless: These are similar to DSLRs but have fewer moving parts and smaller bodies. These use the same sensors as DSLR cameras, but have different lens mounts. In most cases, older SLR lenses can be used with an adapter (Sony LA-EA, Canon RF>EF, Nikon F>Z).
-
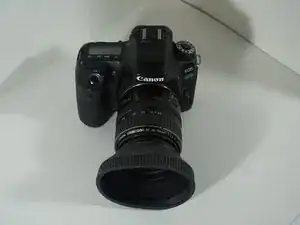
DSLR: Similar to Mirrorless cameras, but use different lenses and have larger bodies. These still get better battery life compared to mirrorless cameras. It is not uncommon for lenses to be cheaper due to the used market. NOTE: I am showing a prosumer DSLR, but it is not required.
-
Point and Shoot: Due to smartphone camera advancements, these have become less common but are still worth considering. Due to smartphones being “good enough” today, MOST P&S cameras have been discontinued. You are (generally) better off with a used high-end P&S these days.
-
-
-
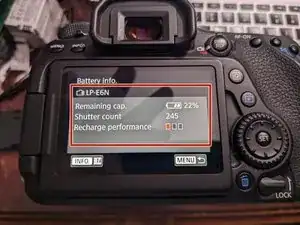
Refer to your camera's menu system to see how to check this as each brand is different. For example, the battery I got with my Canon 80D from 6/2017 is essentially in very poor condition and "end-of-life". I still use it but I do not trust it in the field without a healthy pair of spares.
-
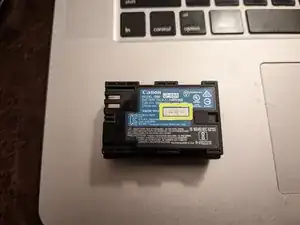
The seller this 80D came from "included" this battery, but likely knew it was nearing the end of it's usable life. I cannot verify this as absolute fact, but this is VERY common with used cameras.
-
Batteries without monitoring: If your battery has no/poor monitoring, look for a date stamp. If it is over 3 years old WITH limited runtime, consider it consumed.
-
-
-
CFL (AVOID): Avoid using CFLs, even on clearance. They are not as bright as LEDs, take time to warm up and contain mercury (disposal is hard). They also tend to fail young due to cheap ballasts and components that do not get along with heat.
-
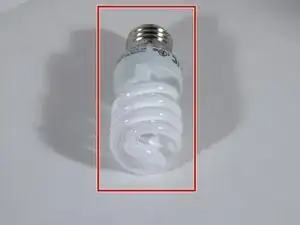
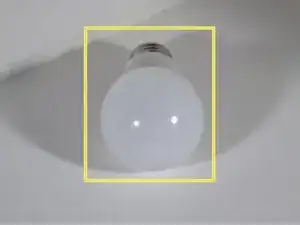
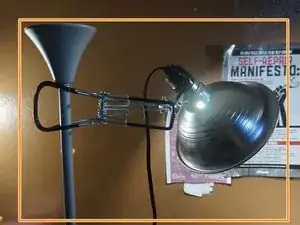
BR30/40: These produce a focused beam of light which can result in better photos compared to omnidirectional bulbs. These bulbs must be used in a specific direction by design.
-
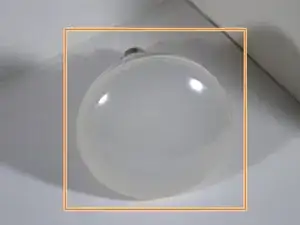
A19: While these work the light can be somewhat unbalanced or scattered without redirection. You must use a minimum of 100W for good photo lighting.
-
Multi-panel workshop lighting: These produce significantly more light than floodlights, but can only be used where weight is not an issue and well spaced to avoid overexposure.
-
-
-
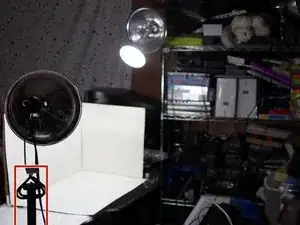
Side lighting
-
Tripod or light stands: If you can find a pair of quality tripods, these can often be used as makeshift light stands. High-end tripods are not required, but nice to have.
-
Standing lamp: Space may be an issue with lamps that have a base, but if you can make this work a broken lamp (with the cord and socket removed) can be used.
-
Edge cases
-
Over the top: This method requires specific setup conditions not always feasible without a dedicated workspace. However, this method can allow the use of one bright LED instead of 2 when it works (must use 1,500-2,000+ lumens).
-
Side clamping: This works in a pinch, but should be considered a last resort. Light placement may be restricted which can show in the final photo. Look into better options first.
-
-
-
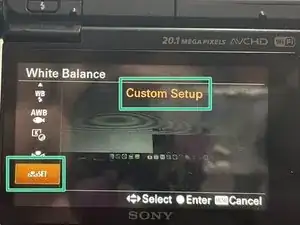
Sony: Sony a5X000 (SW driven) Sony Alpha (Advanced, a6X00 and up) Sony NEX (FOR NEX-5N; NOT CHECKED)
-
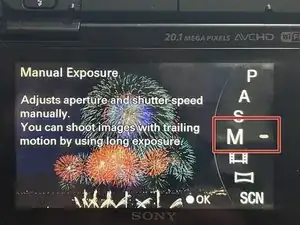
Switch the camera into a Manual mode (P/A/S/M; doesn't matter). You MUST be in a "manual" mode to use custom WB settings.
-
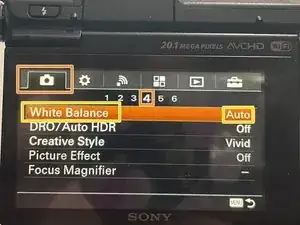
Open the menu and select the following: Camera settings>White Balance.
-
NOTE: The location of the white balance setting varies from camera to camera. Keep this in mind if you do not see the setting as shown in my demo a6000. (Ex: a6000 is Line 4, a6100 is under Line 9 and a6300 is under Line 5.
-
Select the White Balance option, and scroll down until you see Custom Setup. Take a picture of your lighting setup and press the Enter button to save it to the camera.
-
-
-
Take a picture of your workspace without any objects; it must be empty and have no outside elements to affect the WB. Full auto can be used.
-
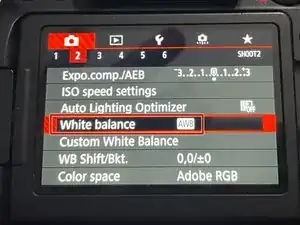
Put the camera in one of the 4 manual modes (P/A/S/M). Select the red menu (Menu 2), then select Custom white balance.
-
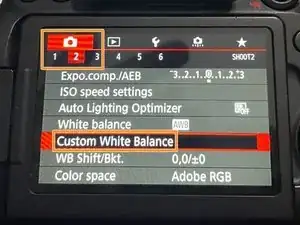
Select the white reference photo. Press SET on the camera. Once this is done, the camera will save the custom white balance.
-
-
-
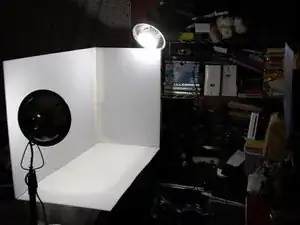
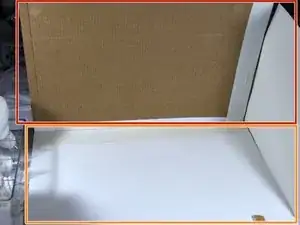
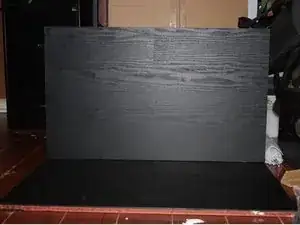
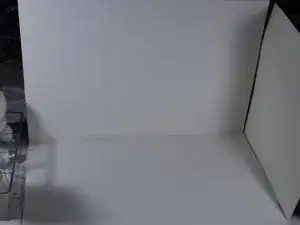
Setup a backdrop support. This can be anything from a trifold board cut in half (the style you used in "school") or a custom design. I chose a custom design to conform it to my design spec and make the modifications I wanted.
-
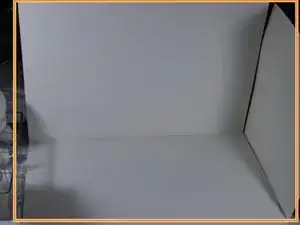
Setup your white background. Once the backdrop is stable, minimize as many unsightly areas as possible. You are ready.
-
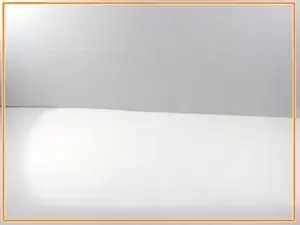
Take a few test photos (Optional). If you are unsure about the end result, take 1-2 test shots for review. Make adjustments until you are happy with the end result.
-
-
-
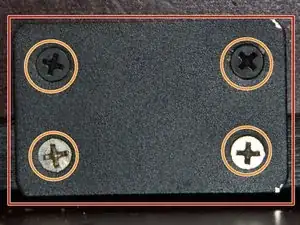
Place a few support brackets on the lower piece. Add screws as your brackets permit.
-
Hold the top piece up and add screws to the top side.
-
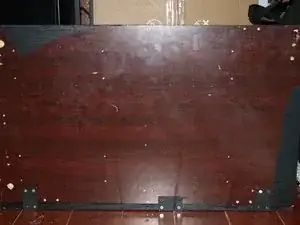
Once assembled, you are ready to use the backdrop.
-
-
-
Affinity Photo (Paid): My preferred choice due to RGB/8/16/32, CMYK, LAB/16, and TIFF RGB/32 color mode support and better high-end printer support. This also has features only found in CC/Legacy CS or full features which are automatic only in PSE. This is a one-time purchase; major upgrades are paid.
-
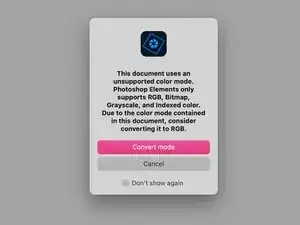
Photoshop Elements (Paid): For most people, this is sufficient but with limitations NOT FOUND in CC/Legacy CS: Advanced functions are automatic only and only supports RGB/8/16* (*downgrades to RGB/8). HDR RGB/32 support is limited to JPG files. While it "works", there are restrictions not found in other programs or CC.
-
DXO PhotoLab (Paid): This is similar to Lightroom before Adobe discontinued non-Saas Lightroom. This is a one-time purchase (3-seat license). I used the trial for this guide.
-
Luminar Neo (Paid): This application is primarily AI driven. It can be purchased one-time or as a subscription. Subscriptions include all extensions (not included with one-time purchase).
-
Free (Mac): There are fewer free Mac programs. However, Darktable (Gatekeeper bypass required) and GIMP run on Macs. There are also free apps in the App Store (NOTE: Most App Store apps push subscriptions!)
-
Free (Windows): For Windows users, there are significantly more free apps available outside of App Stores. For example paint.net is Windows only, while GIMP and Darktable are available for Windows and Mac.
-