Introduzione
Replacing brake pads can be a useful skill especially if you ride a bike with the popular V-brake assembly. If you feel that your bike's brake levers are almost touching the handlebars when squeezed or the bike takes a longer distance to stop, then your brake pads may be worn out.
This guide will provide steps to replace the brake pads on a bike with a V-brake assembly.
Before consulting this guide, please ensure that your bike does have a V-brake assembly.
Strumenti
Ricambi
-
-
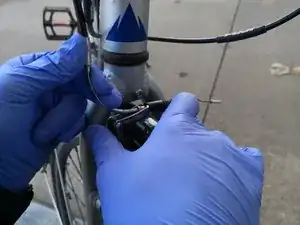
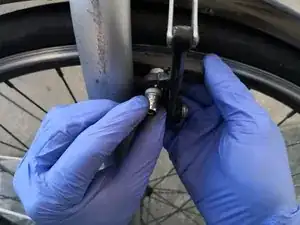
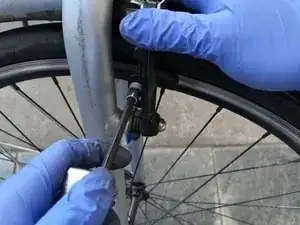
Position yourself directly next to the noodle (curved metal tubing) of the V-brake assembly.
-
Squeeze both arms of the V-brake assembly towards each other with the thumb and index finger of your right hand.
-
Angle the noodle downwards by simultaneously using the index and middle fingers of your left hand to gently hold the noodle in place while pushing the noodle forward with your left thumb.
-
Use your right index finger to push down the quick release hinge once it is pushed outside of the small metal tubing.
-
-
-
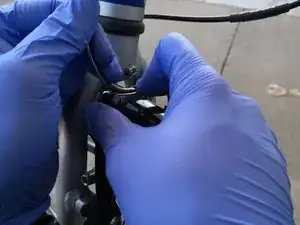
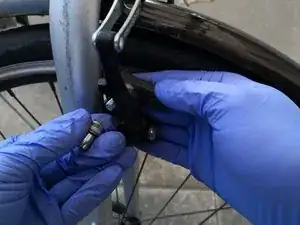
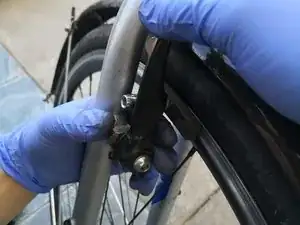
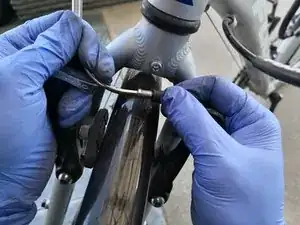
With a 5mm Allen wrench in your left hand, slightly loosen the outer nut by turning it in a counterclockwise motion.
-
While loosening the outer nut with the Allen wrench counterclockwise, support the brake pad with your right hand under it to counterbalance the force.
-
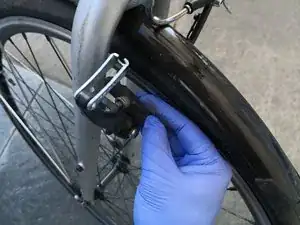
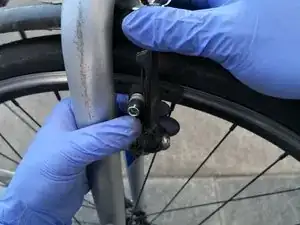
Quickly put the wrench aside and fully loosen the outer nut and following washers with your left thumb and index finger.
-
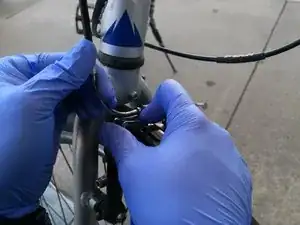
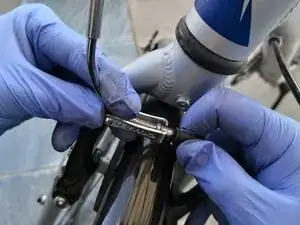
Take out the brake pad by using your right fingers to tilt down the pad and adjacent washers, keeping the washer sequence in mind again.
-
-
-
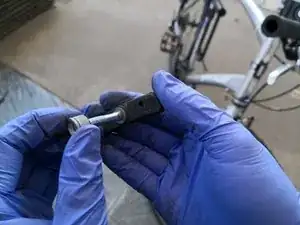
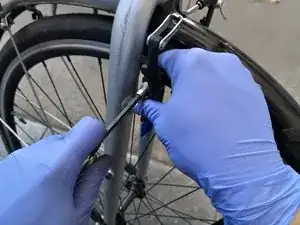
Obtain the new brake pad and insert the inner washers, minding the sequence, into the threaded screw attachment.
-
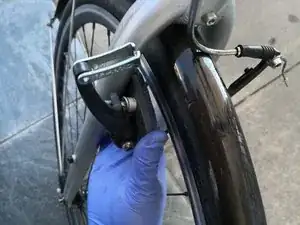
Insert the above attachment back into the assembly arm hole, stabilizing it with your right hand.
-
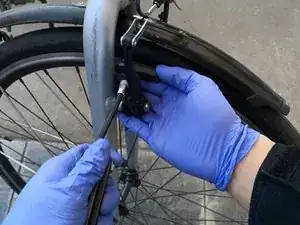
Twist in the outer components (hex nut and outer washers), minding the sequence, into the rest of the threaded screw that passes through the arm hole.
-
-
-
Slightly loosen the outer nut to adjust the height and angle of the brake pad to align exactly with the rim of the tire. Re-tighten the nut with the Allen wrench once finished.
-
-
-
Put the quick release hinge back by squeezing both assembly arms together and pushing the hinge into the metal tubing adjacent to the noodle.
-
Repeat the process for the other side of the tire if necessary. You may switch hand configurations if it feels more natural.