Introduzione

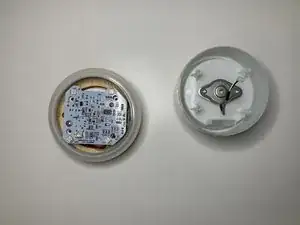
A diffuser's fan and battery are common faults in a diffuser breaking down. The fan keeps the internals of the device, like the motherboard, from overheating. In this guide, we replace a fan from a Blossom Ultrasonic Essential Oil Diffuser ARM-510GY.

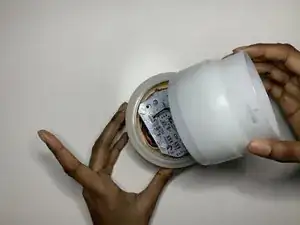
Before disassembling the diffuser, make sure there is no oil or water left in the diffuser and make sure the diffuser is unplugged.

  1. hSfCgfQ6vCcCkOVb
    hSfCgfQ6vCcCkOVb
    nMiAyBt3rU3ei4eS
    pPPdUmJSJRS1uEwy
    • Make sure the diffuser is not plugged into a socket and that there is no water or oil near or in the diffuser before beginning the guide.

    • Use a Phillips #2 screwdriver to remove the four 8 mm screws on the bottom of the diffuser.

  2. aanTaowZGiQxQLHd
    aanTaowZGiQxQLHd
    UZxSy4kdx2lcQqcr
    JIYtLpVkpvqZnXZI
    • Lift the ceramic top of the oil diffuser.

    • Then lift off the plastic top off the diffuser.

  3. 1wXF1TIZgyCURlXs
    1wXF1TIZgyCURlXs
    dEvCVImybfpHUpPN
    oALmfwyOmPeNNb23
    • Lift the last plastic lid.

    • You will see a circuit board, and there will be a cord connecting it to the circuit board.

  4. ALDDSiSlvFQFwaUJ
    ALDDSiSlvFQFwaUJ
    BxVJxsT43EZAxQGV
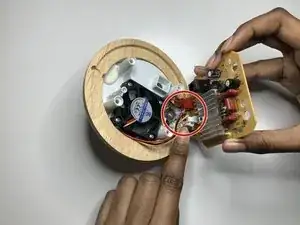
    • Gently unplug the cord from the circuit board.

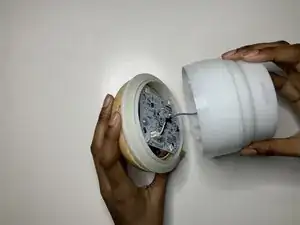
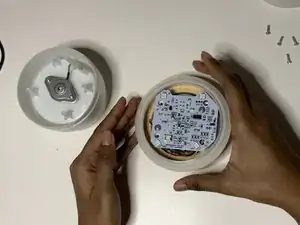
    • Place the plastic lid somewhere safe on the a flat surface.

  5. iEukKFT4sZPNGbWM
    iEukKFT4sZPNGbWM
    RTLLX5MRxYyhRhsO
    LubBOAhZXM1HjPvG
    • Remove the plastic ring and place somewhere safe on a flat surface.

  6. CN6GL6OQVOJsFMlW
    CN6GL6OQVOJsFMlW
    suDGRk242kEoQlql
    1KnY2jFENdxGPuA3
    • Remove two Truss head 4 mm screws with a Phillips #2 screwdriver and place safely nearby.

  7. Wr3yyhI2nCSgZRpq
    Wr3yyhI2nCSgZRpq
    BVGmfXjOwq2lV43f
    BKCDem35IAFlfQRU
    • Gently lift the circuit board onto it's side

    • The white connector plugs the fan into the circuit board.

  8. GWhhsQeSp1UjaRNR
    GWhhsQeSp1UjaRNR
    ieIUgbLZUMKVCMKp
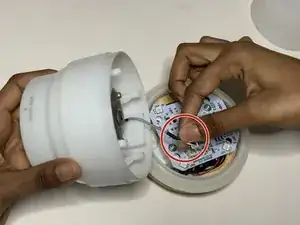
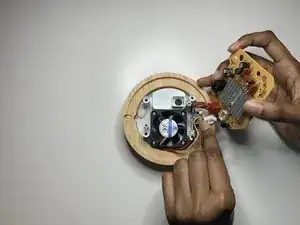
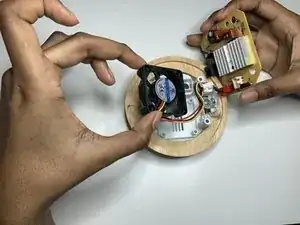
    • Unplug the white connector.

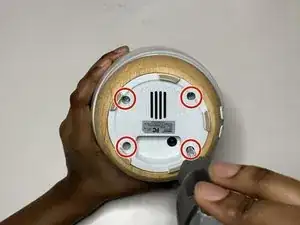
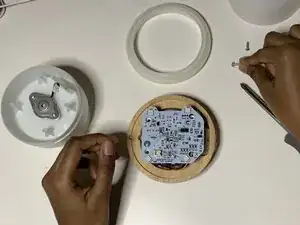
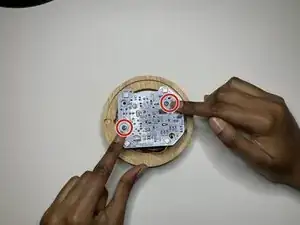
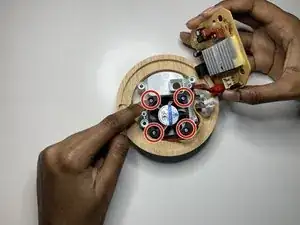
    • There are four #M1 6 mm Phillips pan head screws holding down the fan.

  9. YmR4QMMRXvsHjwpJ
    YmR4QMMRXvsHjwpJ
    aBPXdvGEpFKDlLWU
    VWXmgTAR1BgnHJGu
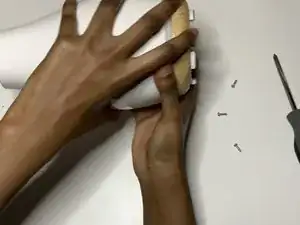
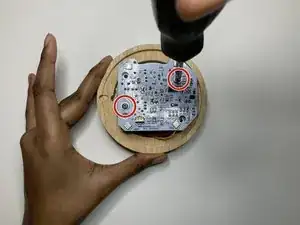
    • Remove the #M1 6 mm screws with a Phillips #2 screwdriver while holding down the fan.

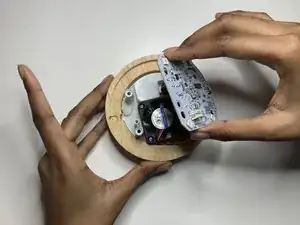
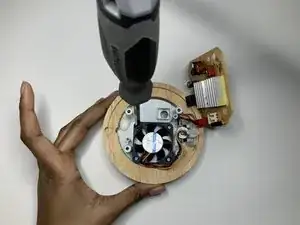
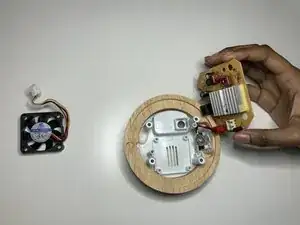
    • Gently lift the fan and place the fan someplace safe on the flat surface.

Conclusione

To reassemble your device, follow these instructions in reverse order.

Muniira Mohamoud

Membro da: 18/01/22

169 Reputazione

0 commenti