Introduzione
I like experimenting with old manual SLR lenses on my mirrorless Sony digital camera.
Unfortunately, they sometimes have problems.
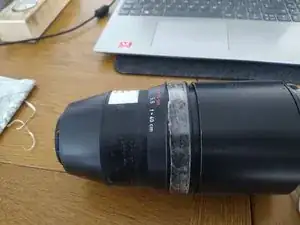
One classic long focus German lens came without the rubber grip on the aperture ring.
This is a common failure, often due to ageing of the rubber..
Searching for replacements I drew a blank.
There are plenty out there, but they are sold on the basis of what lens they fit, and no sizes are given.
You can have one made to measure, but that is quite costly.
However, I found that I could manufacture a replacement for less than £4.00.
This technique could be used for grips on any round object.
Strumenti
Ricambi
-
-
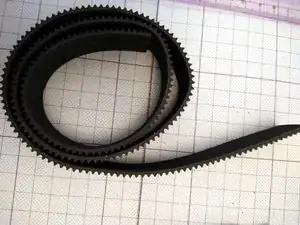
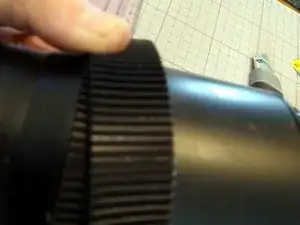
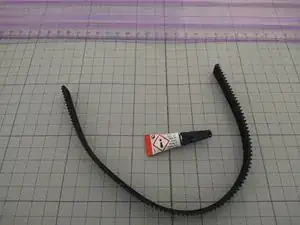
This is rubber grip belt, sold for repairing ball mill jars. There are alternatives available, but I found this one the easiest to source.
-
Ball mills are used to polish stones in rotating containers called ball mill jars, the ribbed belt is usually available on craft sites which specialise in jewellery equipment.
-
The strip I purchased is 3mm thick and 25mm wide.
-
-
-
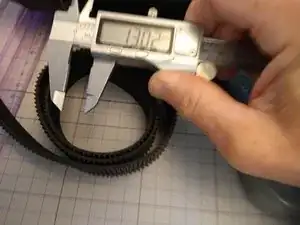
First measure the groove where the strip will fit, if there is one. I used a digital caliper, but a ruler would work.
-
This lens has a 13mm groove for the grip.
-
-
-
Now measure the belt against the lens.
-
Using a sharp knife or scissors, cut the belt to the correct length. This will need to be slightly shorter than the circumference of the lens.
-
With the ends touching, it should be slightly stretched so that it is a tight fit around the lens.
-
-
-
Use cyanoacrylate glue (superglue) to bond the ends together. Hold the joint in firm compression for at least 90 seconds. Allow at least 3 hours before fitting.
-
The glue will dissolve the rubber to form a strong but flexible joint. Any excess that is squeezed out of the joint will be brittle, and can be chipped off with a blunt knife.
-
After at least 3 hours test the joint by firmly pulling to load the joint in tension.
-
-
-
Test fit the tyre to make sure it is tight on the lens.
-
Clean the lens groove. I used Isopropyl alcohol for this.
-
Wrap double sided adhesive tape tightly around the intended location of the tyre with an overlap.
-
Clean the inside of the tyre and fit over the tape using a progressive lift and slide motion to avoid dislodging the adhesive tape.
-
You may find a small screwdriver or similar lever helps to position the belt.
-
Once fitted, press the tyre firmly into the tape to secure the bond.
-
-
-
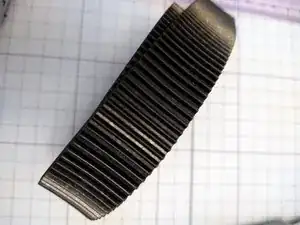
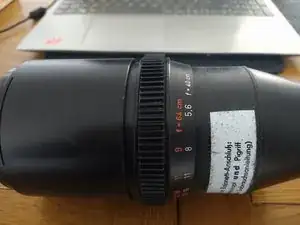
The finished grip in position.
-
So far, it seems to be perfect for my needs, and I can always make another if I need to.
-

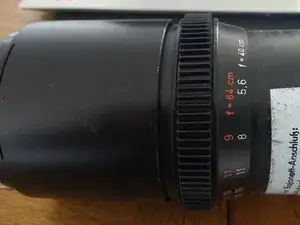
This method could be used to replace damaged, loose or missing rubber grips on any round object.
The replacement grip in this case is almost identical in looks and function to the missing one.
2 commenti
Bonjour auriez vous une reference a communiquer pour le grip
MERCI
Bonjour, Dans UK, j'ai utiliser eBay.