Introduzione

If you're encountering issues as a result from the scanner bed, this is where you will want to start.

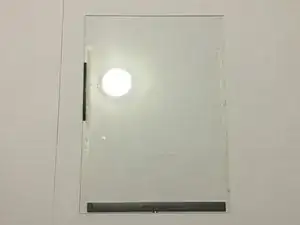
To replace the glass scanner bed, you must:

  • Remove the two plastic bars that holds the scanner bed in place.
  • Carefully remove the glass scanner bed to add the replacement.
  1. XhNXlQHfFnKCkwbV
    • Open up your Canon CanoScan N670U to an upright position.

  2. tGYJdNLeOAMXKdWD
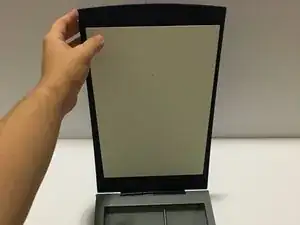
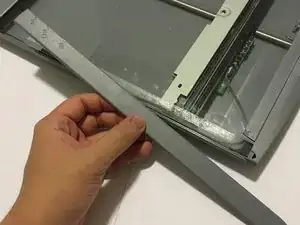
    • Turn your device so that you're facing the long side of the Canon CanoScan N670U.

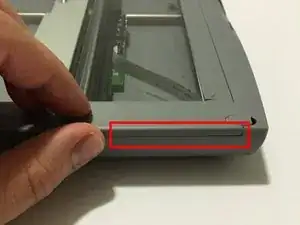
    • Locate the small crevice between the plastic components of the scanner bed and the scanner base.

  3. WORTBDusBwtN1Zwh
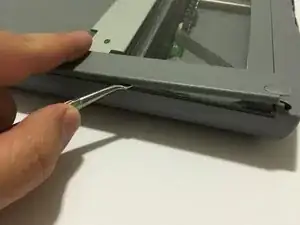
    • Carefully insert a metal spudger tool in the crevice and slowly cut through the adhesive between the plastic components.

    • You may cut small bits of the plastic as you're slicing the adhesive. Do not forcefully bend the plastic strip as you're cutting or it will snap.

    This step isn't necessary. The plastic strips are glued to the glass and can stay that way. Simply pull up the front of the strips, slide the glass forwards a little, then pull up the back of the strips and slide the glass backwards, making sure the back ends of the plastic strips slide over the rear plastic panel. Now you can simply lift and slide the glass out from the front, up and forwards. Easy as that! This works because the adhesive isn't applied to the very ends of the plastic strips and because the strips are slightly flexible.

    Tom -

  4. rKX2OCOdLFoi2R2k
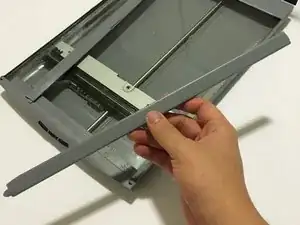
    • Once the adhesive strip is sliced through, the plastic bar that is attached should release. Set aside the plastic bar.

  5. luGmhGyeWQQU32MT
    • Repeat steps 2-4 for the other side of the scanner.

  6. DeAyFIuCR5eENJmq
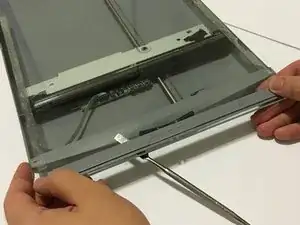
    • Use your hands or a metal spudger tool to push the plastic bar at the bottom of the glass scanner bed forward until you can't push it any farther.

  7. q3vA2WTvW1lTqSro
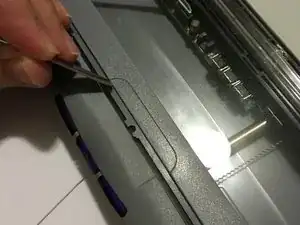
    • Insert the metal spudger tool underneath the glass scanner bed. The front of the scanner bed should be resting on top of the tool.

  8. 5sMfTX5AtVNfTHHc
    • Slowly pull the glass scanner bed towards you and set the piece aside.

  9. NQGxYpnA16ZwNZ1A
    • Replace your defective glass scanner bed with a new one.

Conclusione

To reassemble your device, follow these instructions in reverse order.

Stephen Bui

Membro da: 19/09/15

558 Reputazione

0 commenti